


Here's how to open a new account with Errante
We will explain it with diagrams and smartphone images so that anyone can easily understand it
In conclusion, Errante is
You can easily open an account and set up cashback in just 3 steps
- Step 1: Create an Errante account
- Step 2: Submission of identity verification documents
- Step 3: Open a new trading account
Contents
Step 1: Create an Errante account
① Go to the Errante account creation page
First, please go to the Errante account creation page via the link below
Open a new Errante account here
*Please note that if you register through any link other than this one, you will not be able to receive cashback from Money Charger (Moneycha)
What is cashback with MoneyChat?
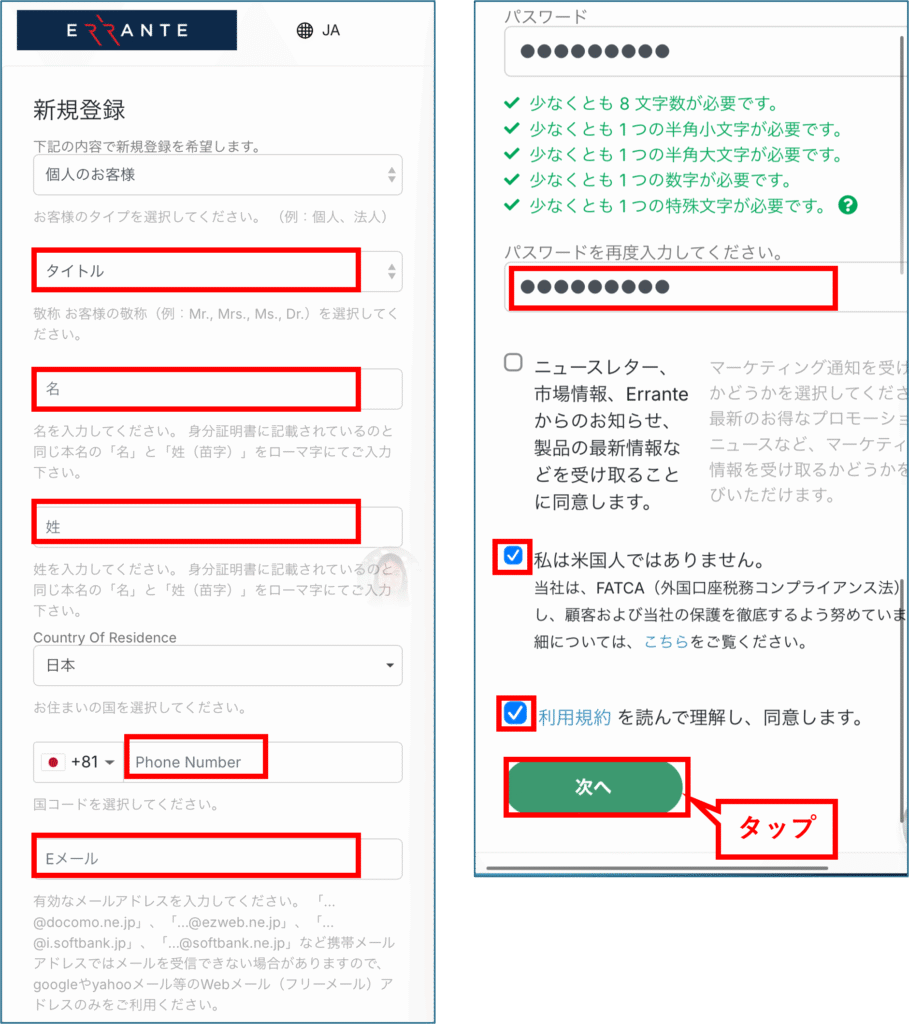
② Entering registration information
Please enter your registration information. The information you need to enter is as follows:
- Title (Mr, Mrs, Ms, etc.)
- Name (in half-width English letters)
- Last name (in half-width English letters)
- telephone number
- password
- Check the box for "I am not American."
- Check the box that says "I have read, understood, and agree to the terms of service."
Once you have finished entering the information, tap "Next."
Please make sure to write down the email address and password you registered.
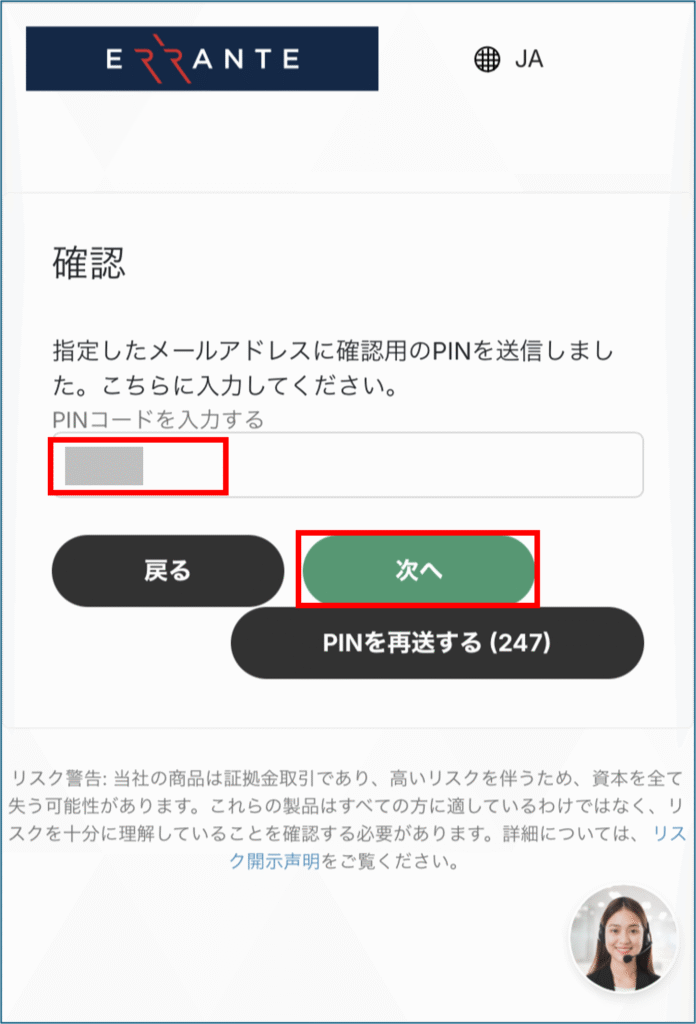
An email containing a verification code has been sent to the email address you entered on the previous screen. Please copy the verification code from that email.
Then, tap "Verify" to return to your Elante My Page.

Enter the PIN code you copied earlier and tap "Next."
(In some cases, you may be authenticated simply by tapping "Authenticate" without entering the PIN code.)
③ You will then enter more information about yourself
After entering your personal information, tap "Next."

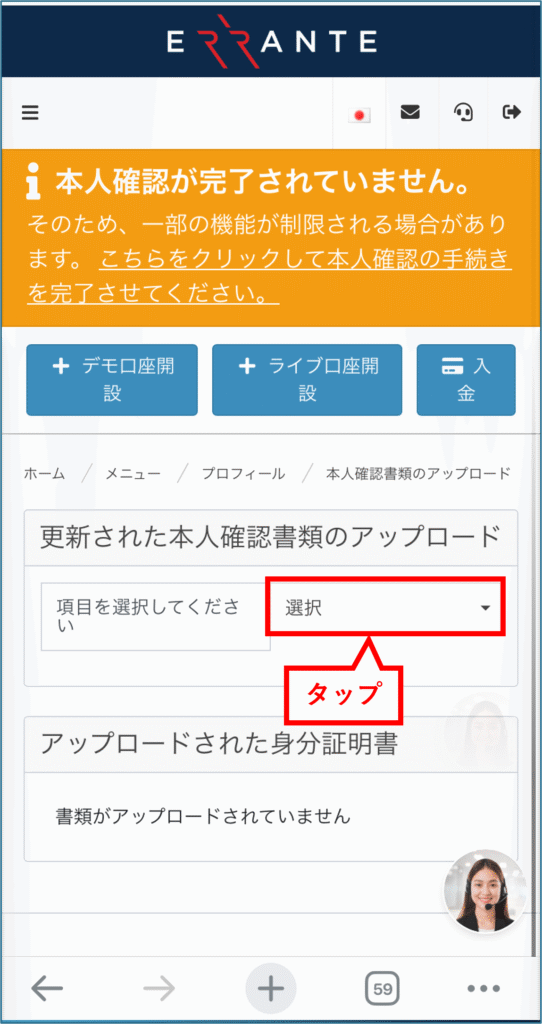
Step 2: Submission of identity verification documents
① Proceed to submitting your identity verification documents
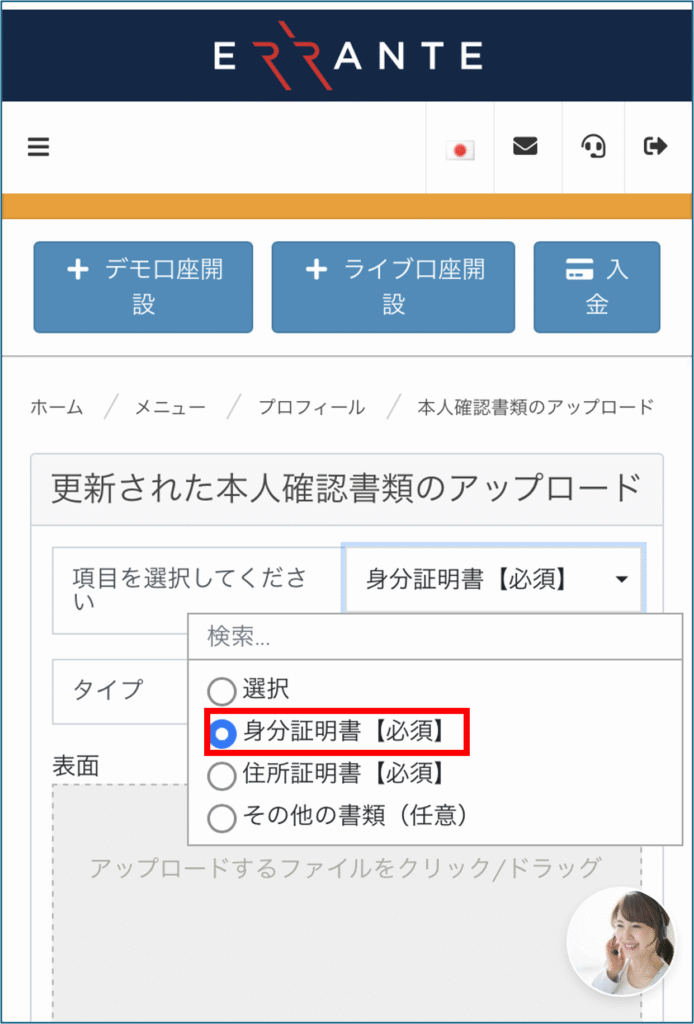
Tap "Select" in the column to the right of "Please select an item"
② Submit your "identification document"
A dropdown menu will open.
The required documents are "Identification Document" and "Proof of Address".
First, select "Identification Document [Required]".
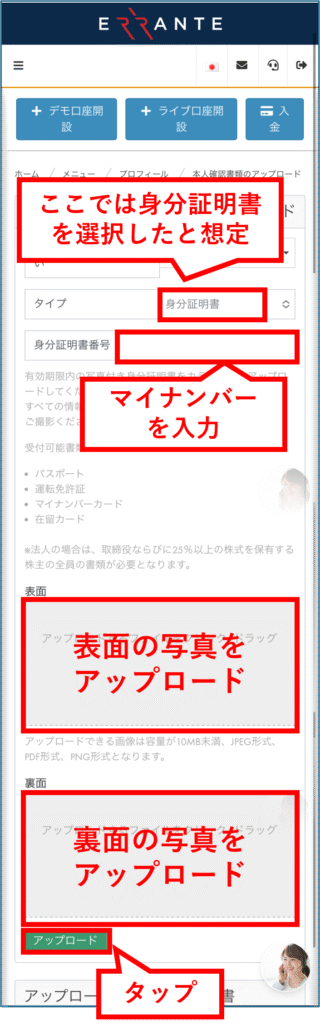
Next, you will choose the type of identification document you will submit

Here, we will assume you have selected your identification document (My Number Card).
Below that, enter your identification document number (My Number).
Upload photos of the front and back of your identification document (My Number Card).
Then, tap "Upload".
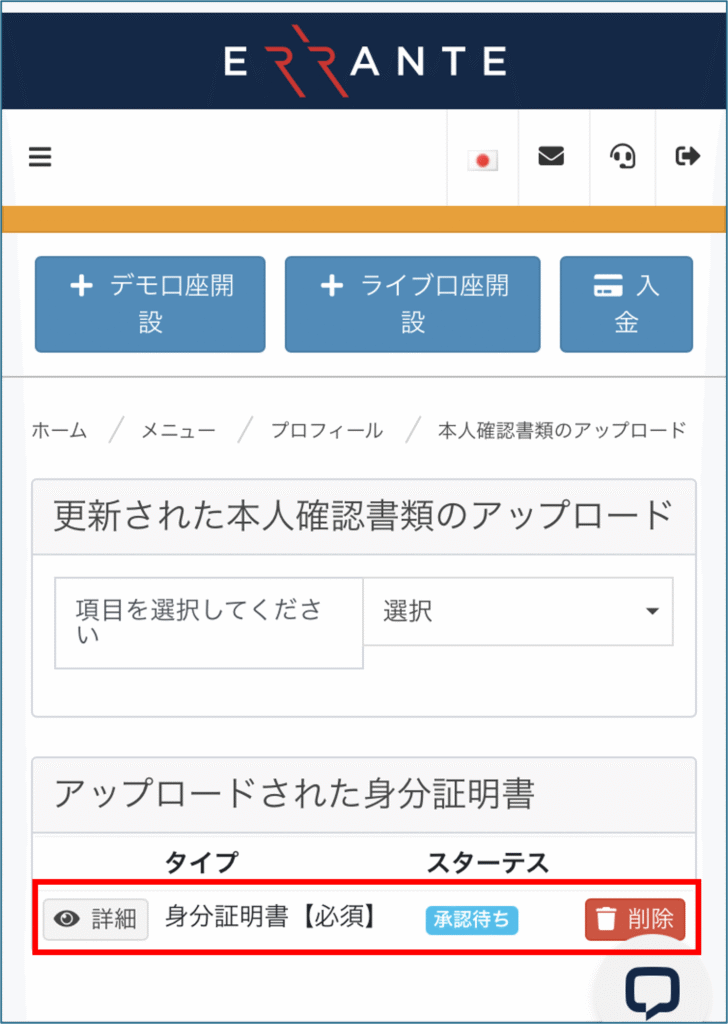
Once you have submitted your identification documents, the status will display as "Pending Approval," as shown in the following diagram
③ Submit proof of address
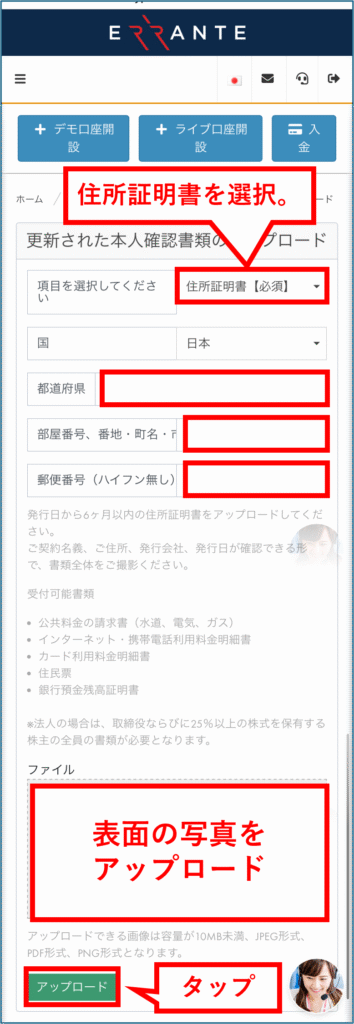
Next, we will proceed to submitting your "Proof of Address."
First, in the column to the right of "Please select an item," select "Proof of Address [Required]."
Next, enter the following information
- Prefecture (in half-width English letters)
- Room number, street address, town name, and city name (using alphanumeric characters)
- Postal code (without hyphens)
Furthermore, you will need to upload a photo of a document that proves your address.
The following types of documents, issued within the last six months, are acceptable:
- Utility bills (water, electricity, gas)
- Internet and mobile phone usage statement
- Credit card statement
- Resident record
- Bank deposit balance certificate
Please take a photograph of the entire document so that the following items are clearly visible
- Contract Name
- Your address
- Issuing company
- Publication date
Once you're finished, tap "Upload"
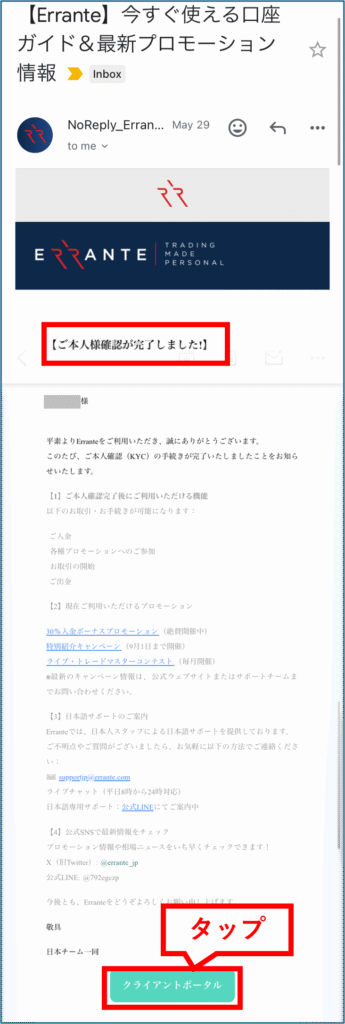
Once your identity verification documents have been confirmed, you will receive an email like the one below at your registered email address.
Tapping "Client Portal" will take you back to your My Page.
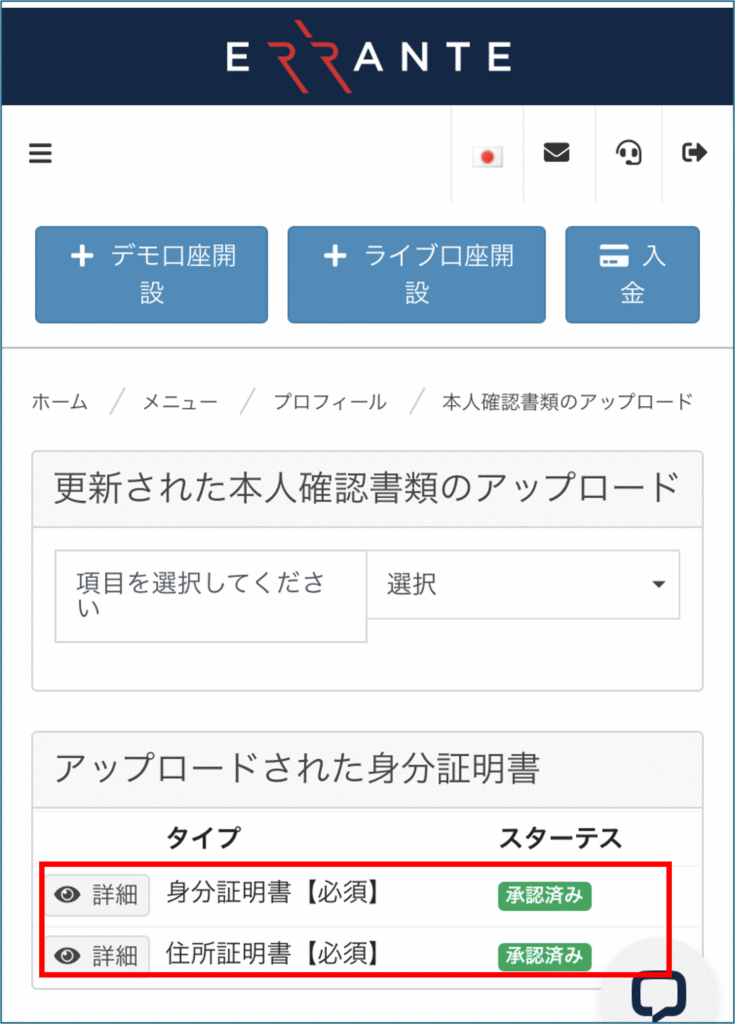
When you go to your My Page, you will see that both documents you submitted are marked as "Approved," as shown in the following image
Step 3: Open a new trading account
Next, we will proceed with the procedure for opening a new trading account
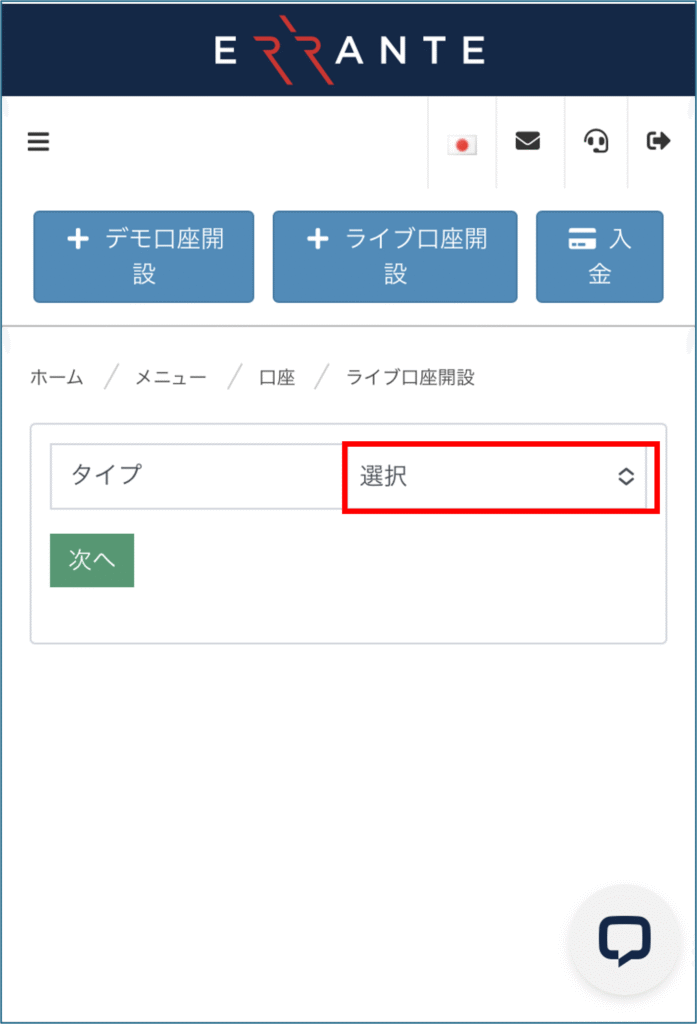
① Specify the type of trading account
First, tap "Open Live Account"

Next, tap "Select" in the column to the right of "Type"
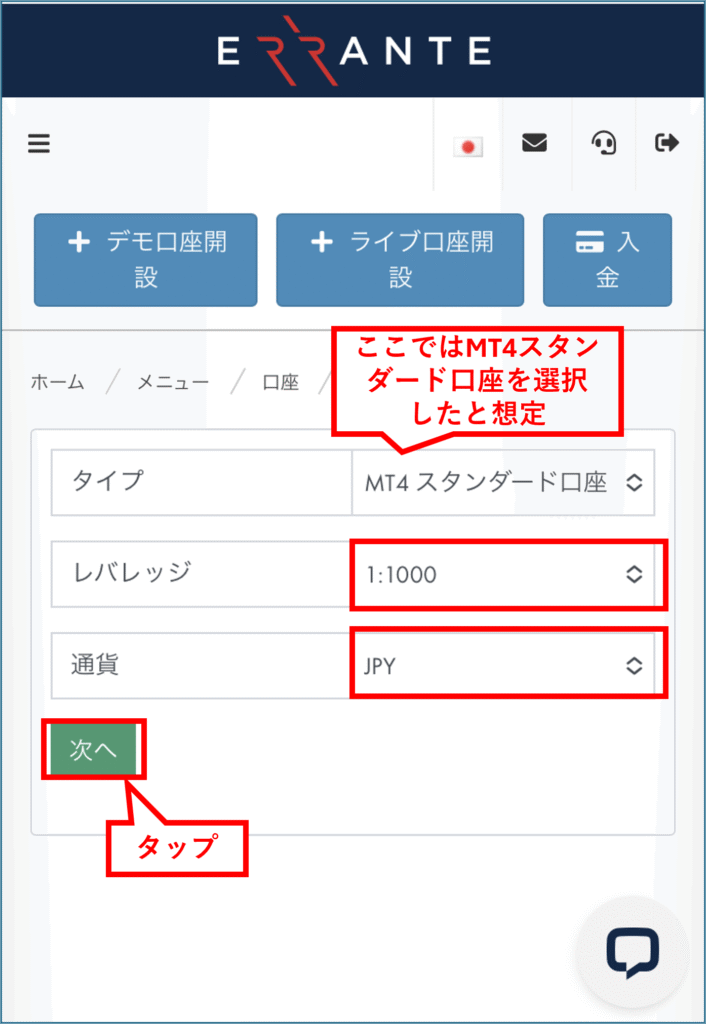
Here, we'll assume you've selected "MT4 Standard" as the platform type.
Next, select "Leverage" and "Currency".
After that, tap "Next"
Once the next screen appears, you know that your trading account has been successfully opened
At the same time, your "Login ID," "Password," and "Read-Only Password" will also be displayed
Once Errante has verified the documents you submitted, you will receive an email from Errante to your registered email address.
This email contains your account information for the trading server, so please save or make a note of it.
You can return to your My Page by tapping "Client Portal".
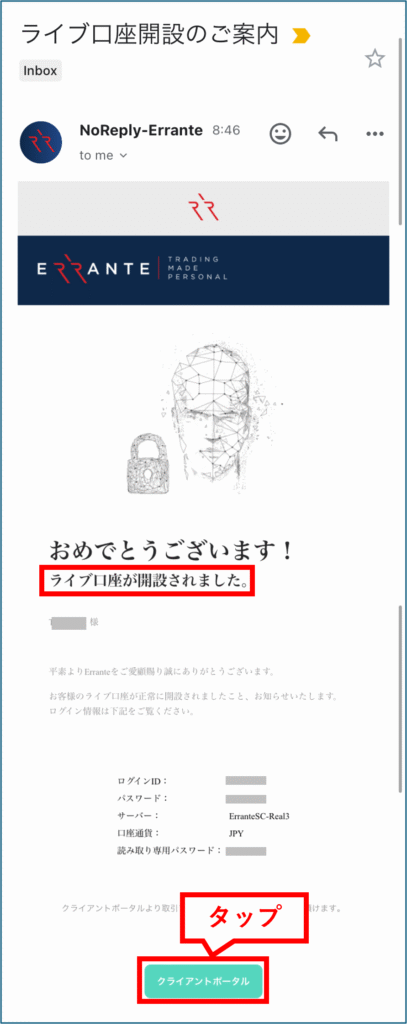
Thank you for your time. Your account opening process is now complete
Step 4: IB Application Flow
Next, we will proceed with the IB application process
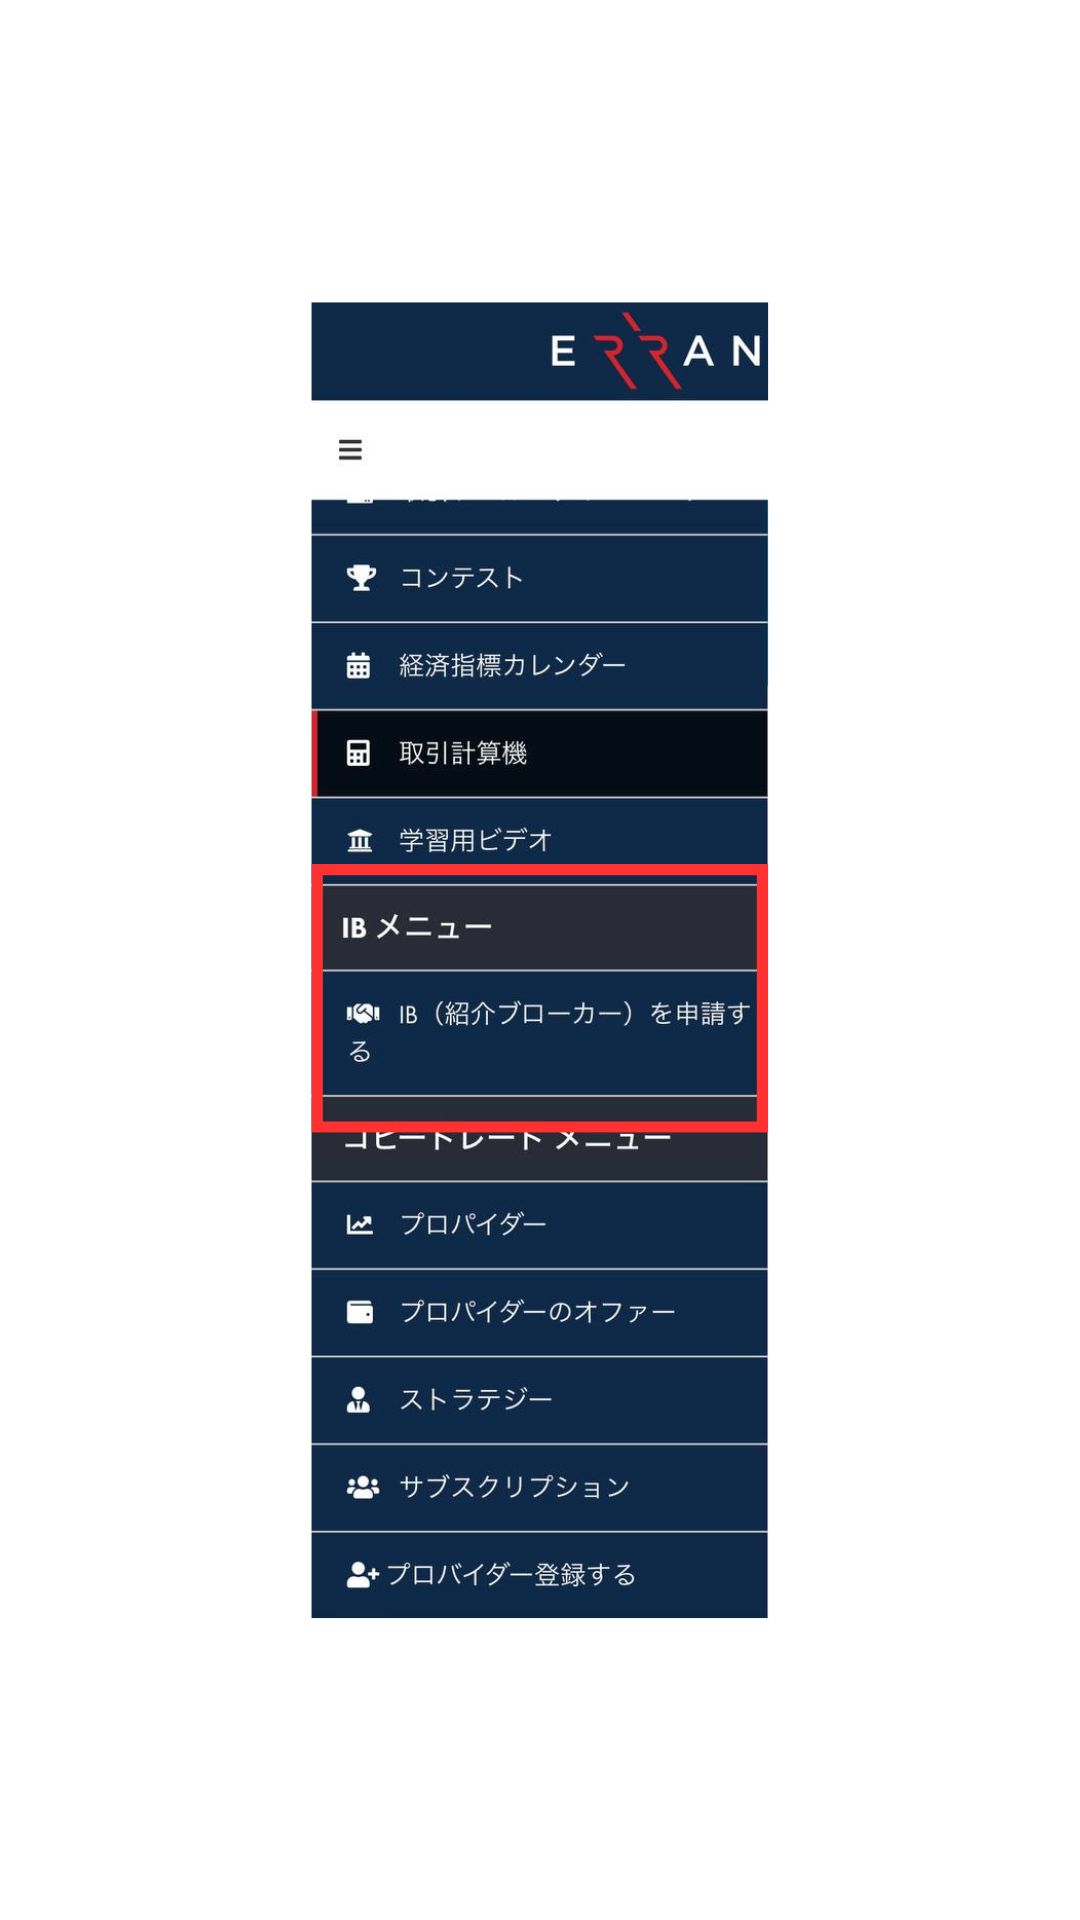
Click the three lines in the upper left corner of My Account, then tap [IB Menu] > [Apply for IB (Referral Broker)]
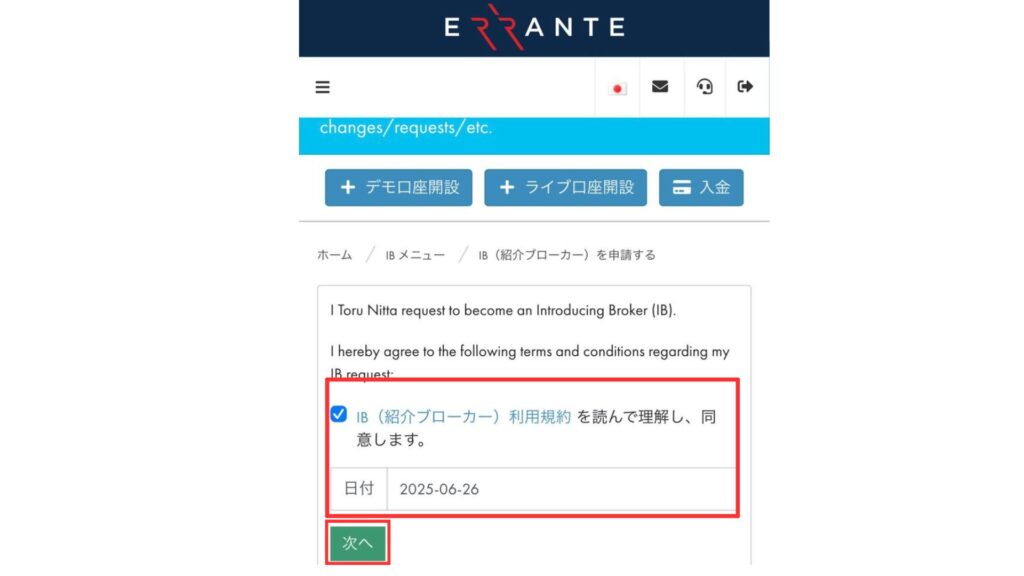
By reading and agreeing to the terms of service, entering the date, and clicking "Next," your rebate application will be complete
In conclusion
The above is a step-by-step guide with smartphone screenshots explaining how to open a new account with Errante
Next, let's check the withdrawal procedure on your Money Charger My Page