











\Better deal than registering directly through the official site/in 1 minuteOQTimaOpen an

There are only three things you need to do!
Step 1
Open an account via the referral link
Step 2
Register an account with MoneyChat
Step 3
If it's approved, then it's OK!
Let's get started by opening anOQTimaaccount!
Proceed to the officialOQTimawebsite via the referral link ↗Check the account opening procedure that suits you.
OQTimacreating an
?
HOW TO OPEN
Account Opening Procedure
Please see below for detailed instructions
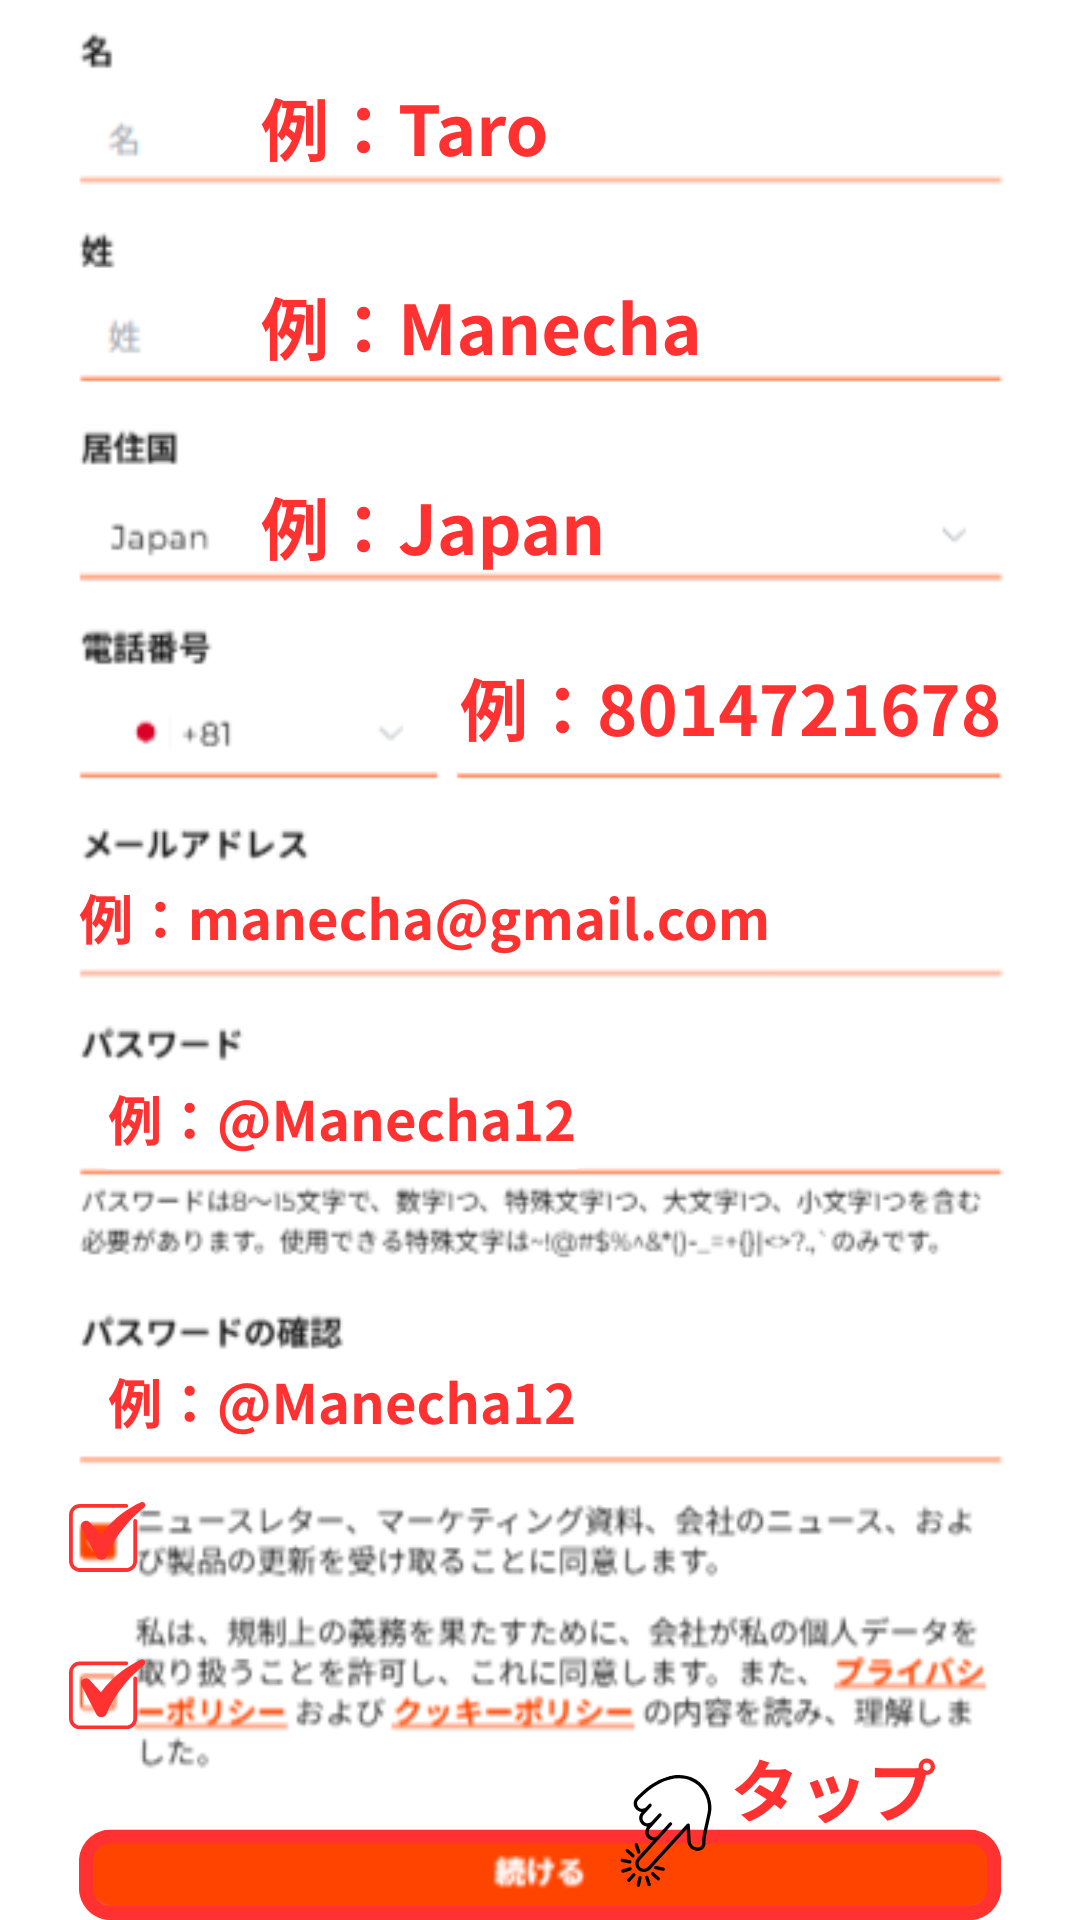
Register your email address and password
Enter your basic information, such as your email address, password, phone number (without the leading 0), and date of birth
Get cashback once your account is open !
CASHBACK APPLICATION
Register with Manecha and get cashback on every trade.
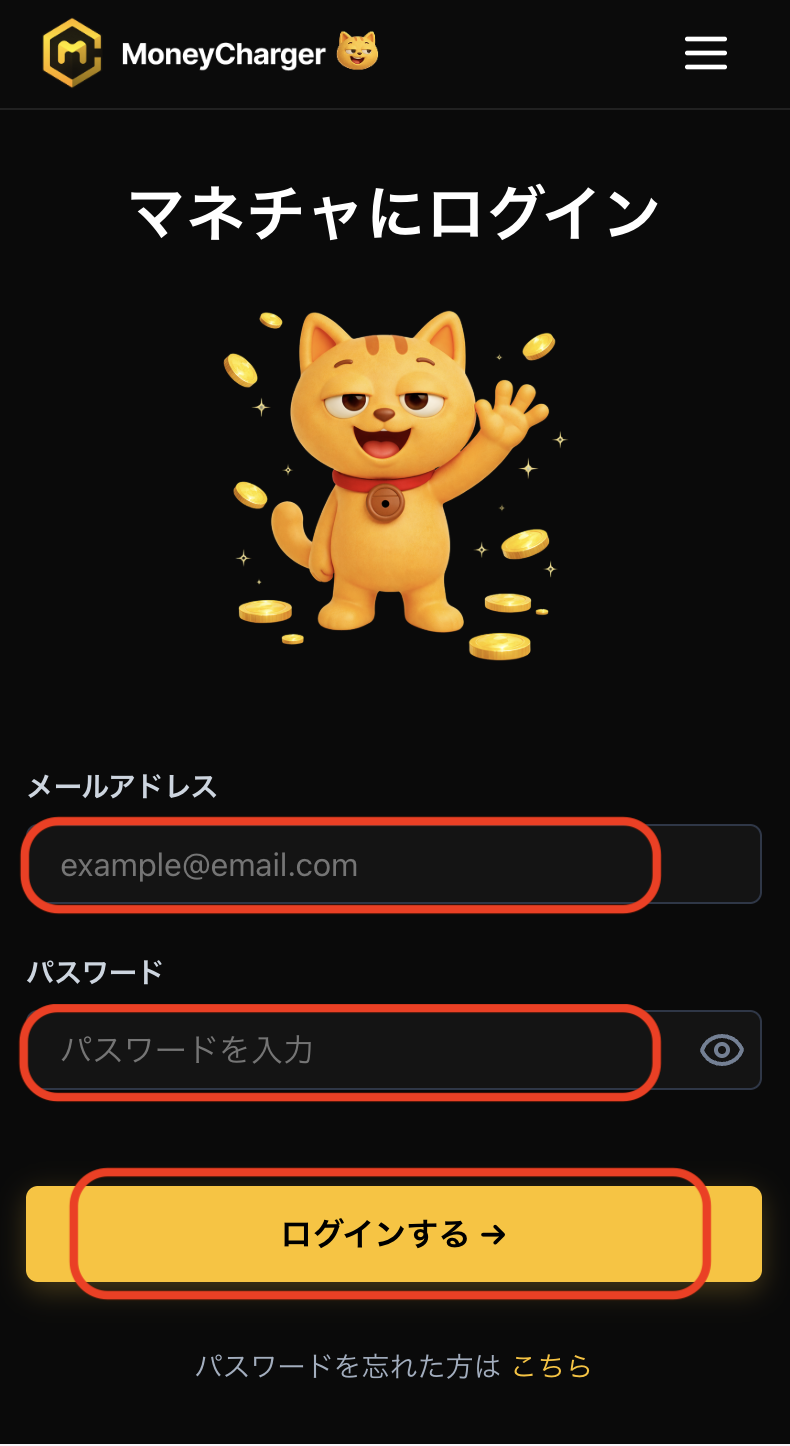
Log in to your MoneyChat My Page
Once your account is opened, log in to your MoneyChat My Page
If you haven't yet registered for a free Manecha account, please complete your registration first
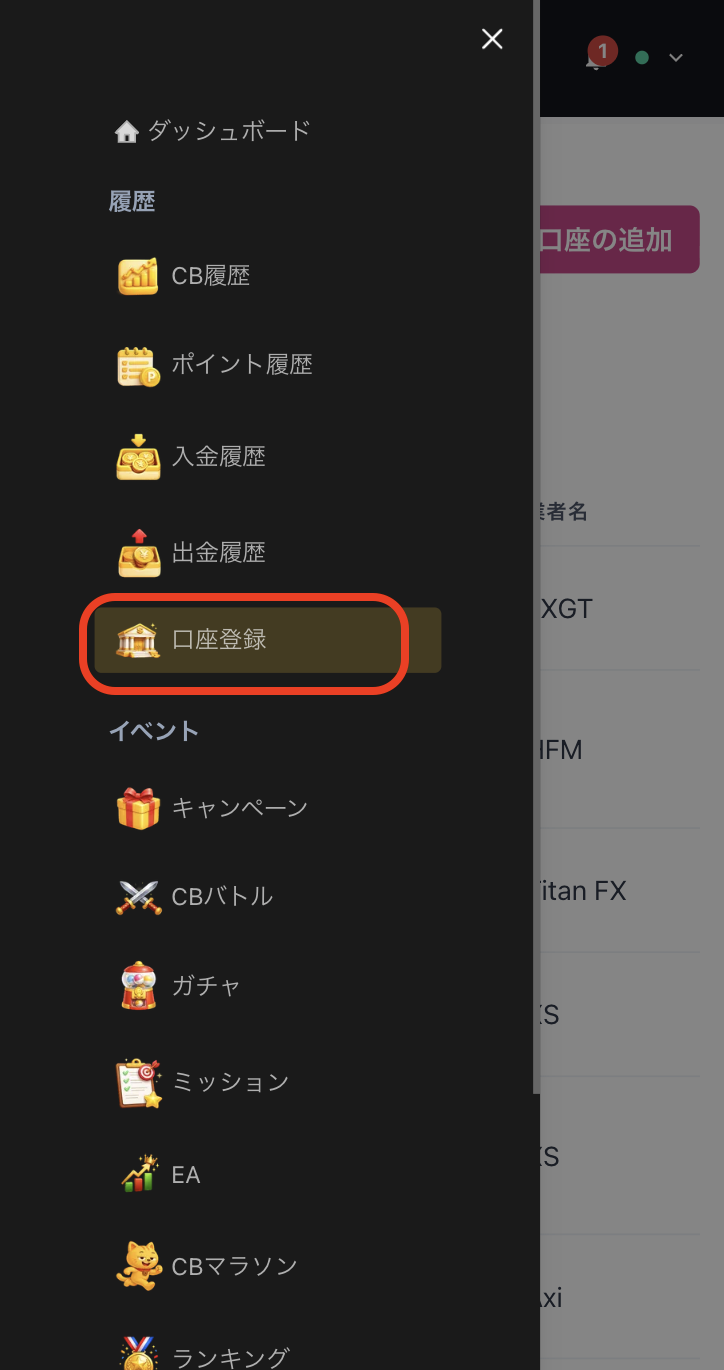
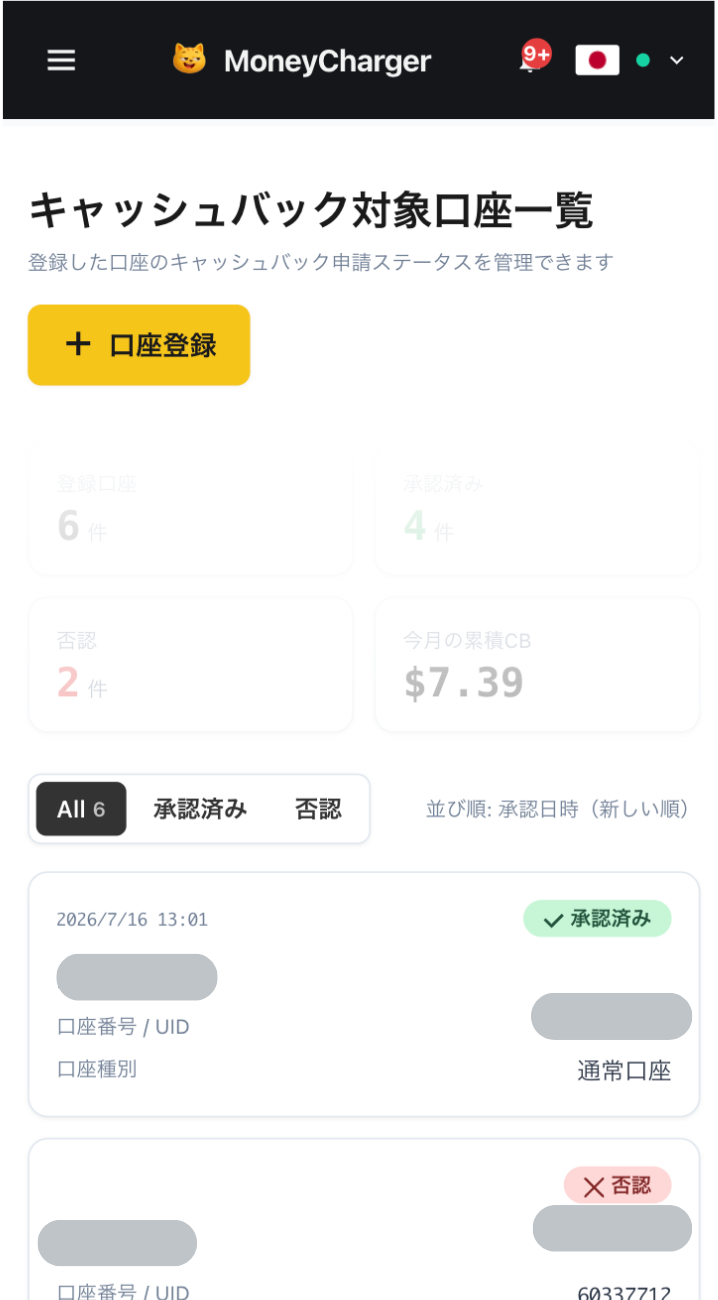
Select "Register Account" from the menu
Open the menu in the upper left corner of the screen and select "Register Account"
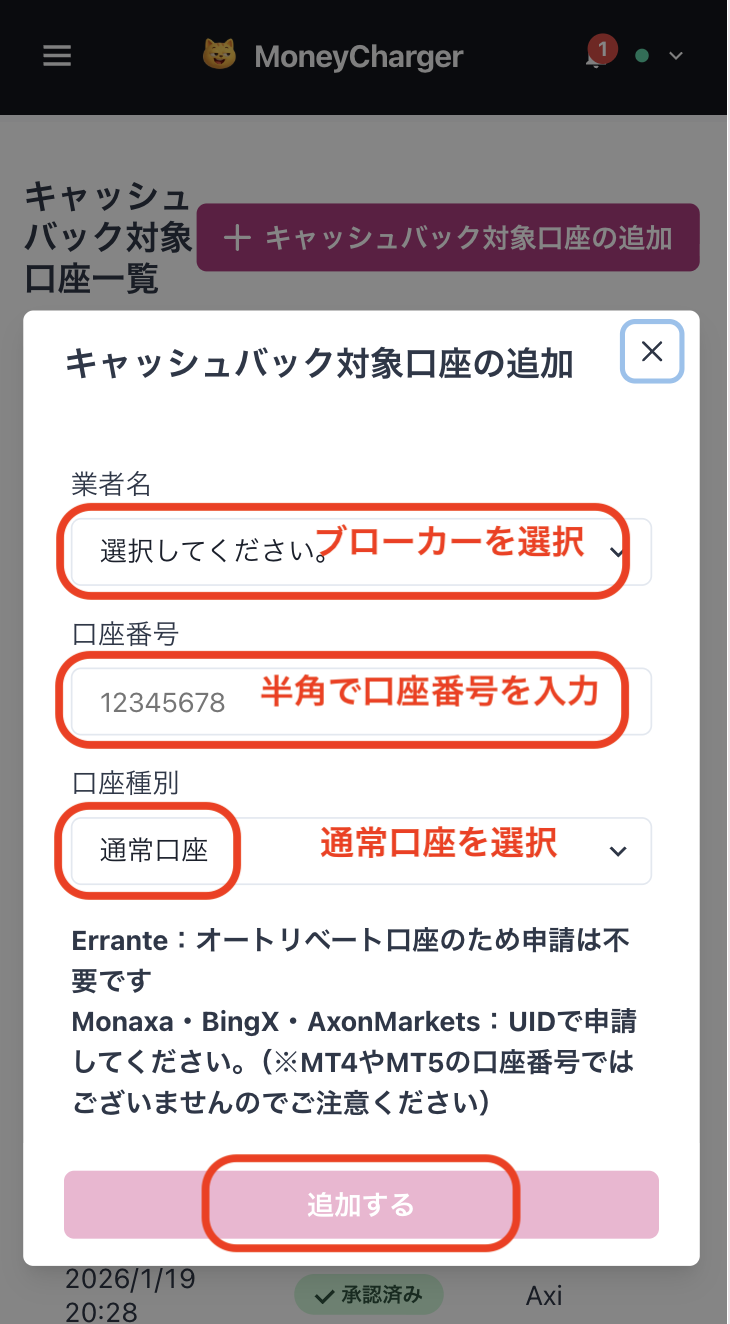
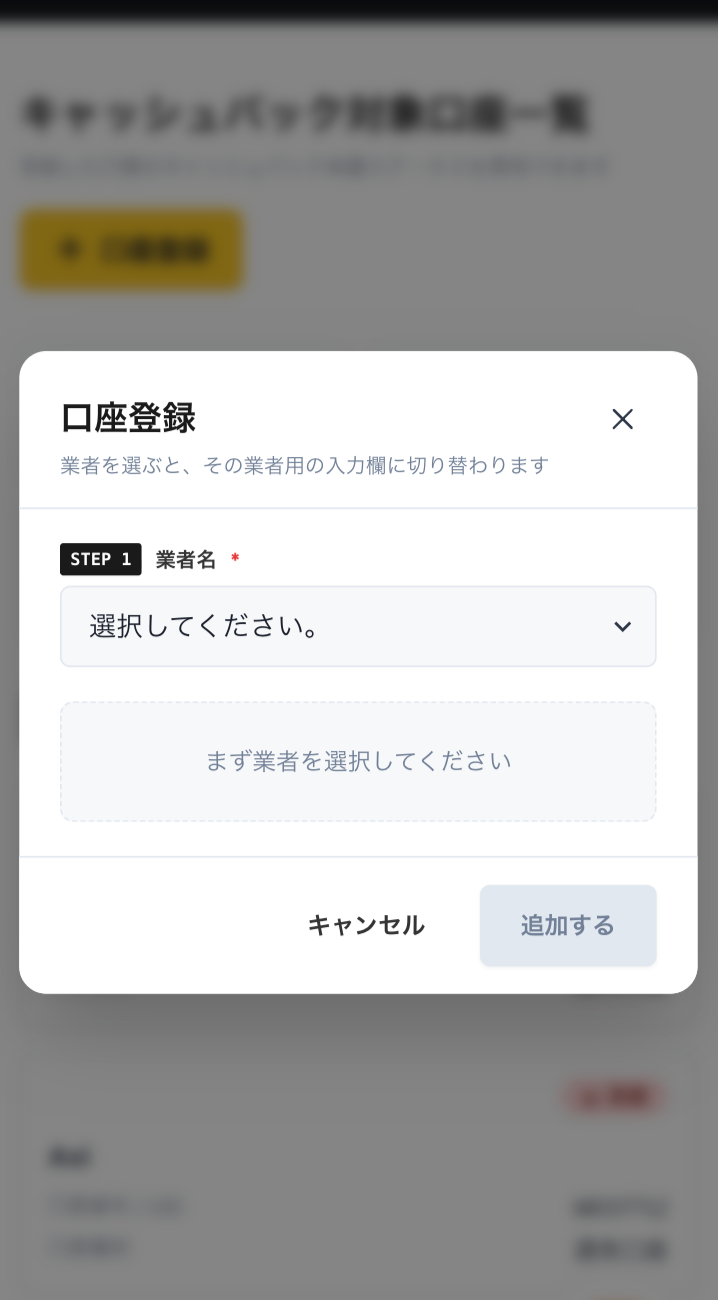
Enter your broker and account number on the account registration screen
On the account registration screen in My Page, selectOQTimaas the broker name and enter the trading account number you opened using half-width numerals
If you are using regular discretionary trading or your own Expert Advisor (EA), please select "Standard Account" as your account type
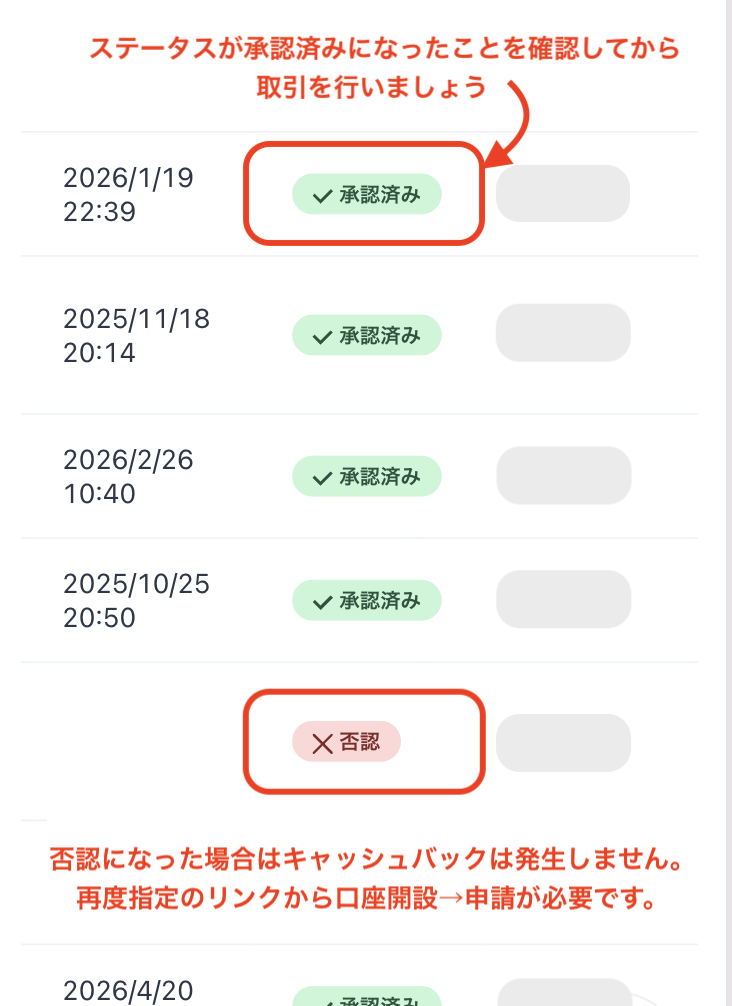
You will be eligible for the cashback after approval from the management
Once your application is approved, the cashback earned for each eligible transaction will be reflected in your MoneyChat My Page
Transactions that have not yet been approved may not be eligible for cashback. Please check that the status is "approved" before making a transaction
HOW TO OPEN
Transfer procedure
Please see below for instructions on how to make your existing account eligible for MoneyChat
How to change OQTima linking
I will request a change of account linking through the support chat on OQTimaofficial website
- OQTimaOpen The official page is here.
- Launch support chat
- Request to "change linking to MoneyChat"
- After processing is complete (1-3 business days), please apply for registration on your MoneyChat My Page
FAQ
Frequently Asked Questions about Opening an Account or Switching Accounts
What documents are required to open an account?
Generally, you will need to provide proof of identity (passport, driver's license, or My Number Card) and proof of address (utility bill, bank statement, or resident registration certificate, issued within the last three months)
How long does it take to open an account?
The input process itself takes as little as 5 minutes, and the identity verification review is usually completed within one business day. The actual time required may vary depending on the service provider and the review status
I already have anOQTimaaccount. Can I receive cashback?
Existing accounts are generally not eligible. Please check the instructions for transferring or adding accounts from the "Already usingOQTima" tab at the top of the page
Can I open multiple accounts with OQTima?
The possibility and conditions for opening multiple accounts vary from broker to broker. If you plan to use an additional account, please check the process for receiving cashback through MoneyChat before proceeding
Does OQTimasupport auto-rebates?
No.OQTimadoes not currently support auto-rebates. To receive cashback, please register your account number on your MoneyChat My Page