












\Better deal than registering directly through the official site/in 1 minuteAxiOpen an

There are only three things you need to do!
Step 1
Open an account via the referral link
Step 2
Register an account with MoneyChat
Step 3
If it's approved, then it's OK!
Let's get started by openingAxiaccount!
Proceed to the officialAxiwebsite via the referral link ↗Check the account opening procedure that suits you.

Axicreating an
?
HOW TO OPEN
Account Opening Procedure
Please see below for detailed instructions
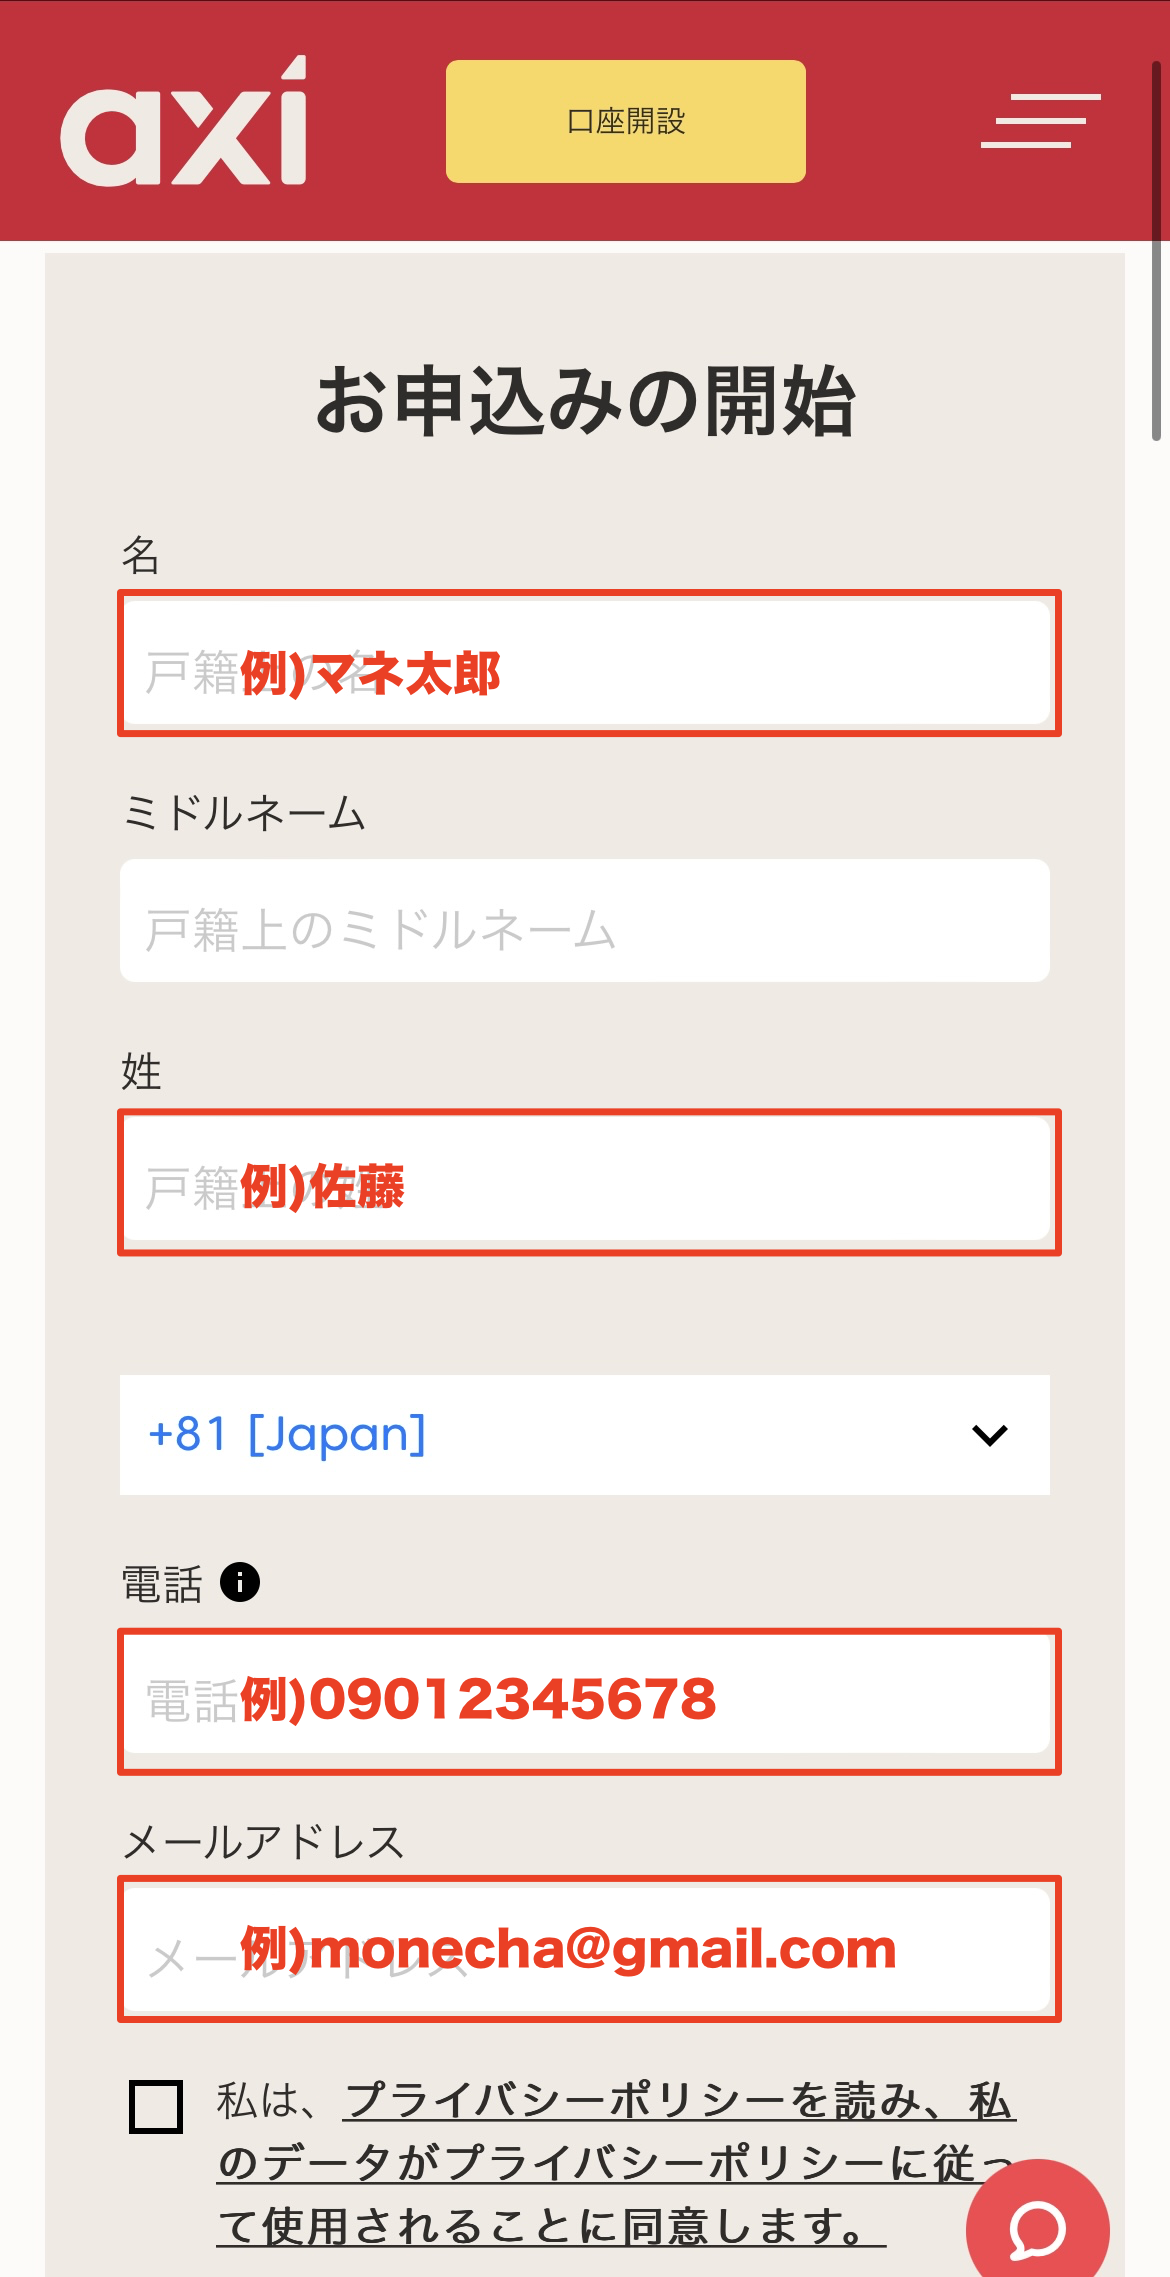
Go to Axiaccount creation page
First, click the button below to go to theAxiaccount creation page. When you open the link,Axiregistration form will be displayed
*Please note that if you register through a link other than the one provided by Moneycha, you will not be able to receive cashback from Moneycha
Enter your registration information
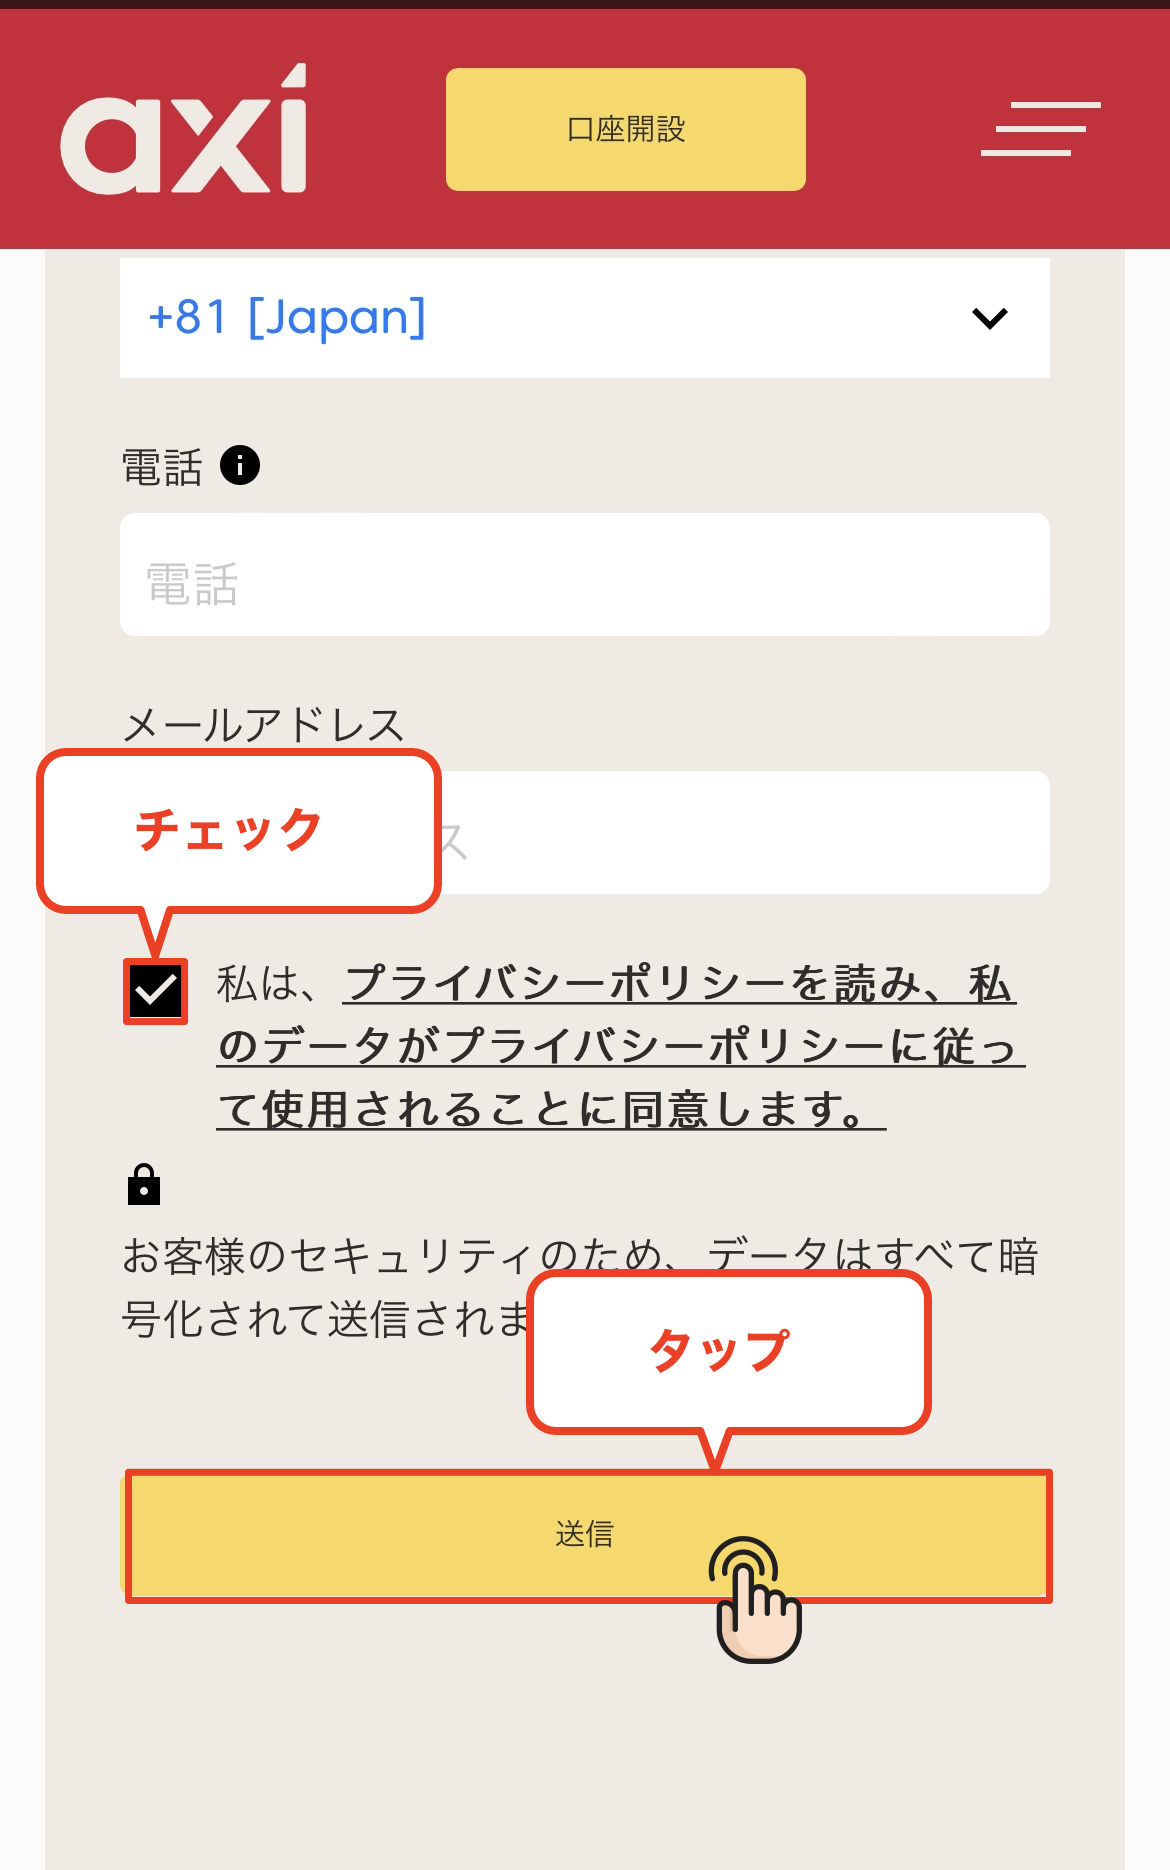
Please fill in the required information on the displayed registration form. Enter "Japan" for your country of residence, your full name in Roman letters, and ensure your email address and phone number are entered correctly
Once you have completed filling in all the fields, check the box to agree to the privacy policy
*The email address you register will be used for logging in and receiving verification emails, so please be sure to enter an email address that you can access
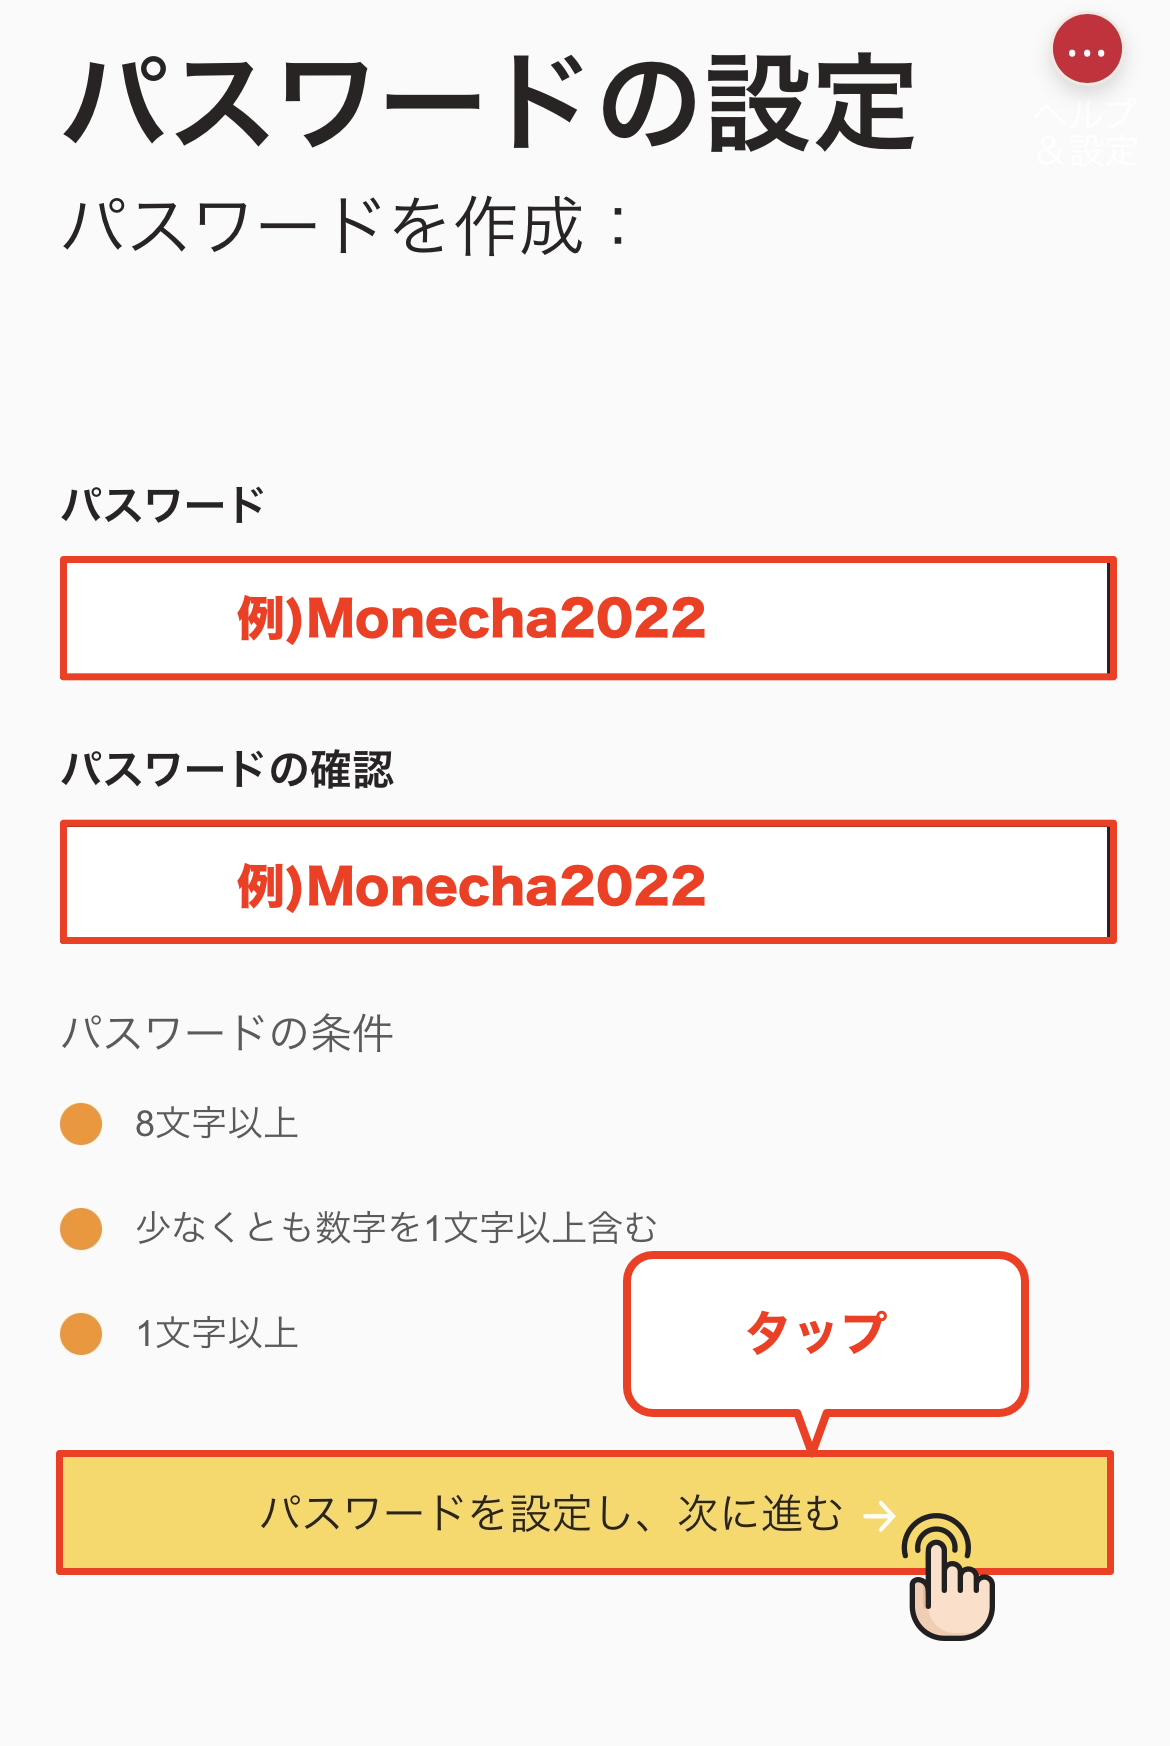
Set a password
Next, you will set your password. The password you register must be at least 8 characters long and include at least one uppercase letter and one number. Once you have finished entering your password, tap "Set Password and Proceed."
*The password you set will be used to log in to your My Page, so please make sure to write it down so you don't forget it
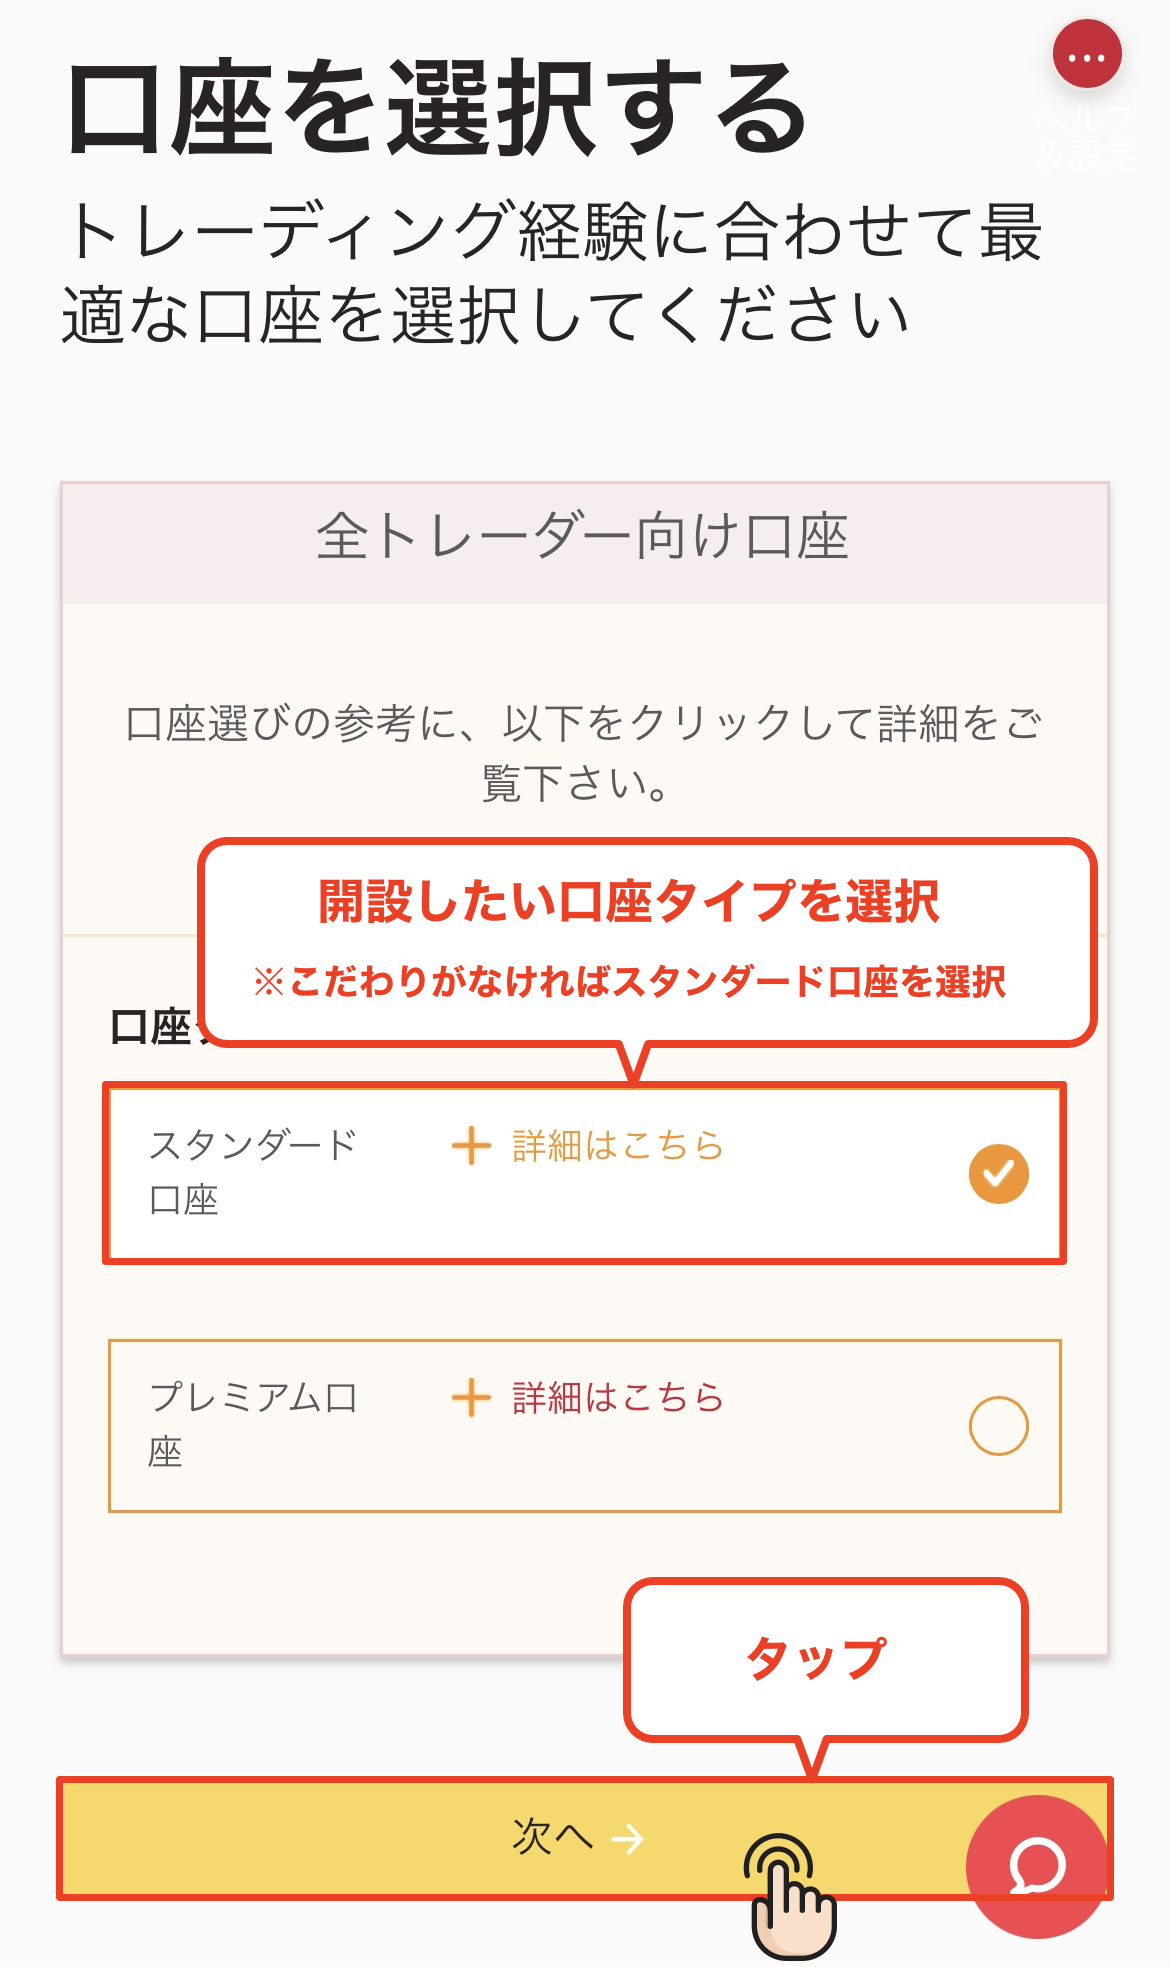
Select an account type
Select the type of trading account you wish to use. You can choose between a Standard account and a Pro account; please tap your preferred account type
*For those without specific preferences, we recommend the versatile "Standard Account."
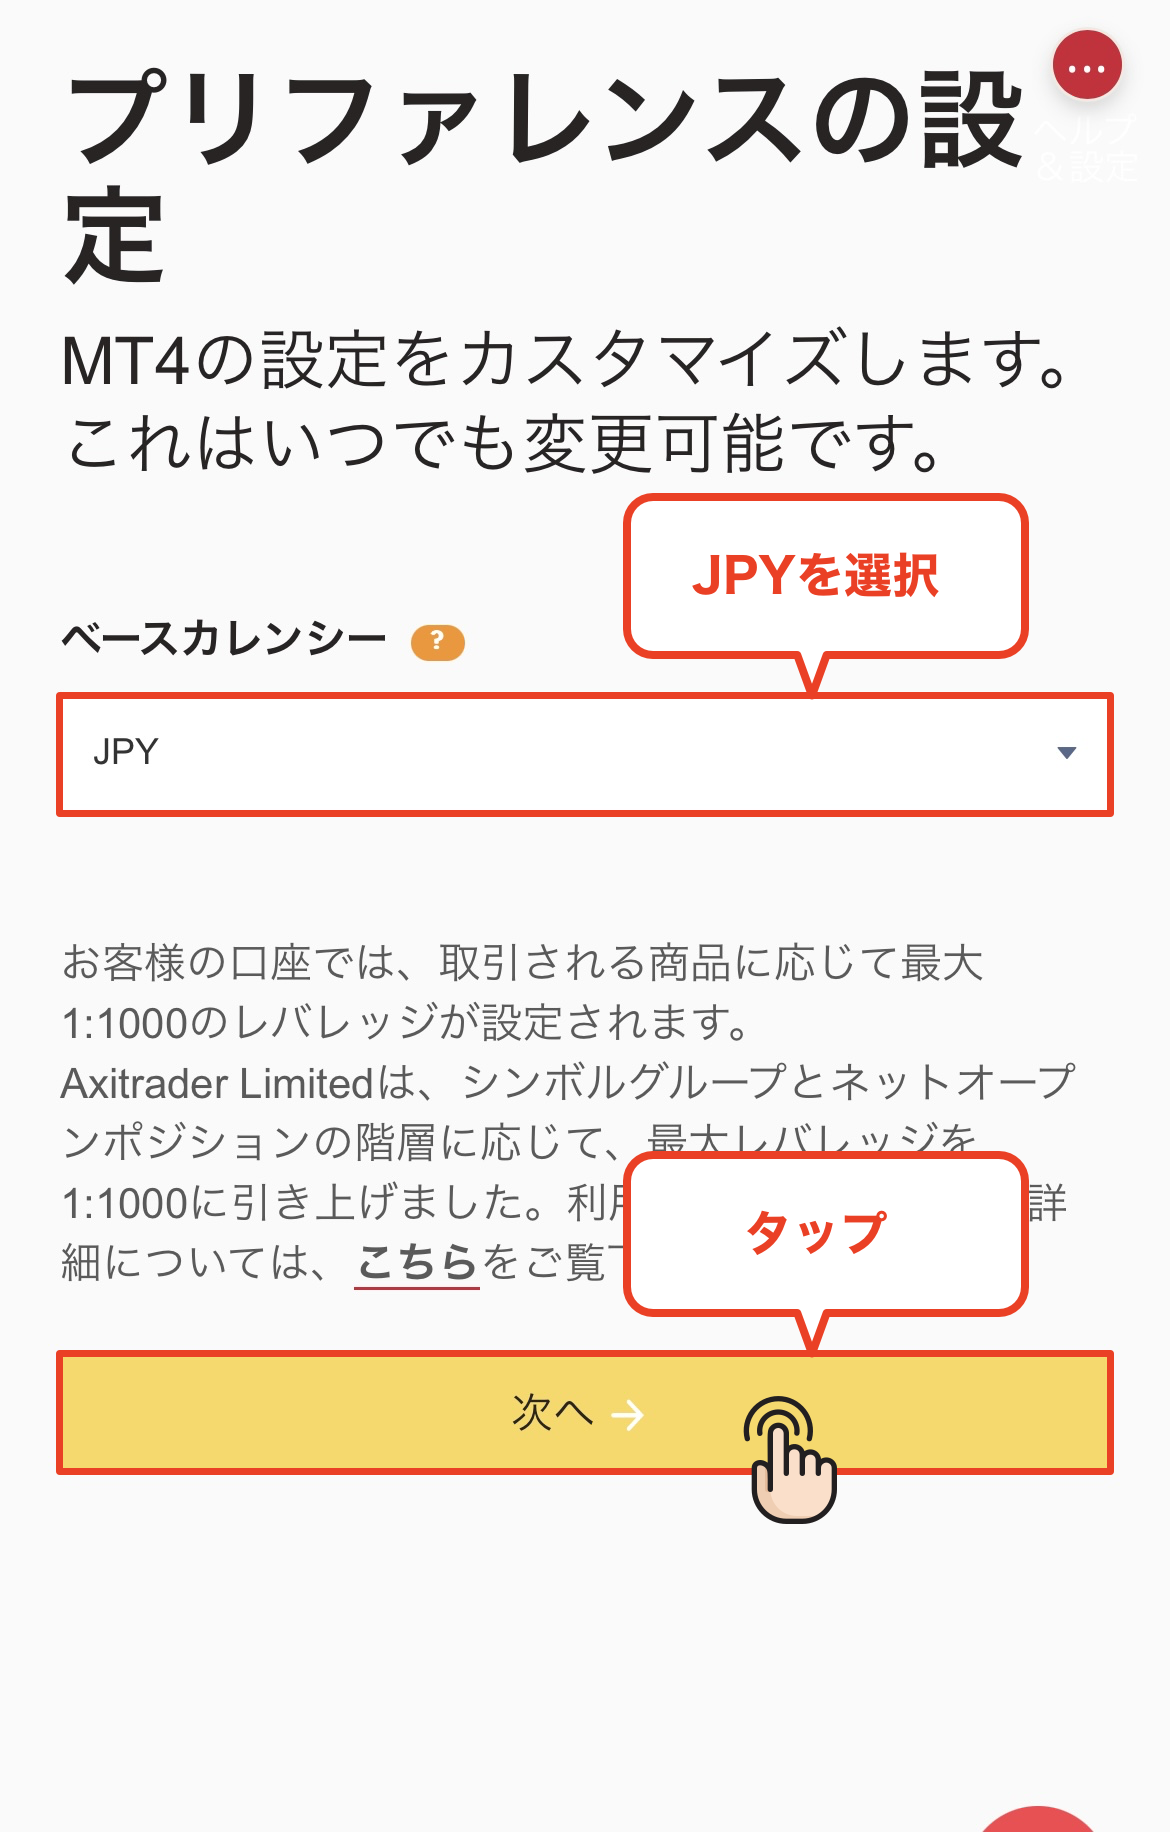
Set the base currency
Set the base currency for your trading account. You can choose from several currencies, such as USD and EUR. After selecting the currency you want to set, tap "Next"
*If you don't have a particular preference, we recommend choosing "JPY" as it helps reduce exchange fees during deposits and withdrawals
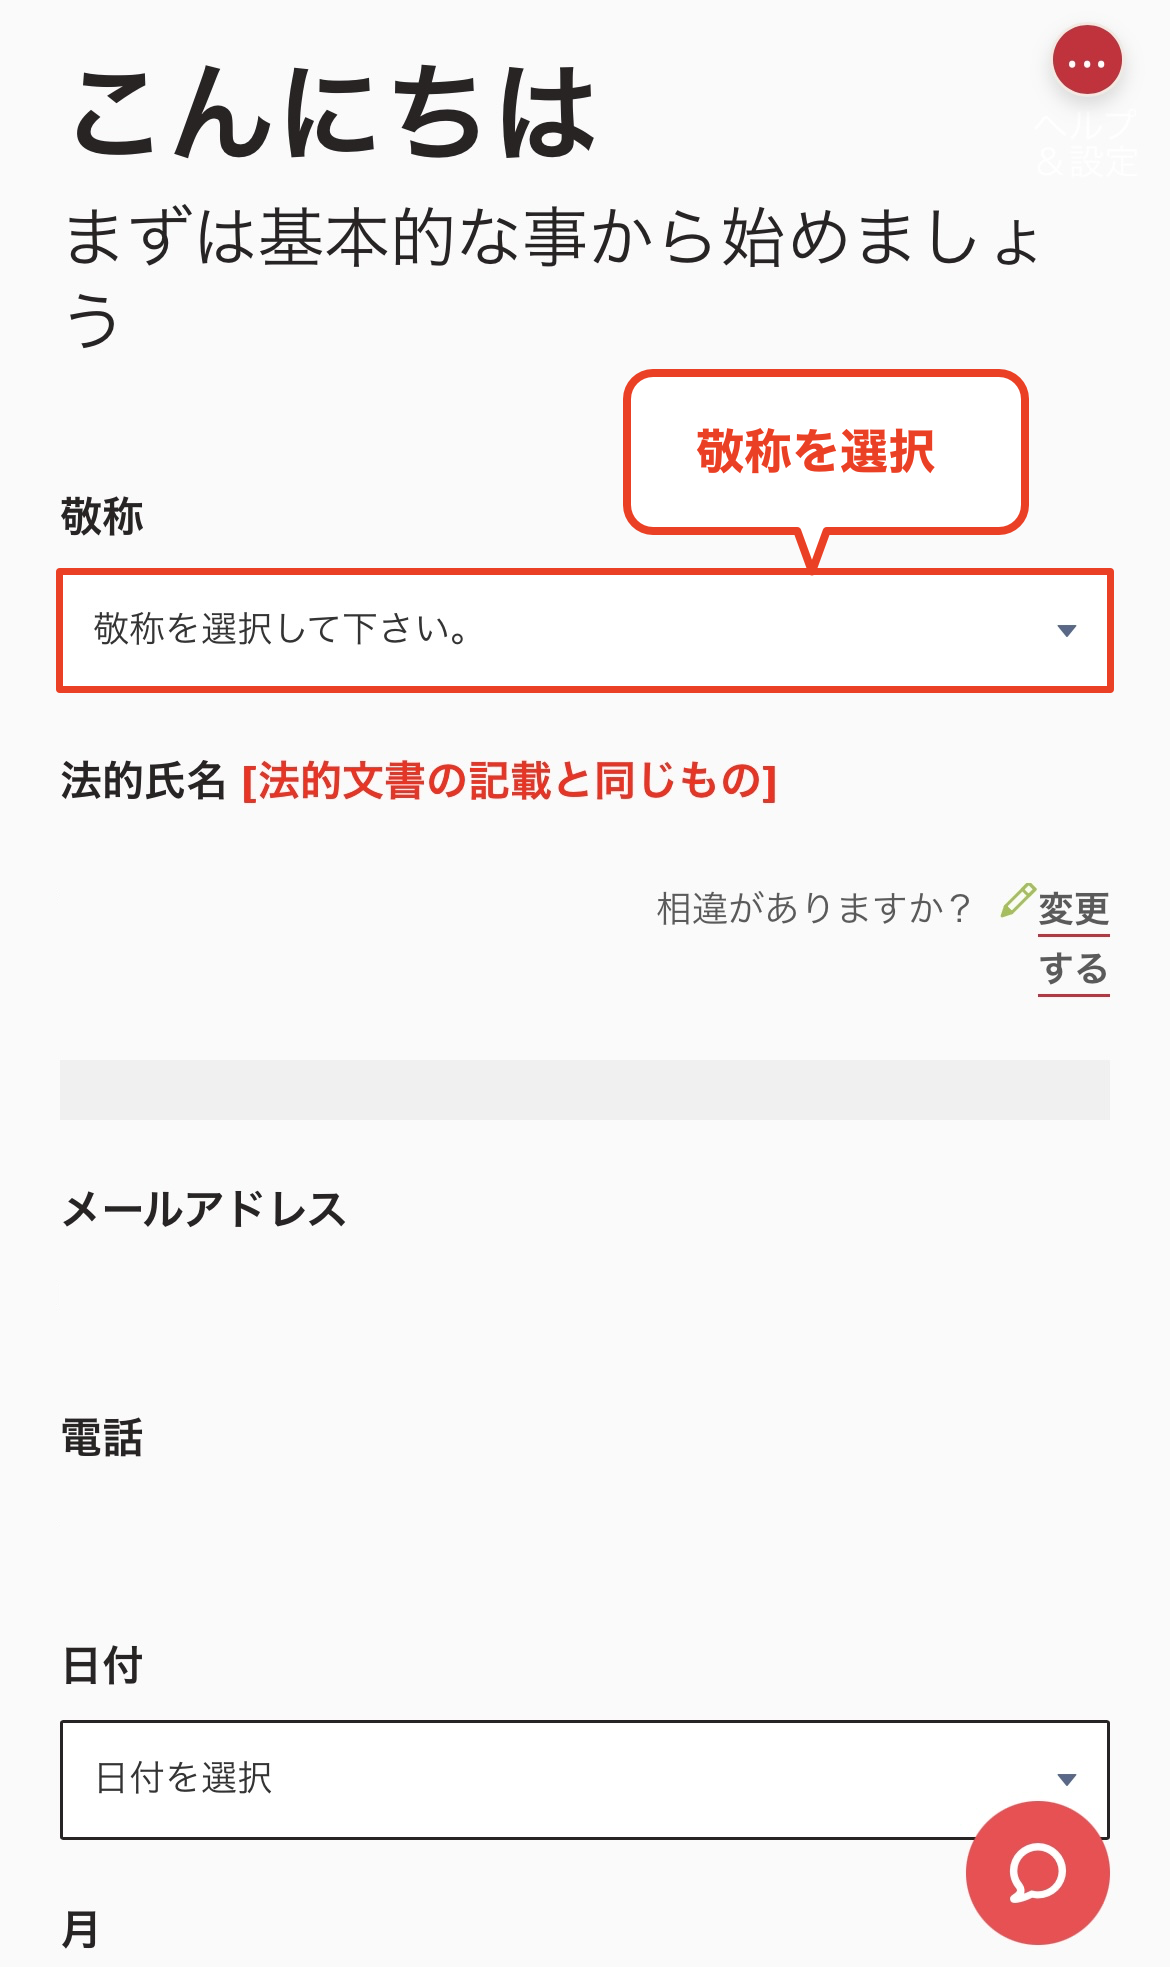
Select a title of respect (Mr./Mrs.)
You will now proceed to the personal information input screen. First, please select your title (Mr. or Mrs.)
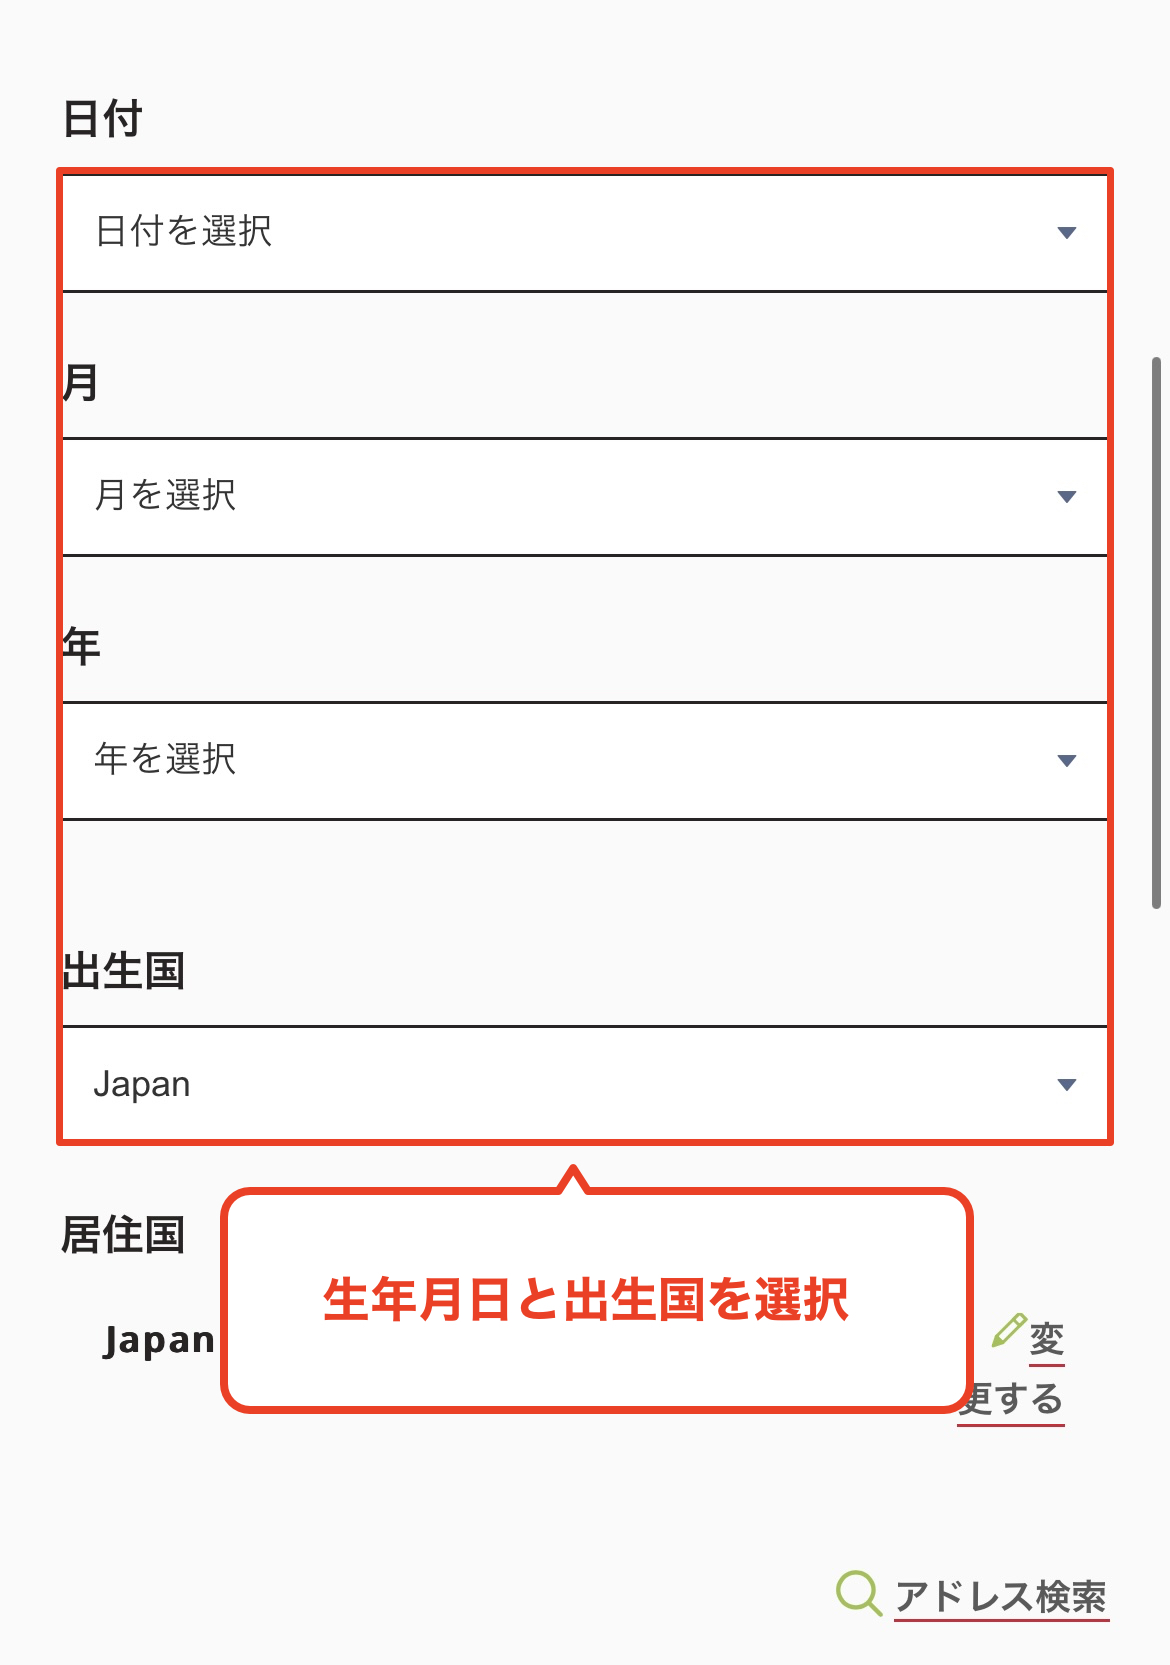
Enter your date of birth
Next, select and enter your date of birth. Please note that if you enter information that does not match the information on your identification document, your verification process will fail later
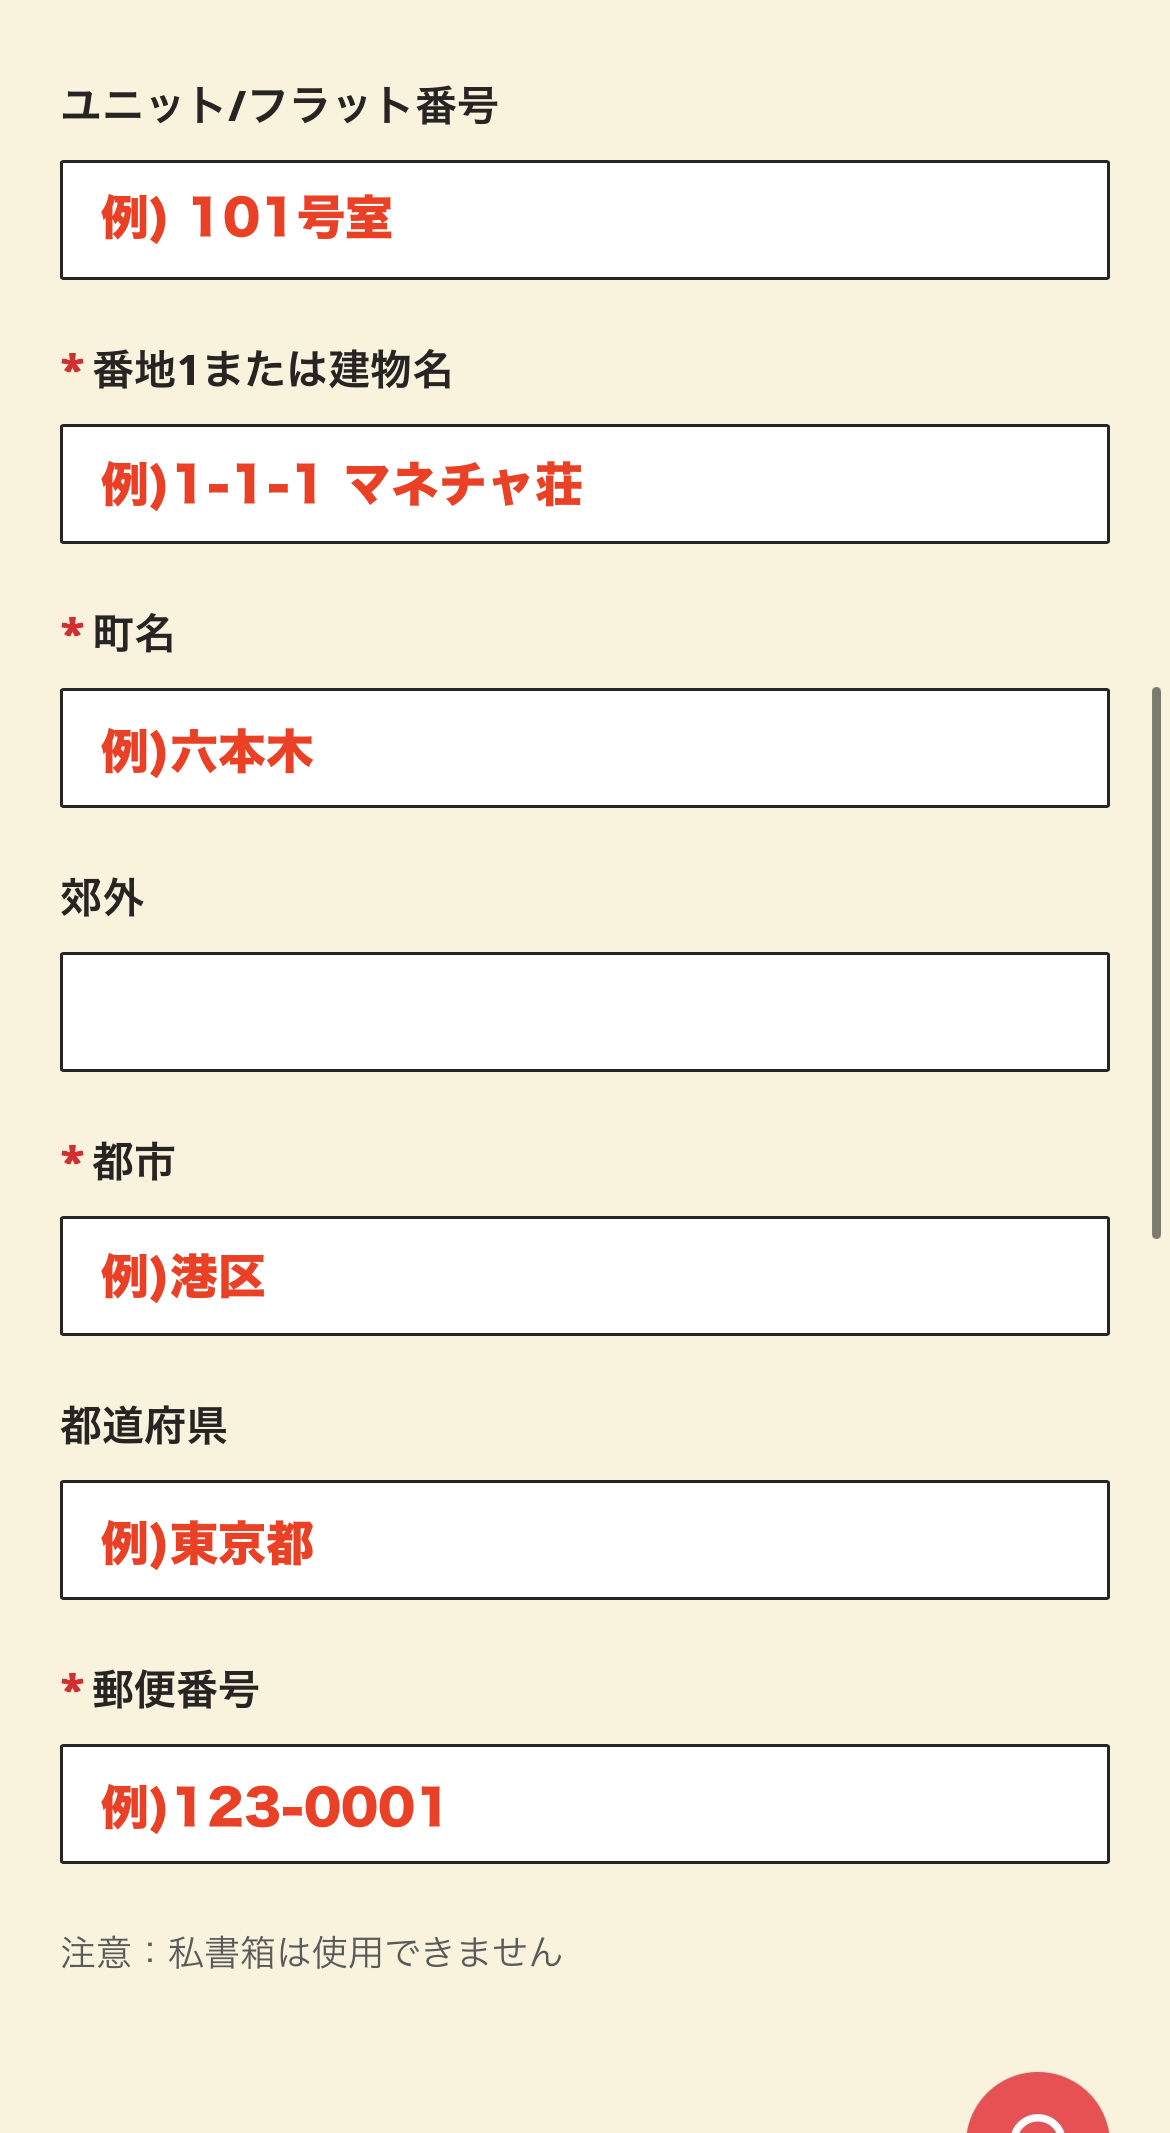
Enter your address
Please enter your address in Roman letters. Enter it accurately in the following order: street number, city/ward/town/village, prefecture, and postal code
*Please enter the same address as on the identification document you will be using for identity verification. Verification may fail if the address is different
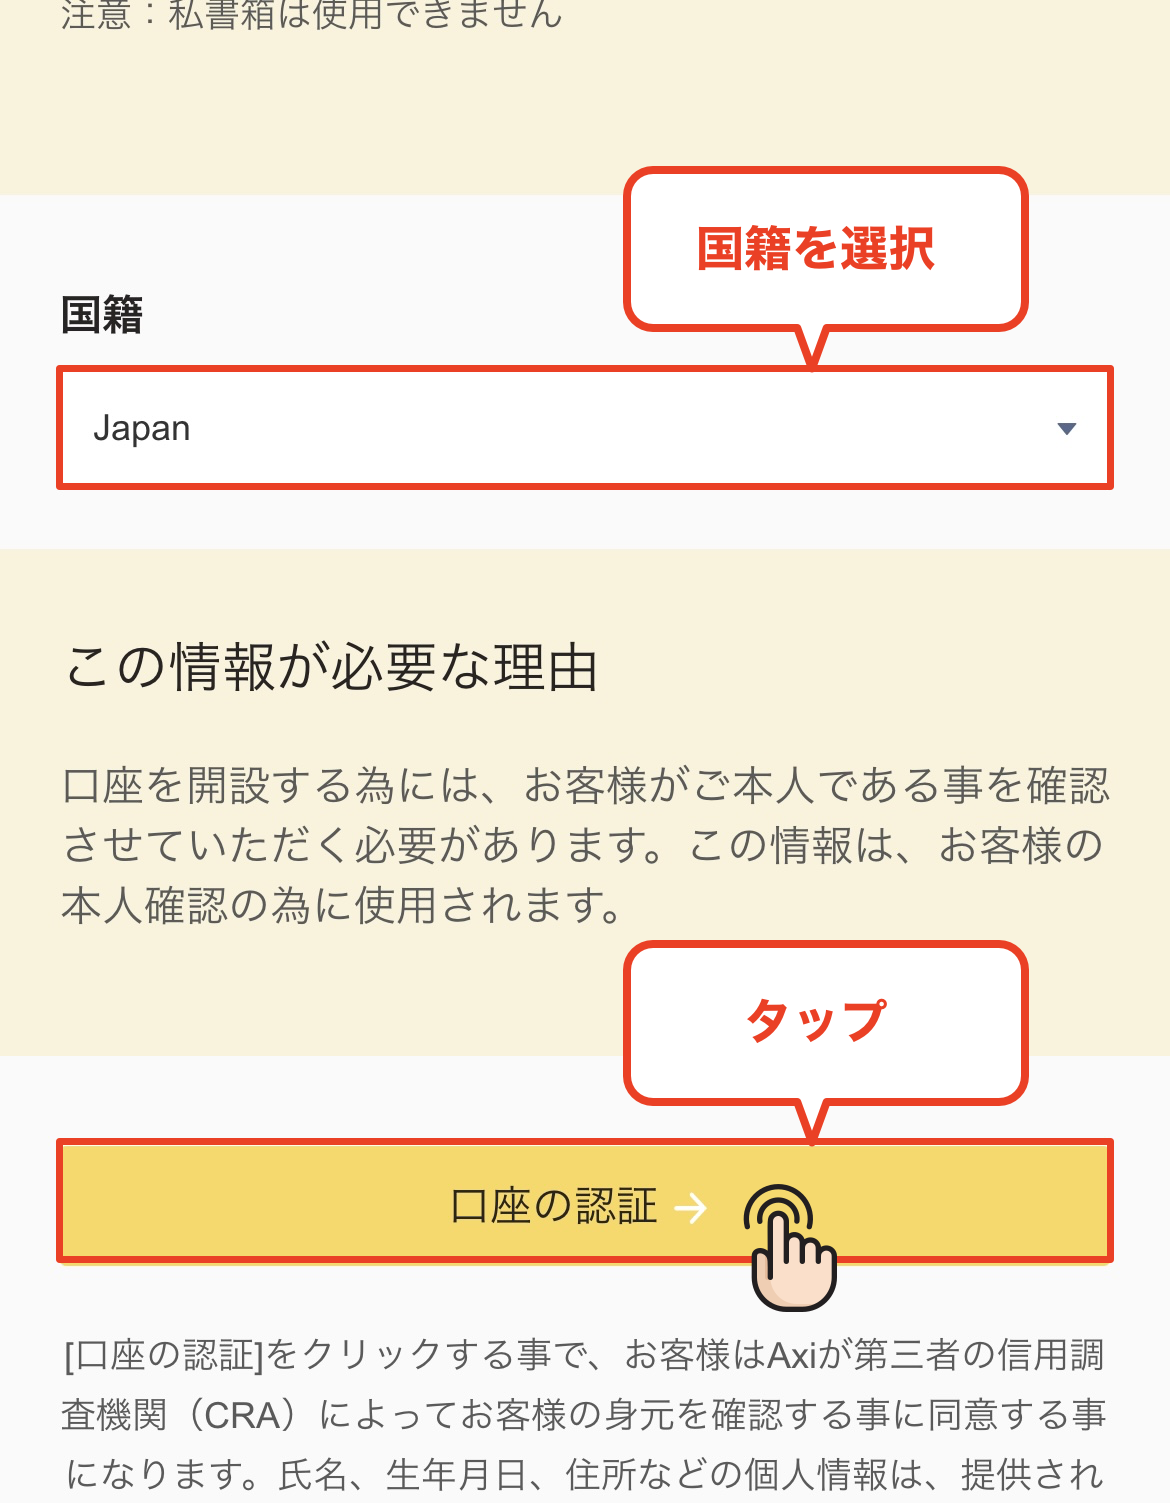
Select your nationality and proceed to account verification
Once you have entered your address, select your "Nationality" from the dropdown menu. After selecting "Japan," tap the "Account Verification" button to proceed
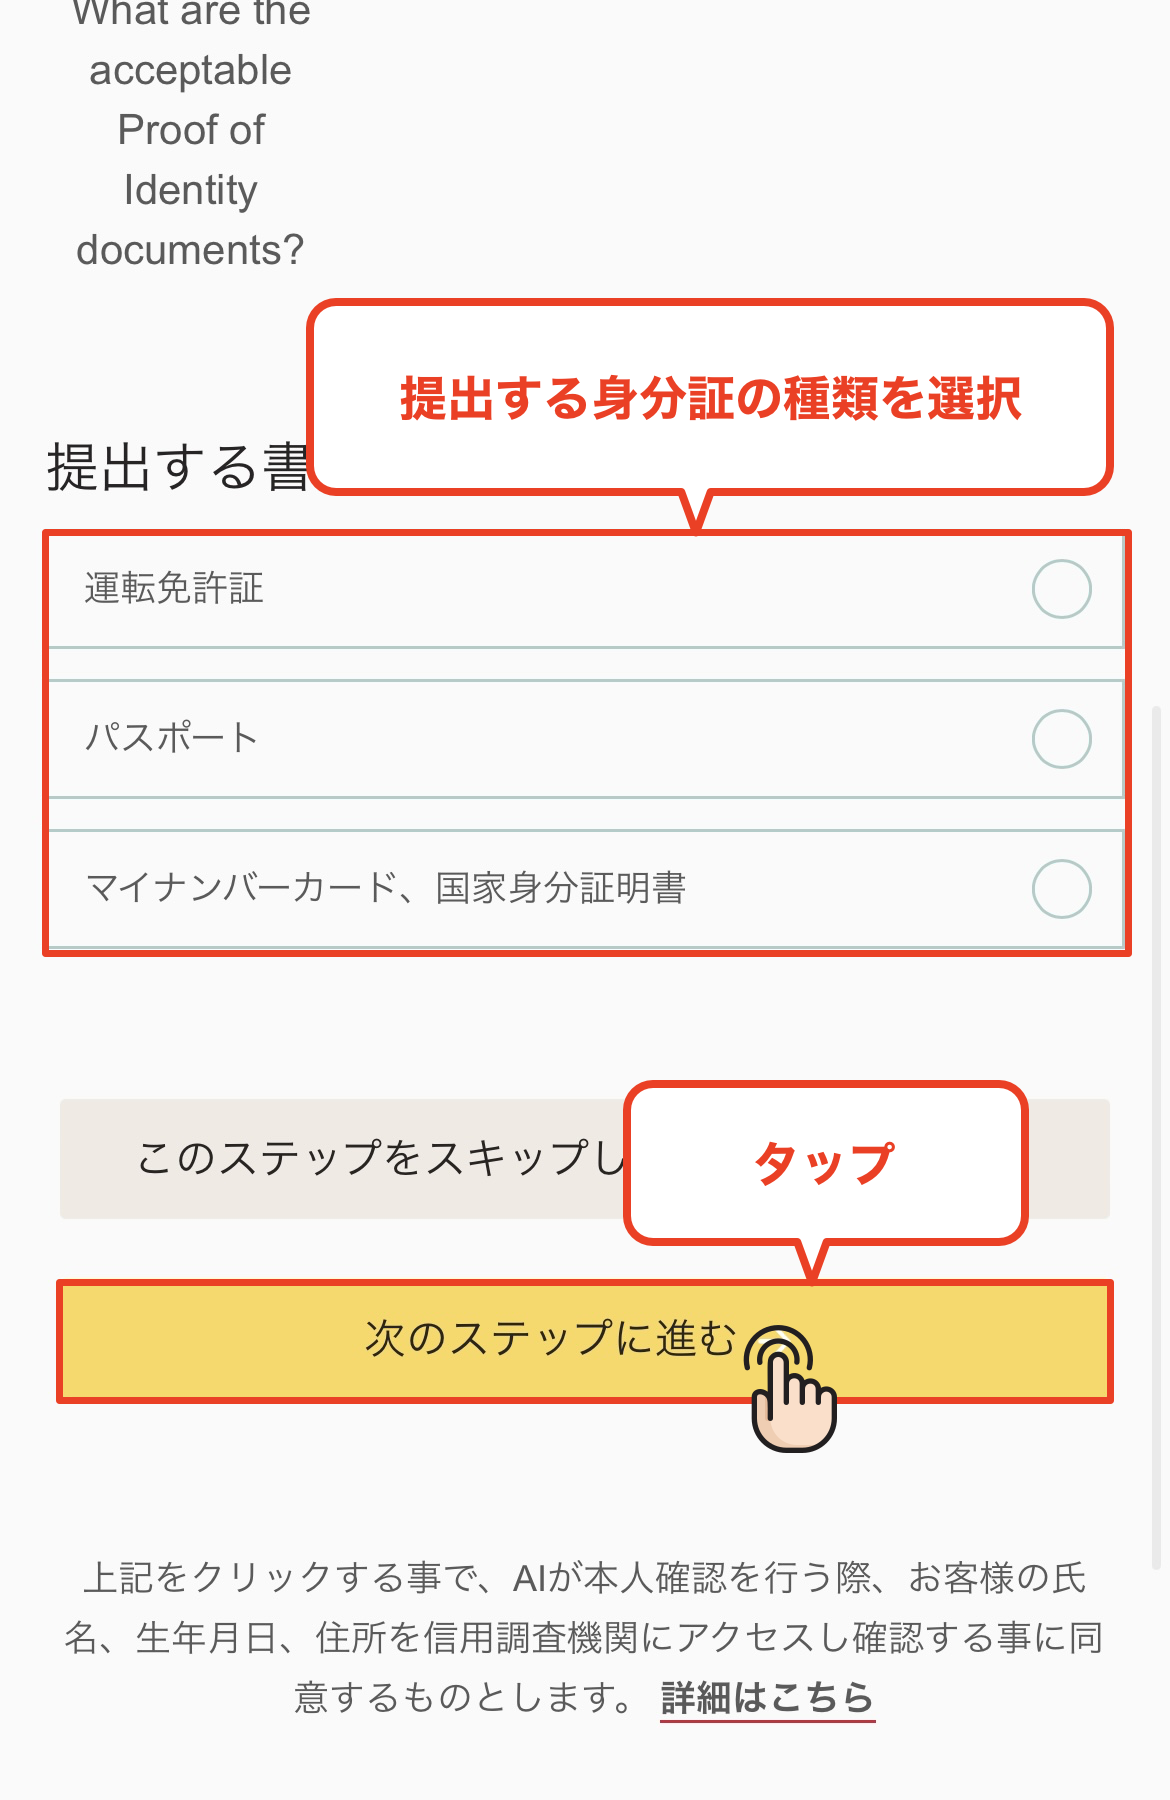
Select the type of identification document
We will now proceed to submitting your identification. You can choose from the following three types of identification; please tap the document you have prepared
* Acceptable documents: Passport / Driver's license / My Number Card (Individual Number Card)
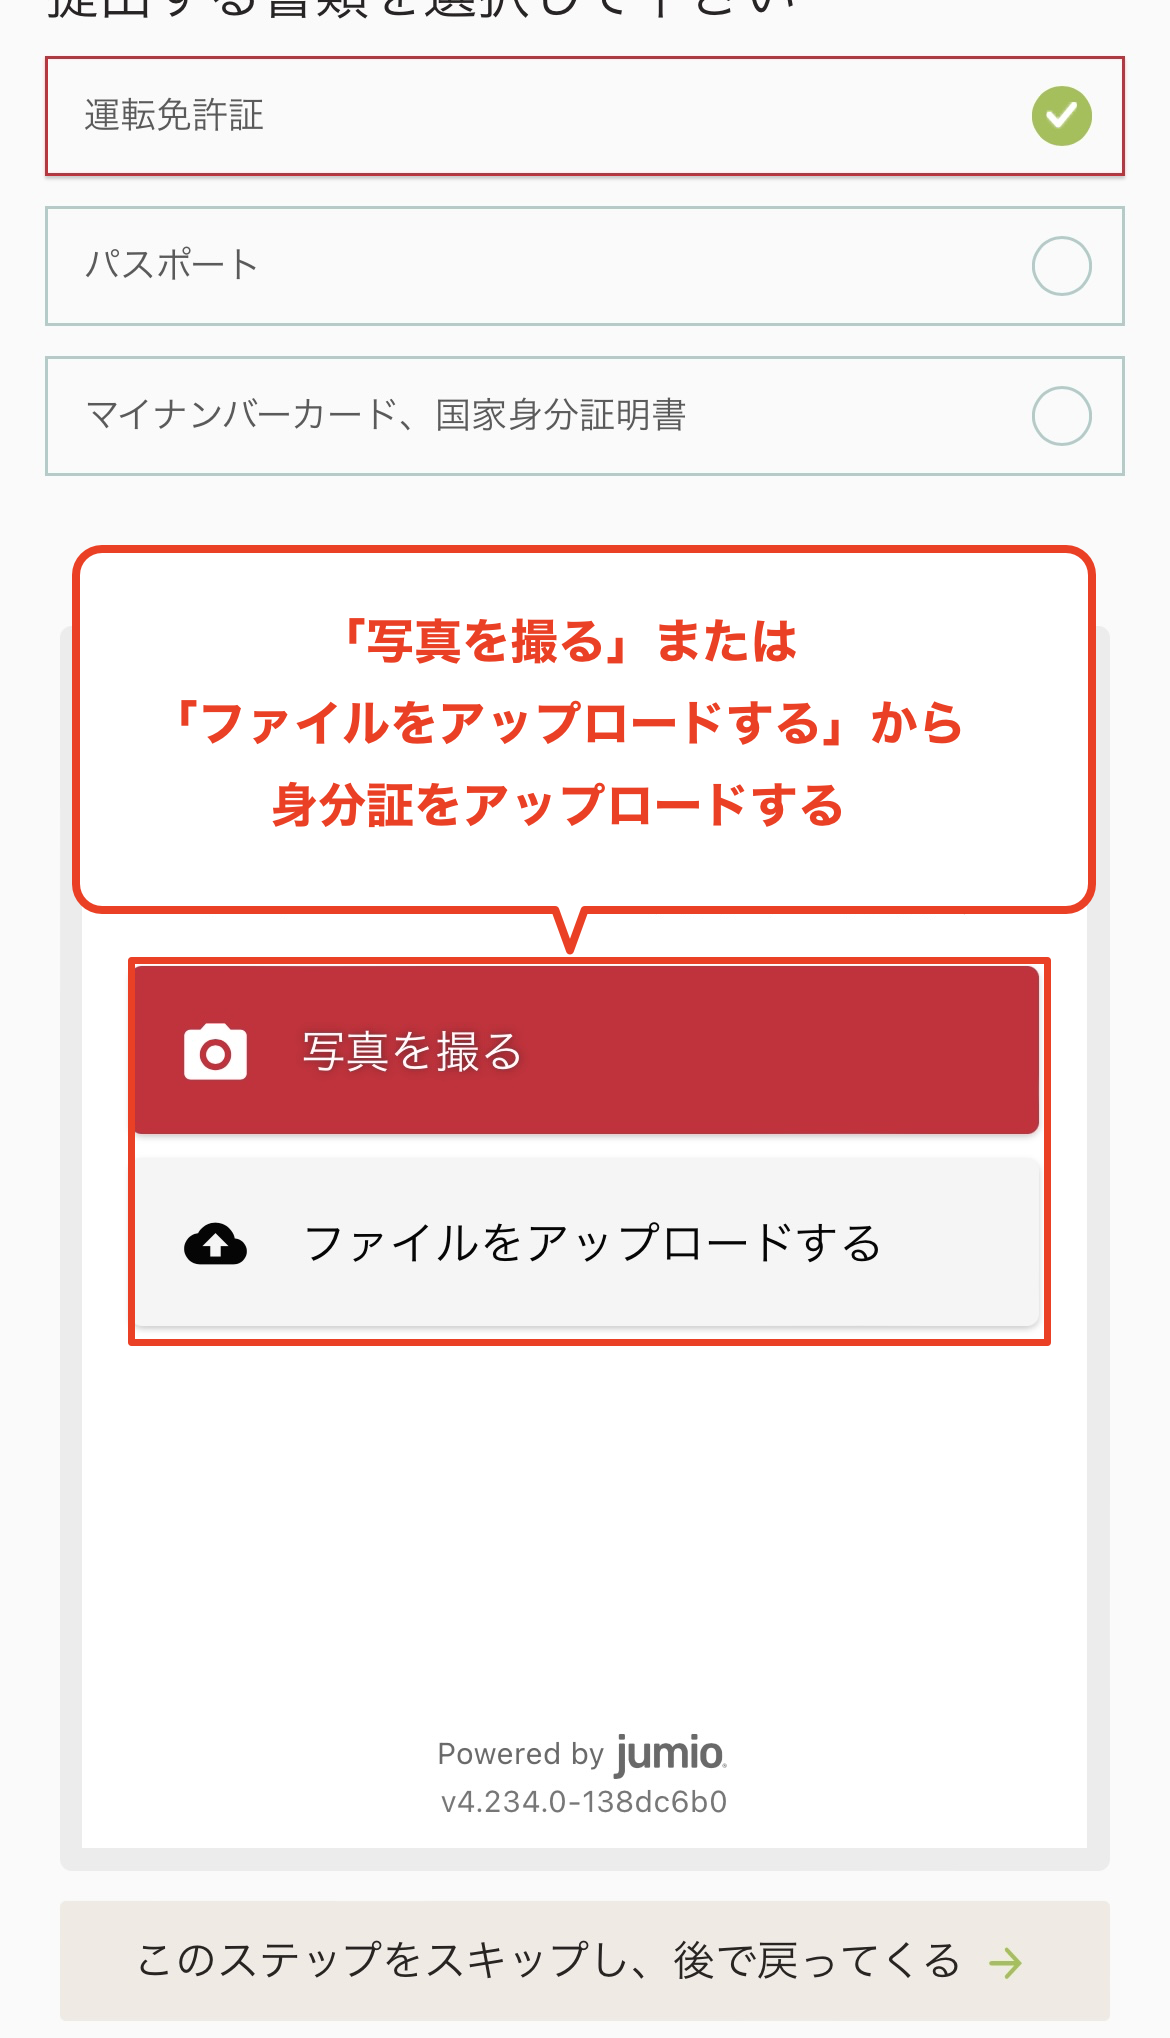
Select how you want to upload your identification document
Please upload your identification document using one of the following two methods: "Take a photo with your camera" or "Select from files."
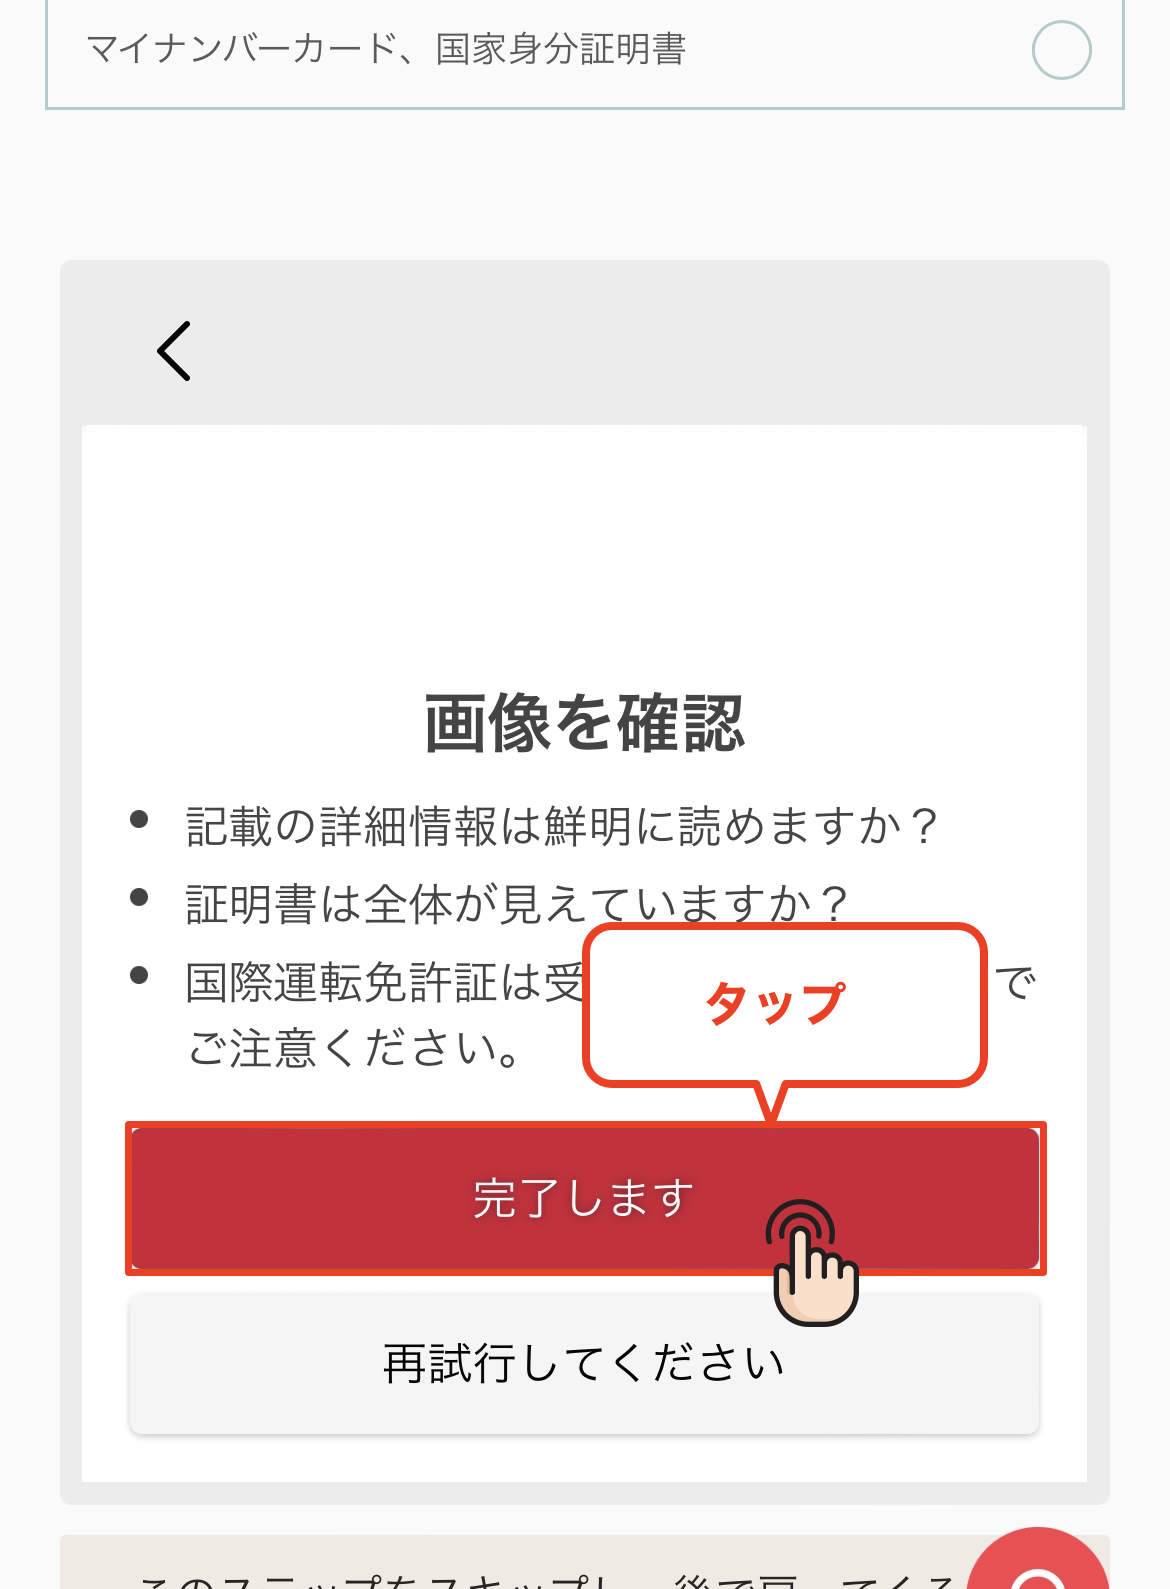
Check the uploaded content
Once you have finished uploading your identification document, check to make sure the image has been uploaded correctly, and if there are no problems, tap "Complete"
*Please ensure that all four corners of the document are visible in the image and that the text is clearly legible
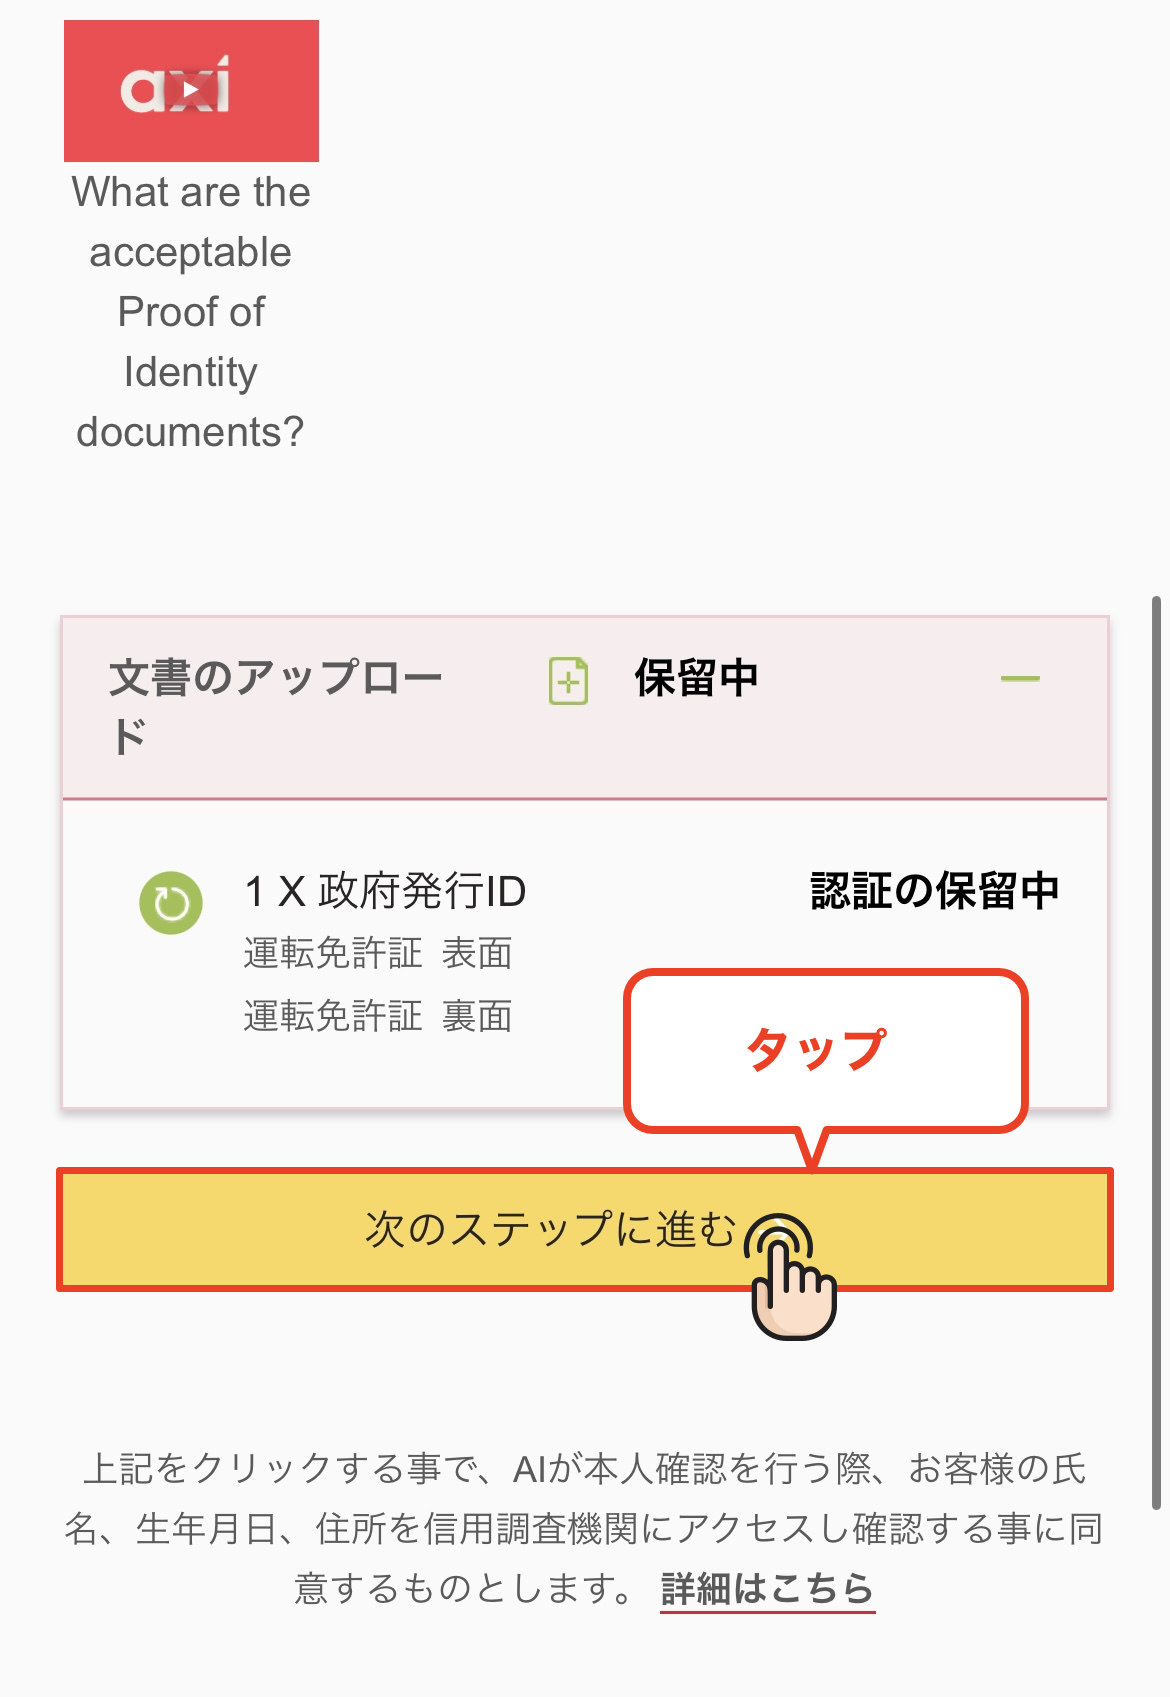
Proceed to the next step
Once the upload is complete, tap the "Proceed to the next step" button to go to the survey response screen
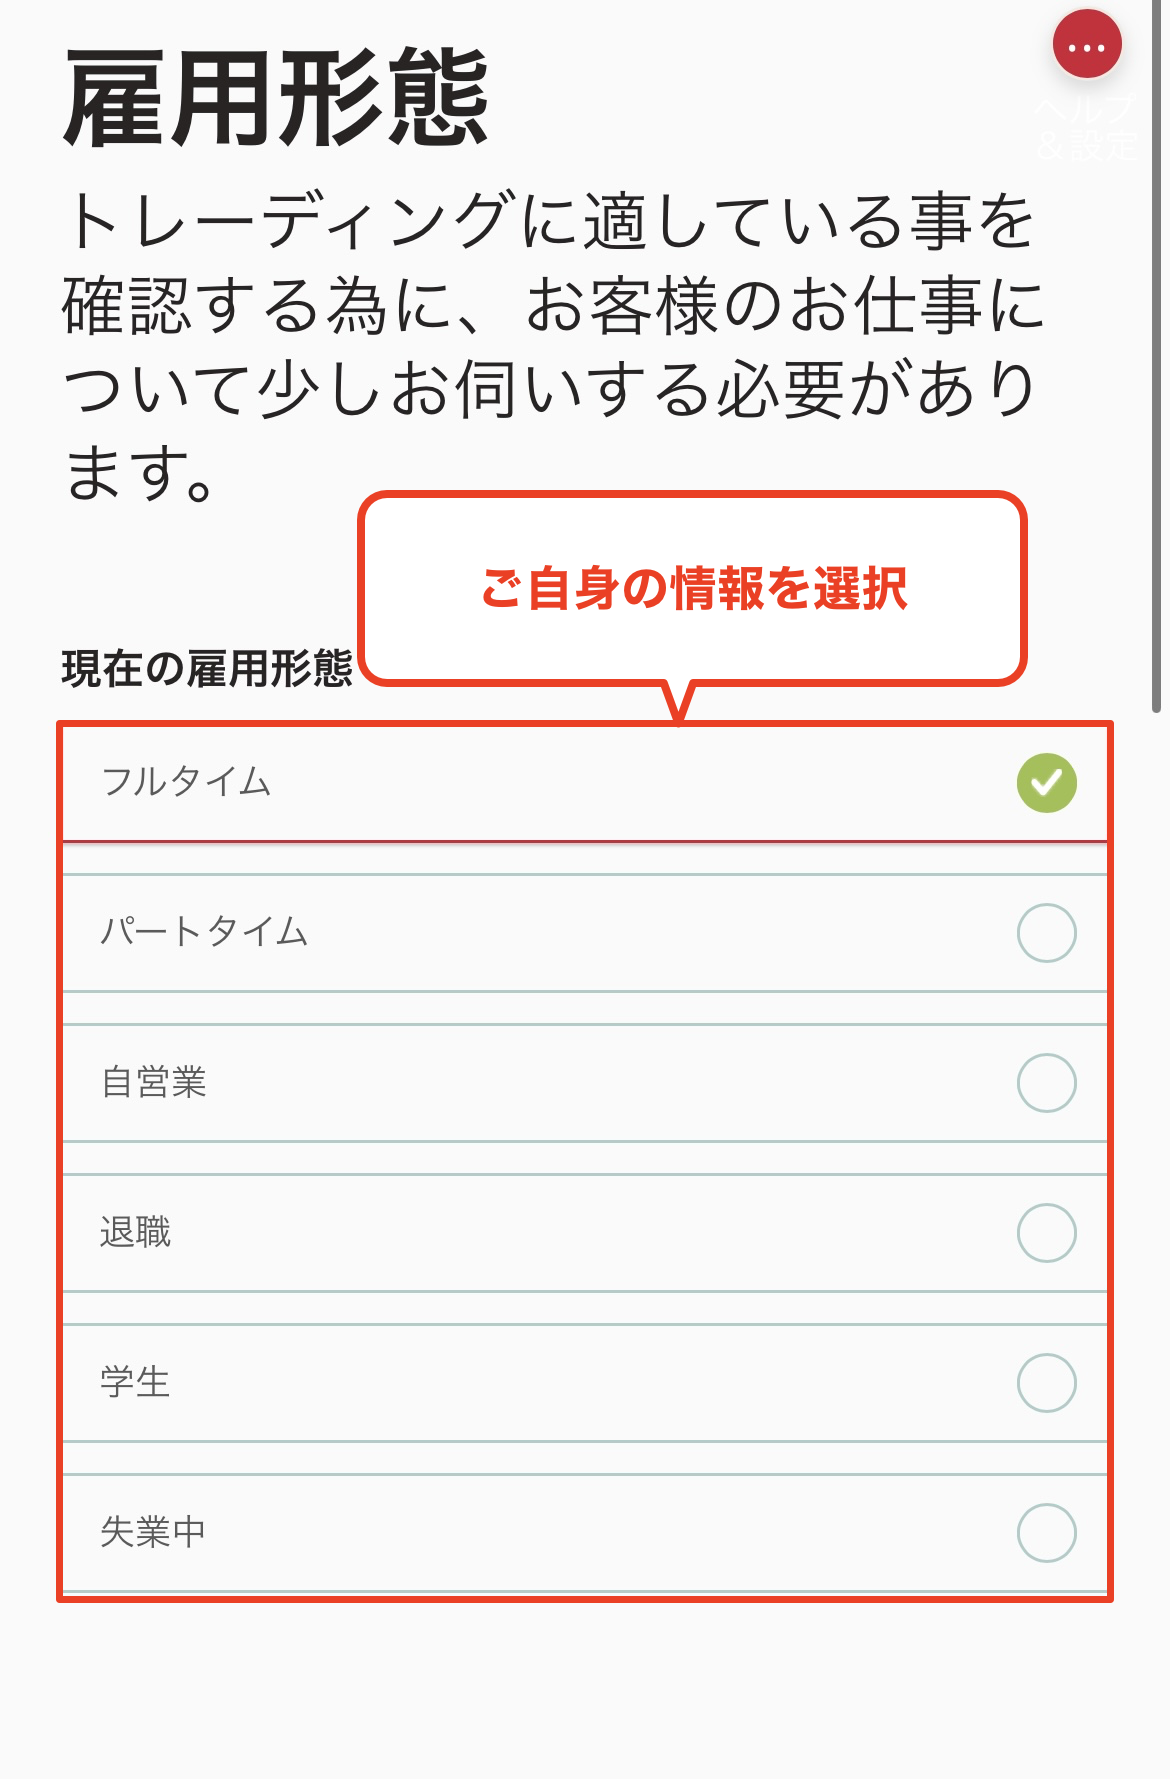
Select employment type
From here, you will answer questions about your occupation and trading. First, please select your current employment status
*There is no particular reason why your account opening will be prevented based on your answers
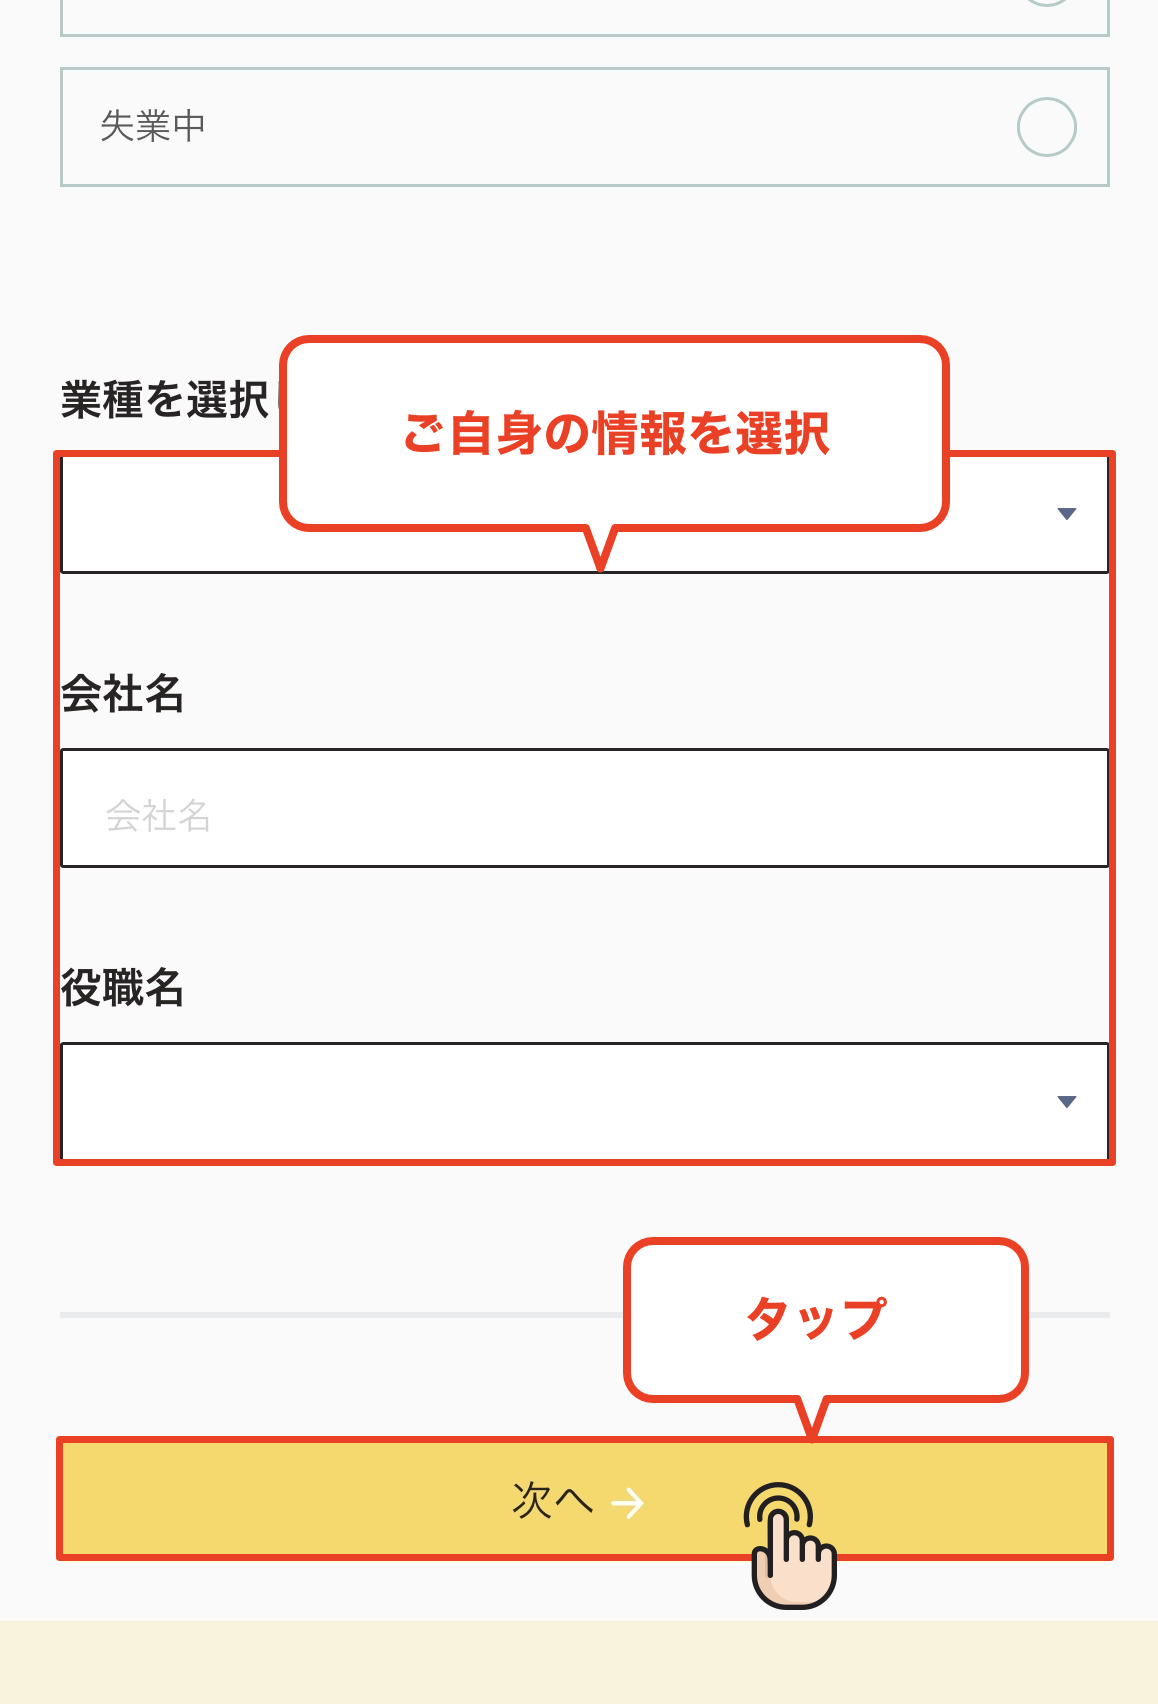
Enter your industry and company name
Enter the industry and company name of your workplace, then tap "Next" to proceed
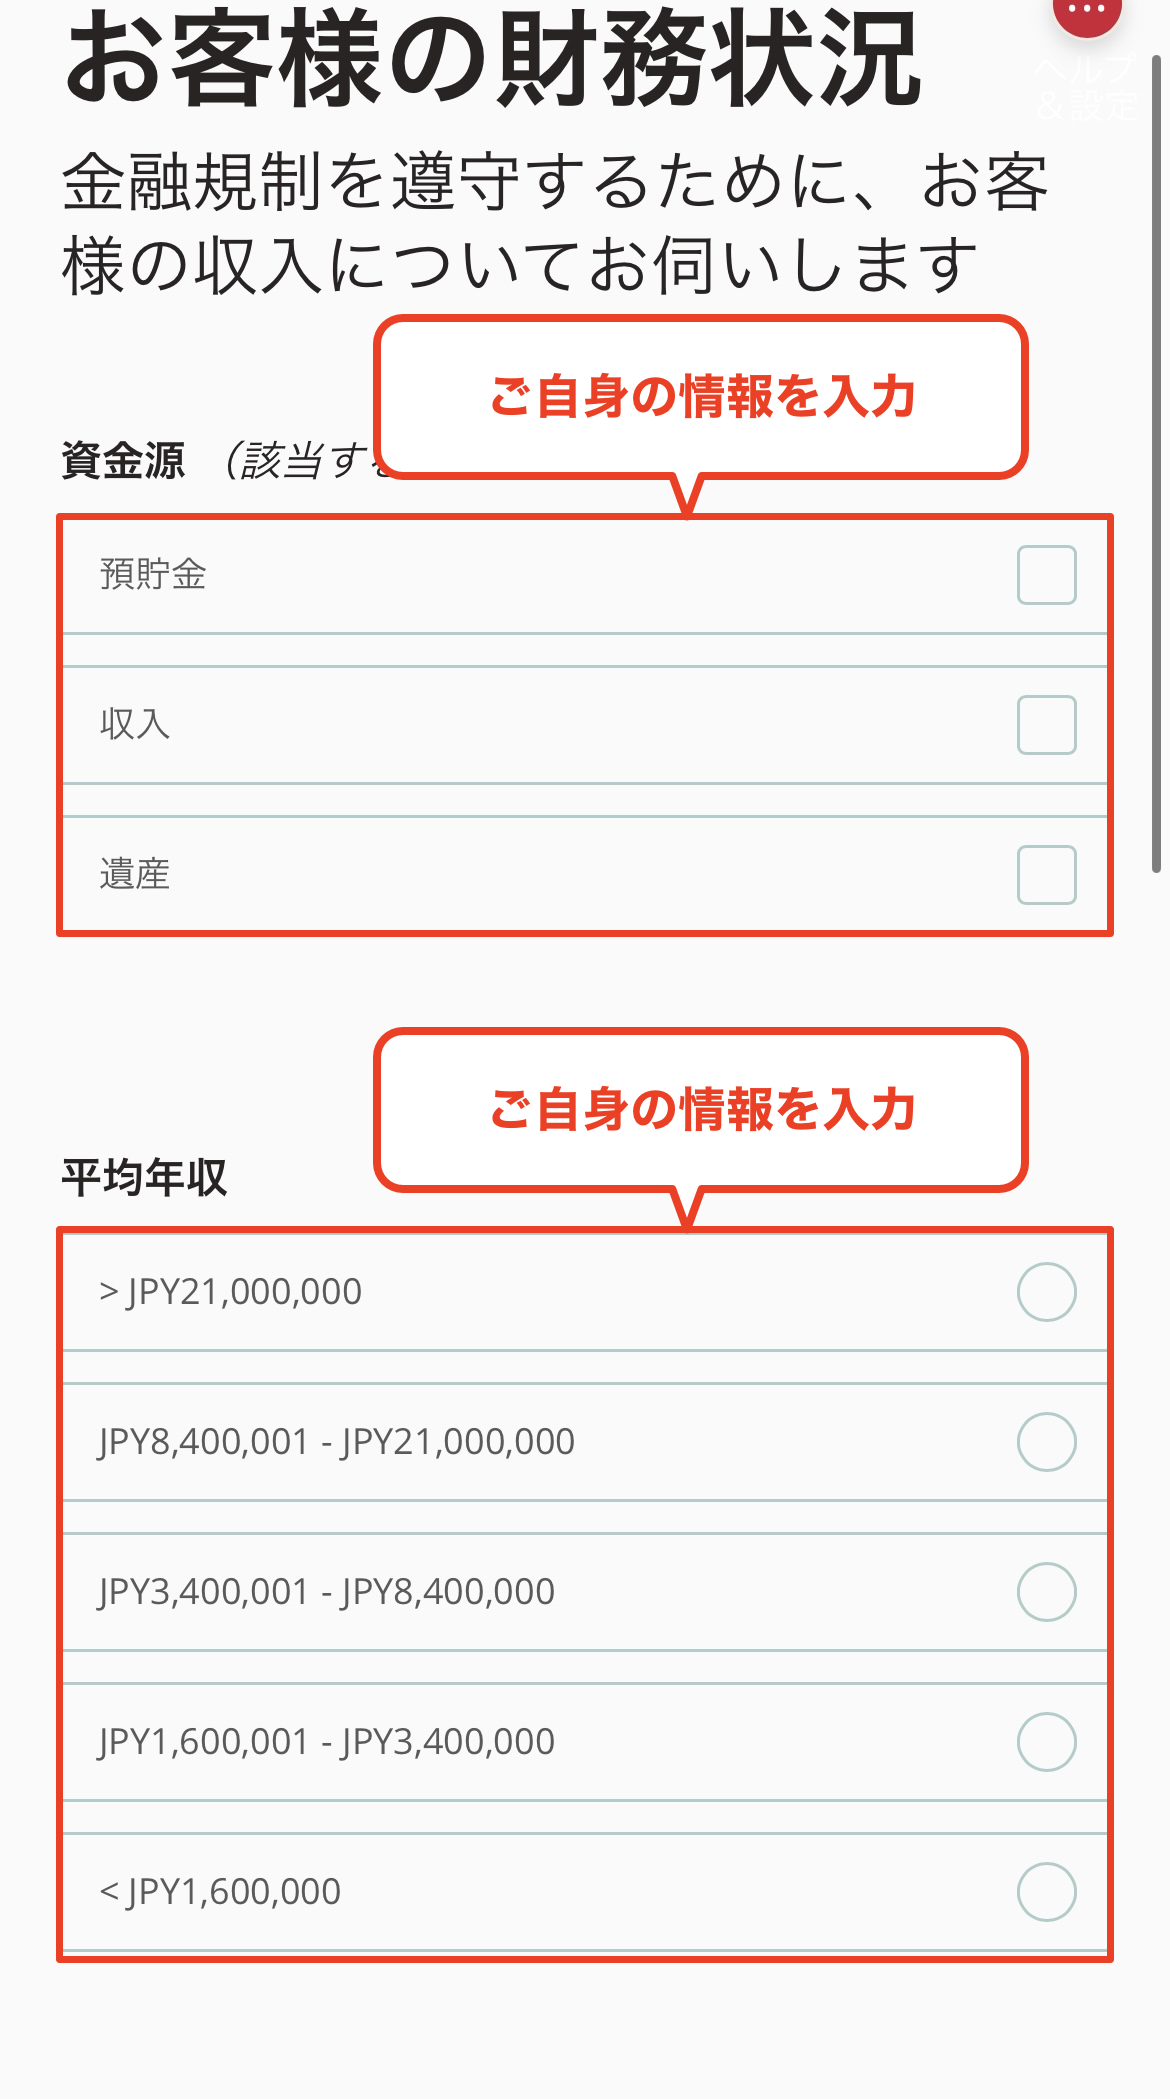
Select your source of funding and annual income
Please select the source of the funds you will use for trading (salary, savings, etc.) and your annual income range
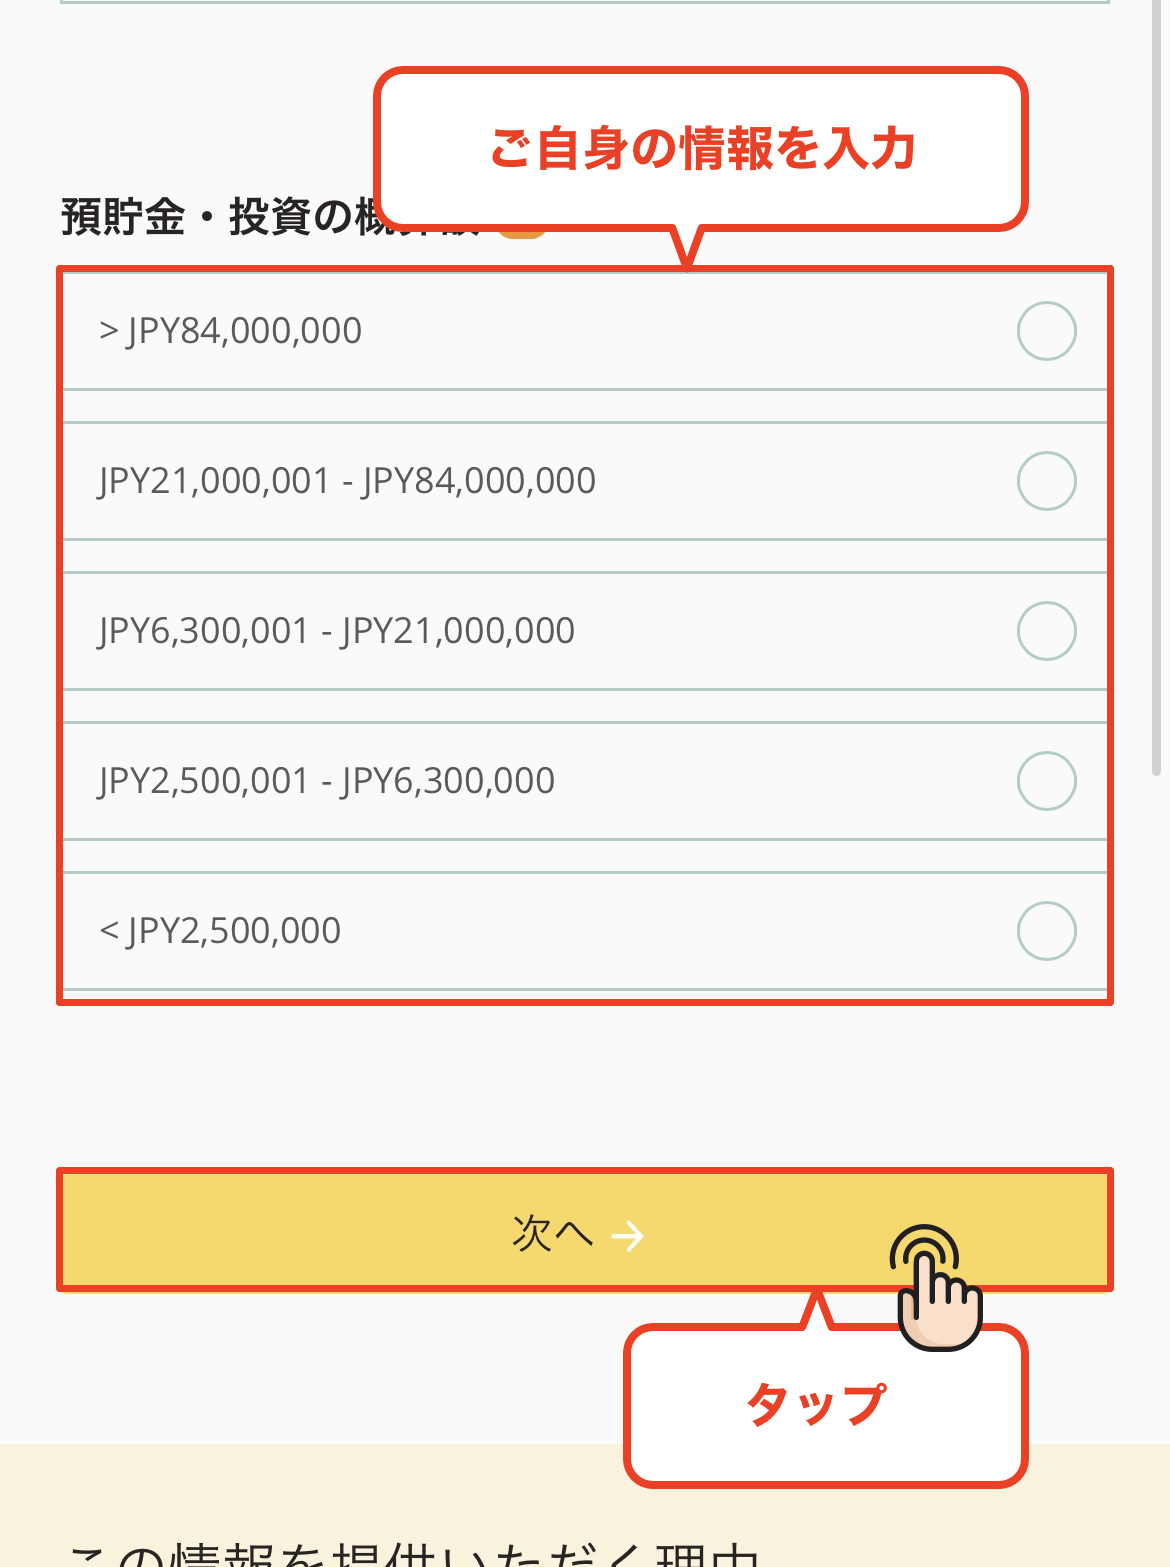
Select the amount to save
Next, please select the range of your savings amount. Choose the appropriate amount and proceed to the next step
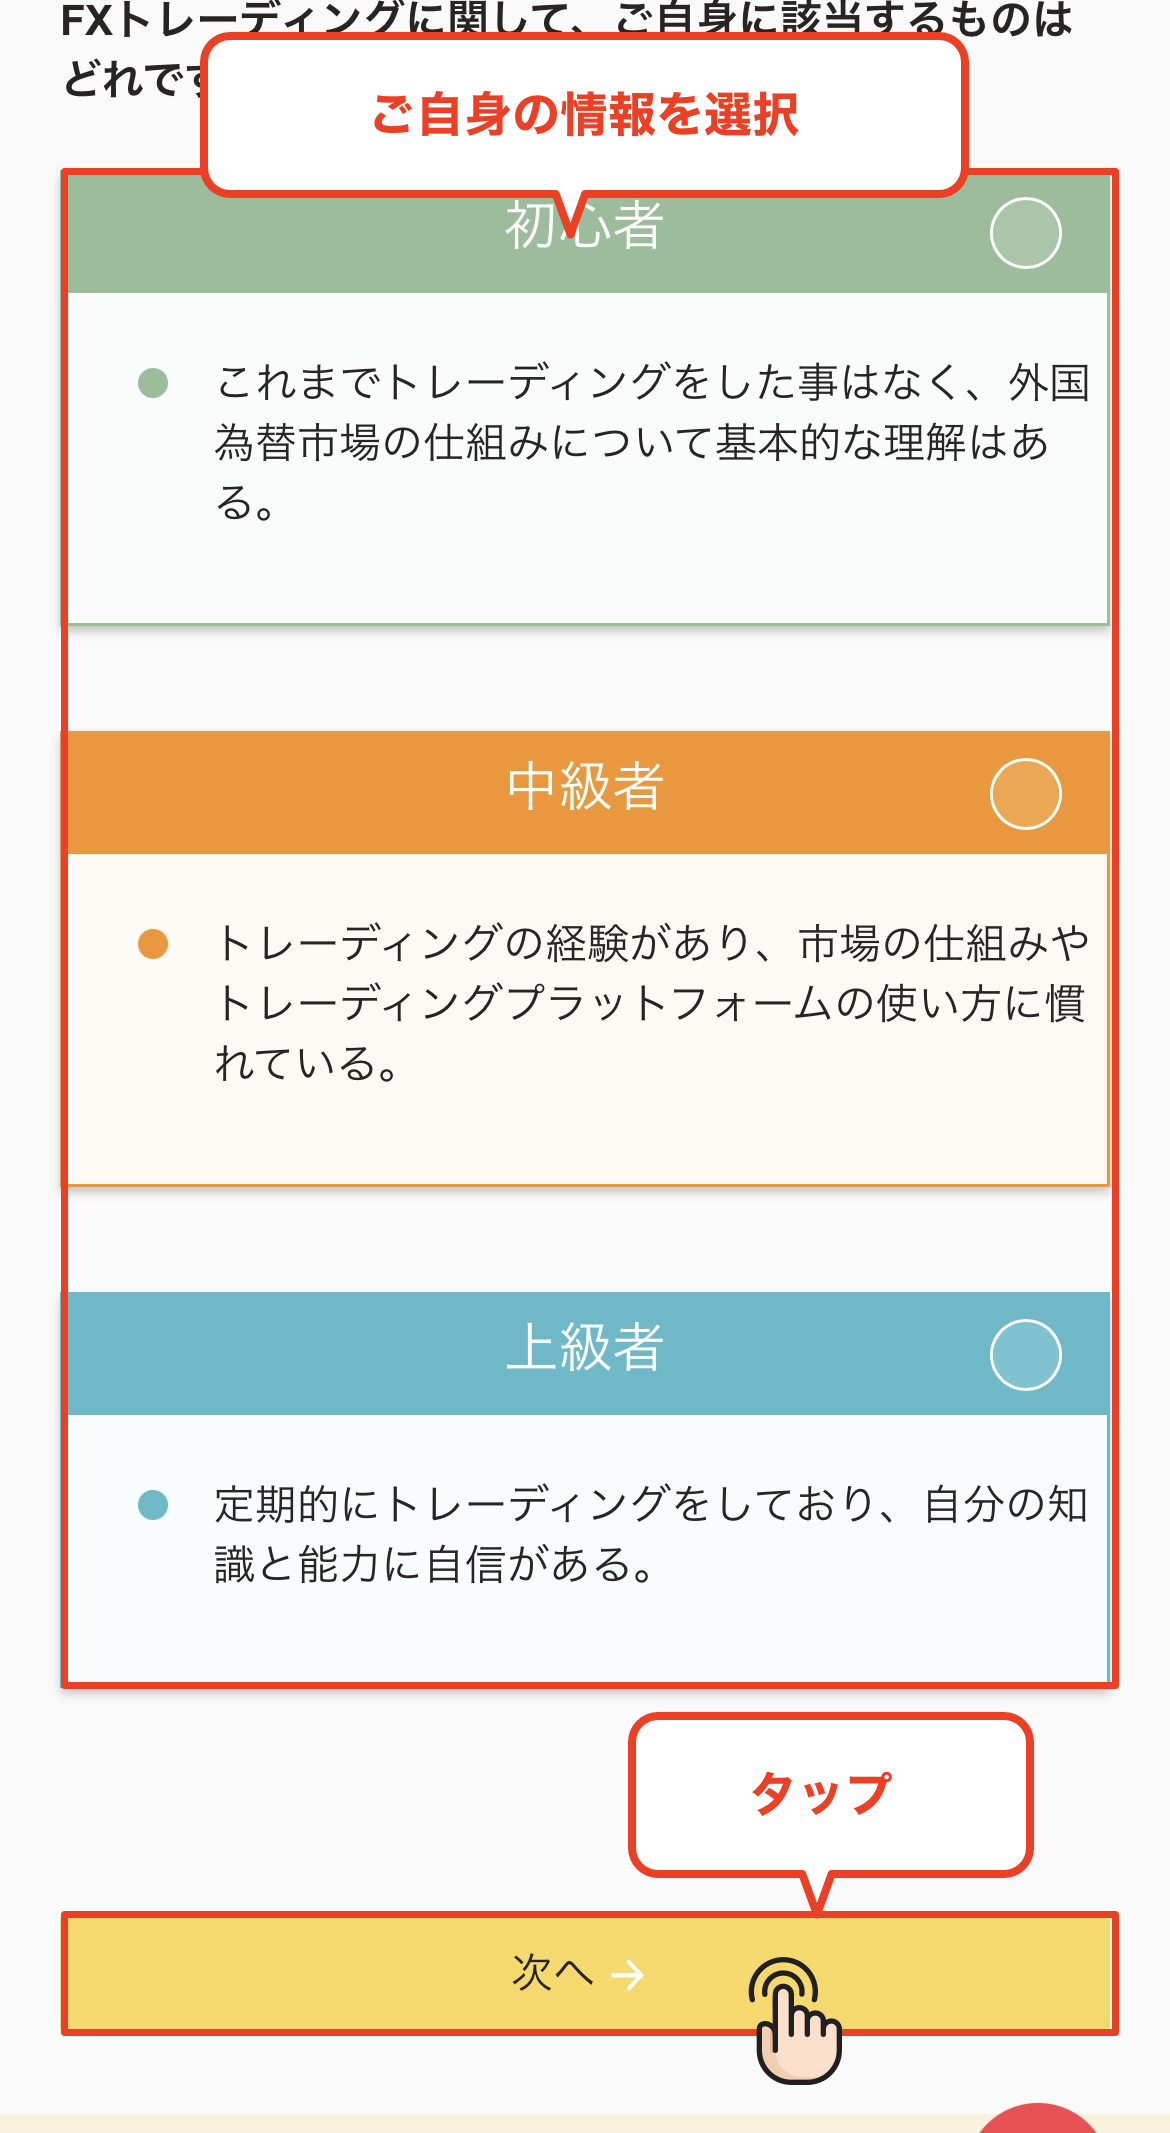
Select your trading experience
Please answer the following questionnaire regarding your trading experience with FX, CFDs, etc. Please select your years of experience, trading frequency, etc., and proceed
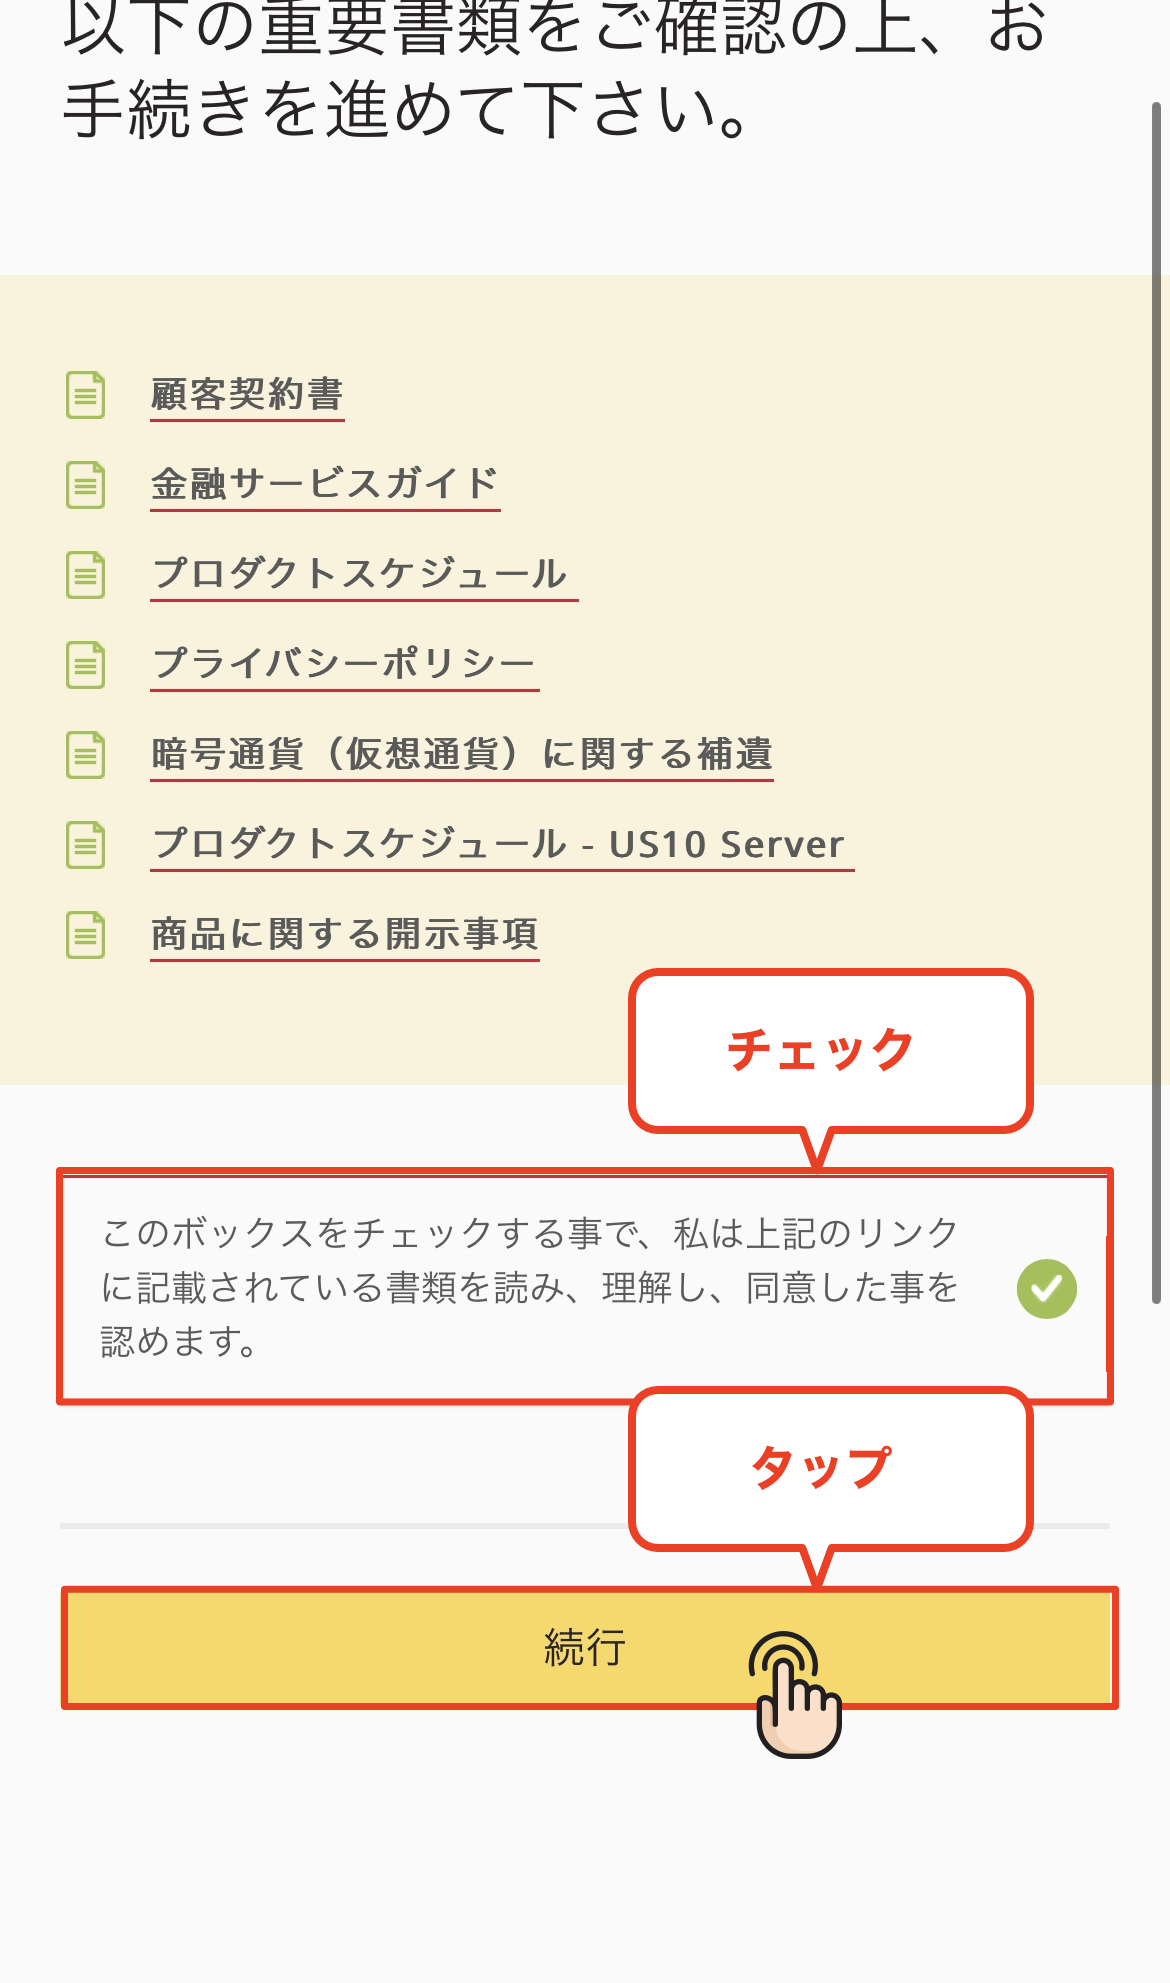
I agree to the terms of service
Review the terms of service, check the agreement checkbox, and tap "Continue."
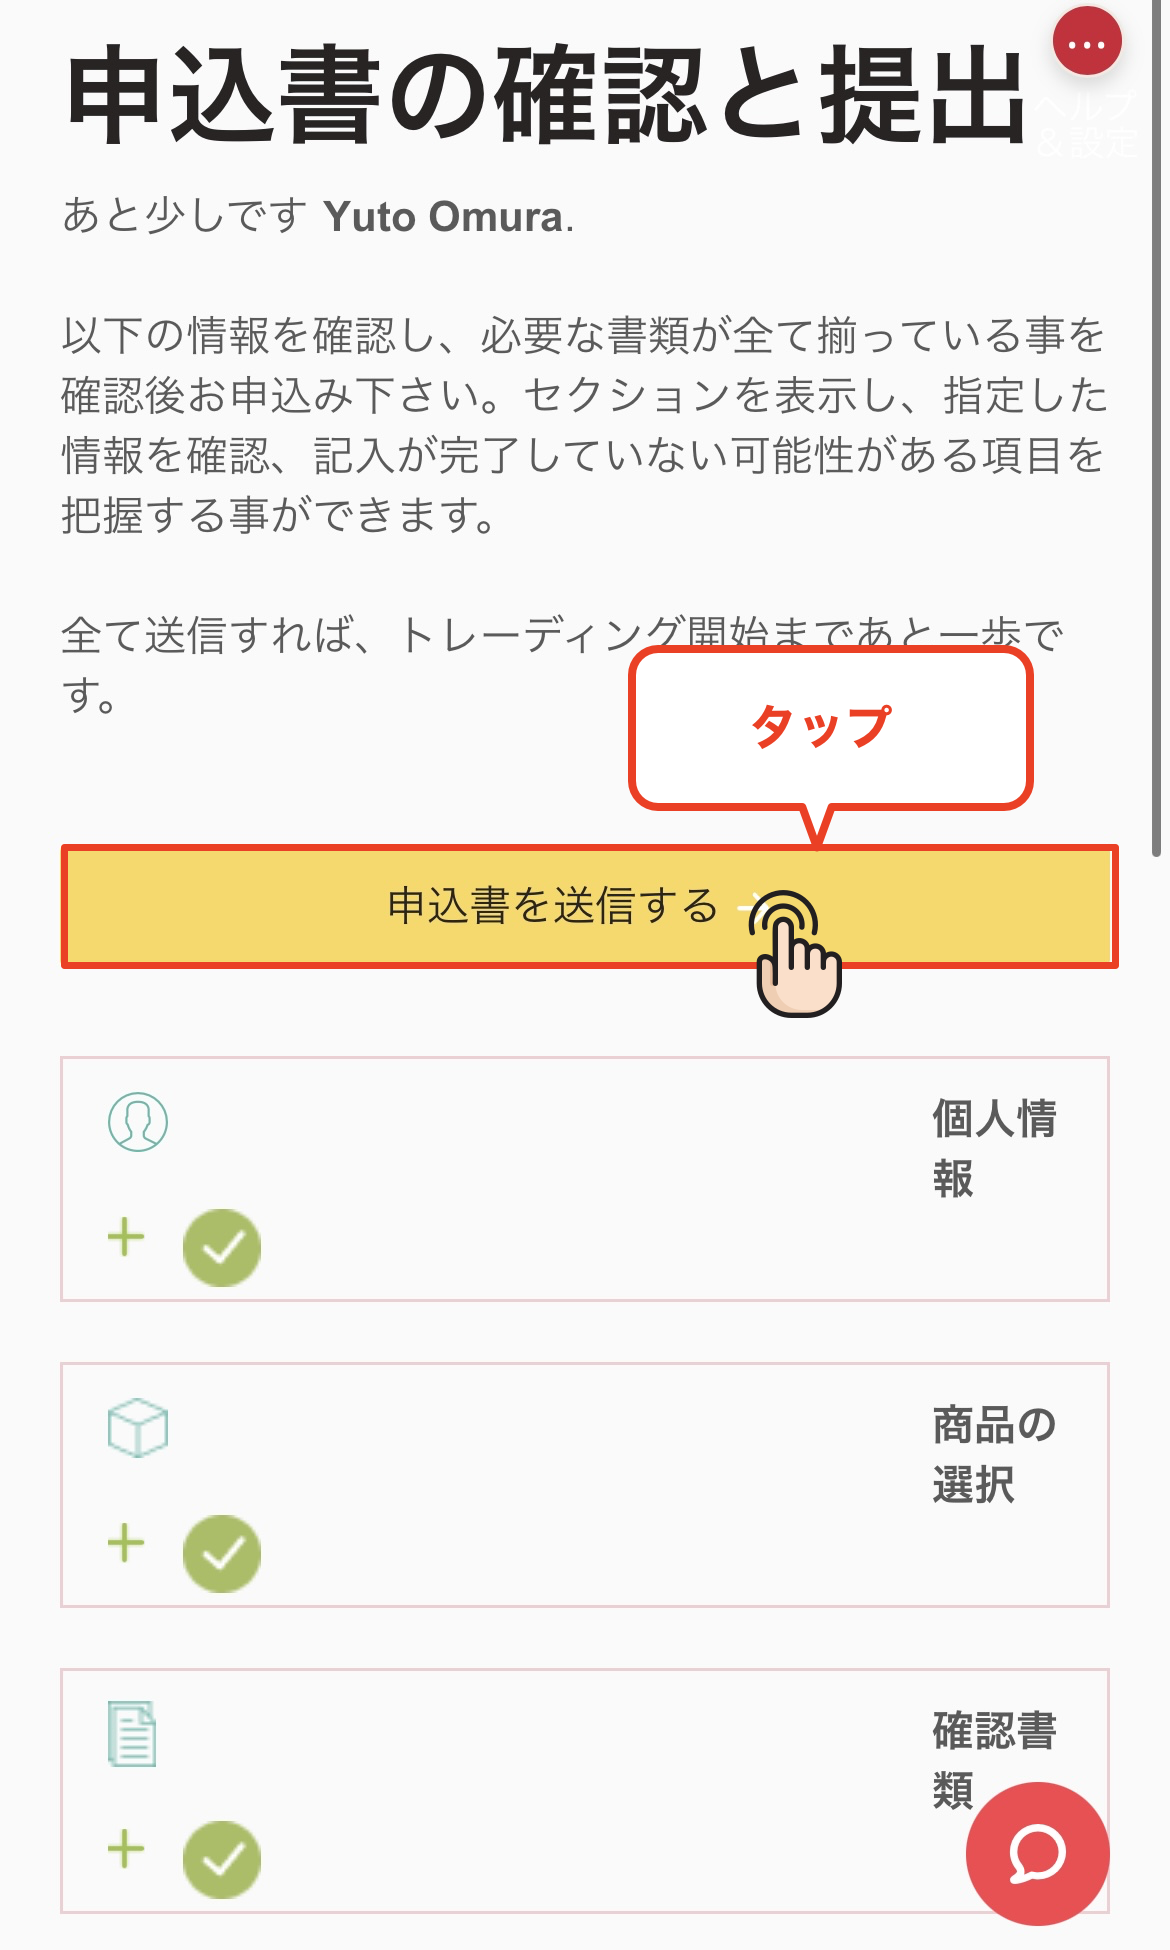
Submit the application form
Please check that the information you have entered is correct, and then tap the "Submit Application" button to complete your application
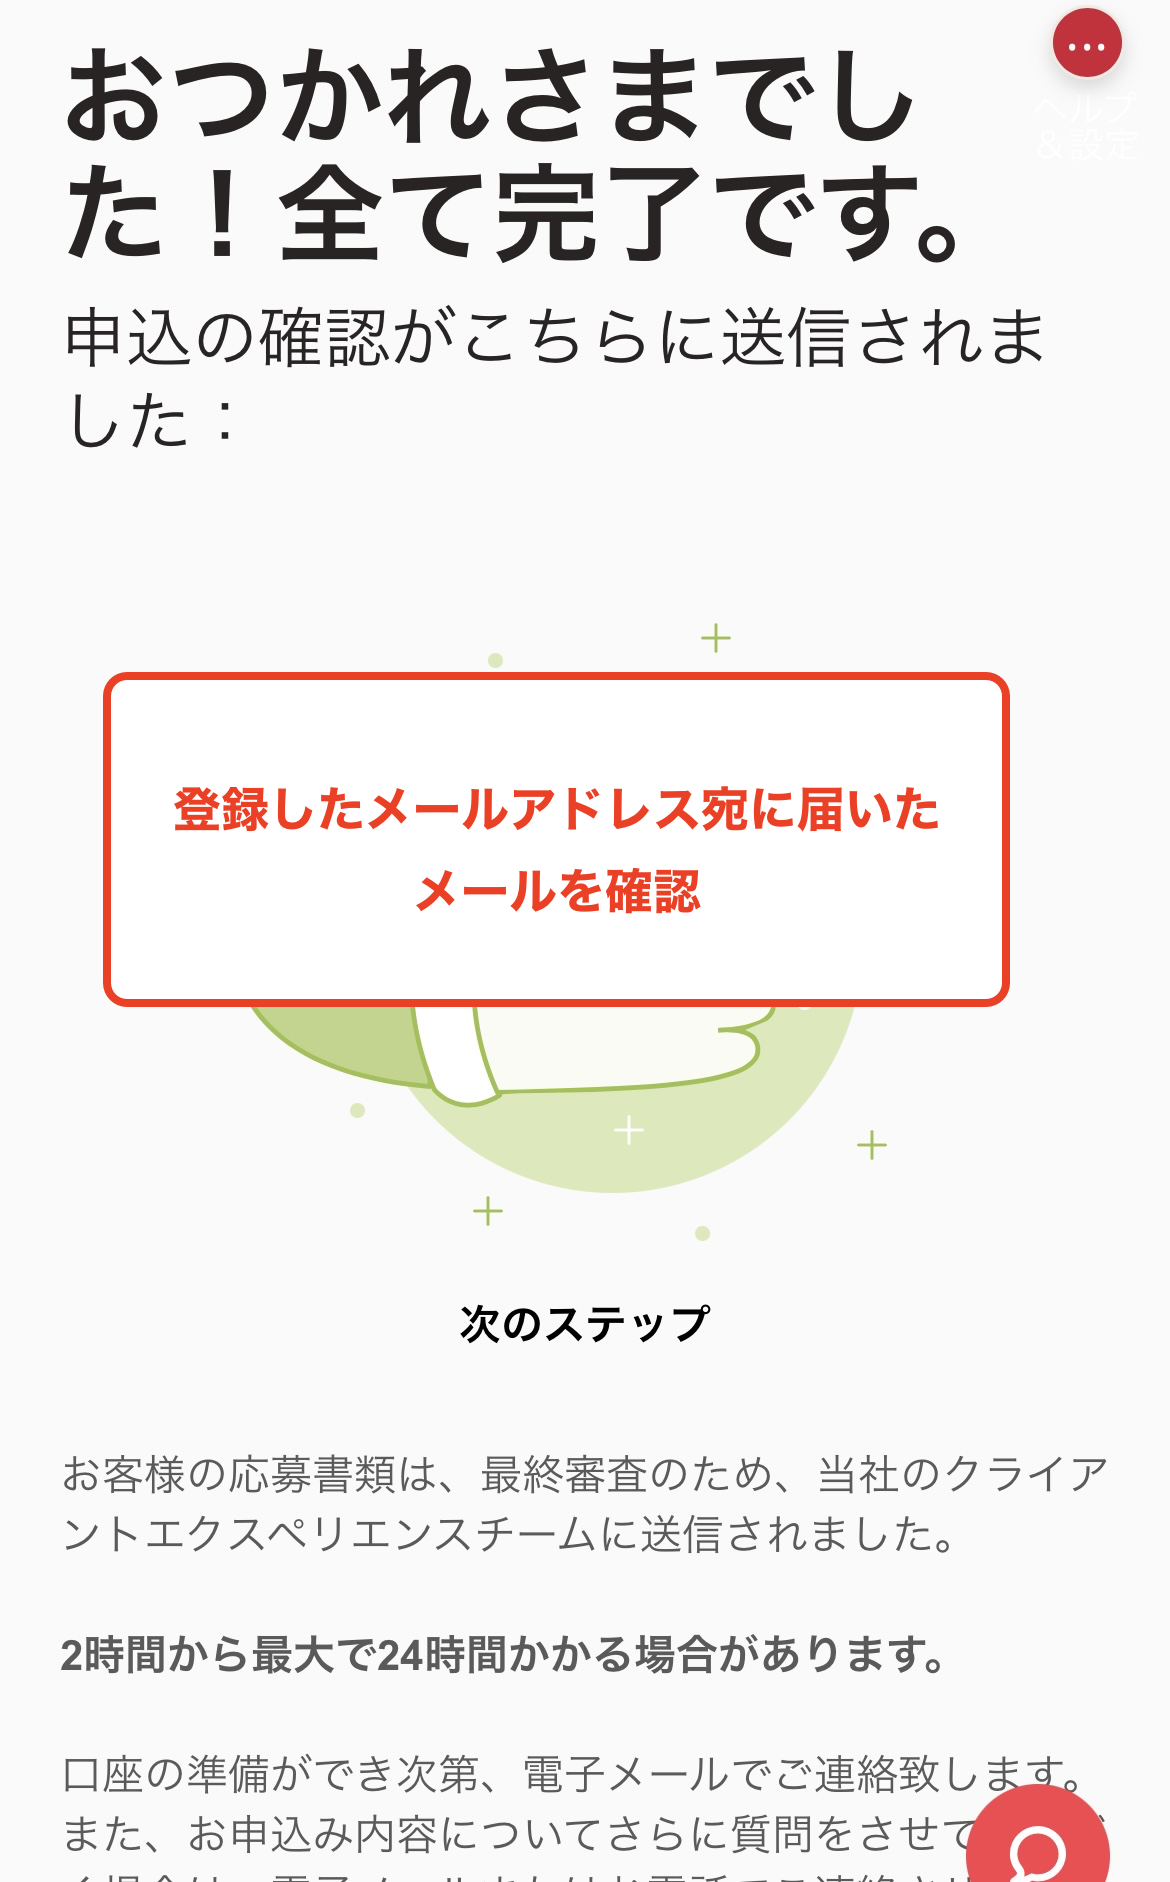
Complete the account opening procedure
Once this screen appears, yourAxinew account opening process is complete. Thank you for your hard work. You will receive an account opening notification and trading account information to your registered email address shortly
*It may take some time for you to receive the email confirming your account opening. If you do not receive it, please check your spam folder
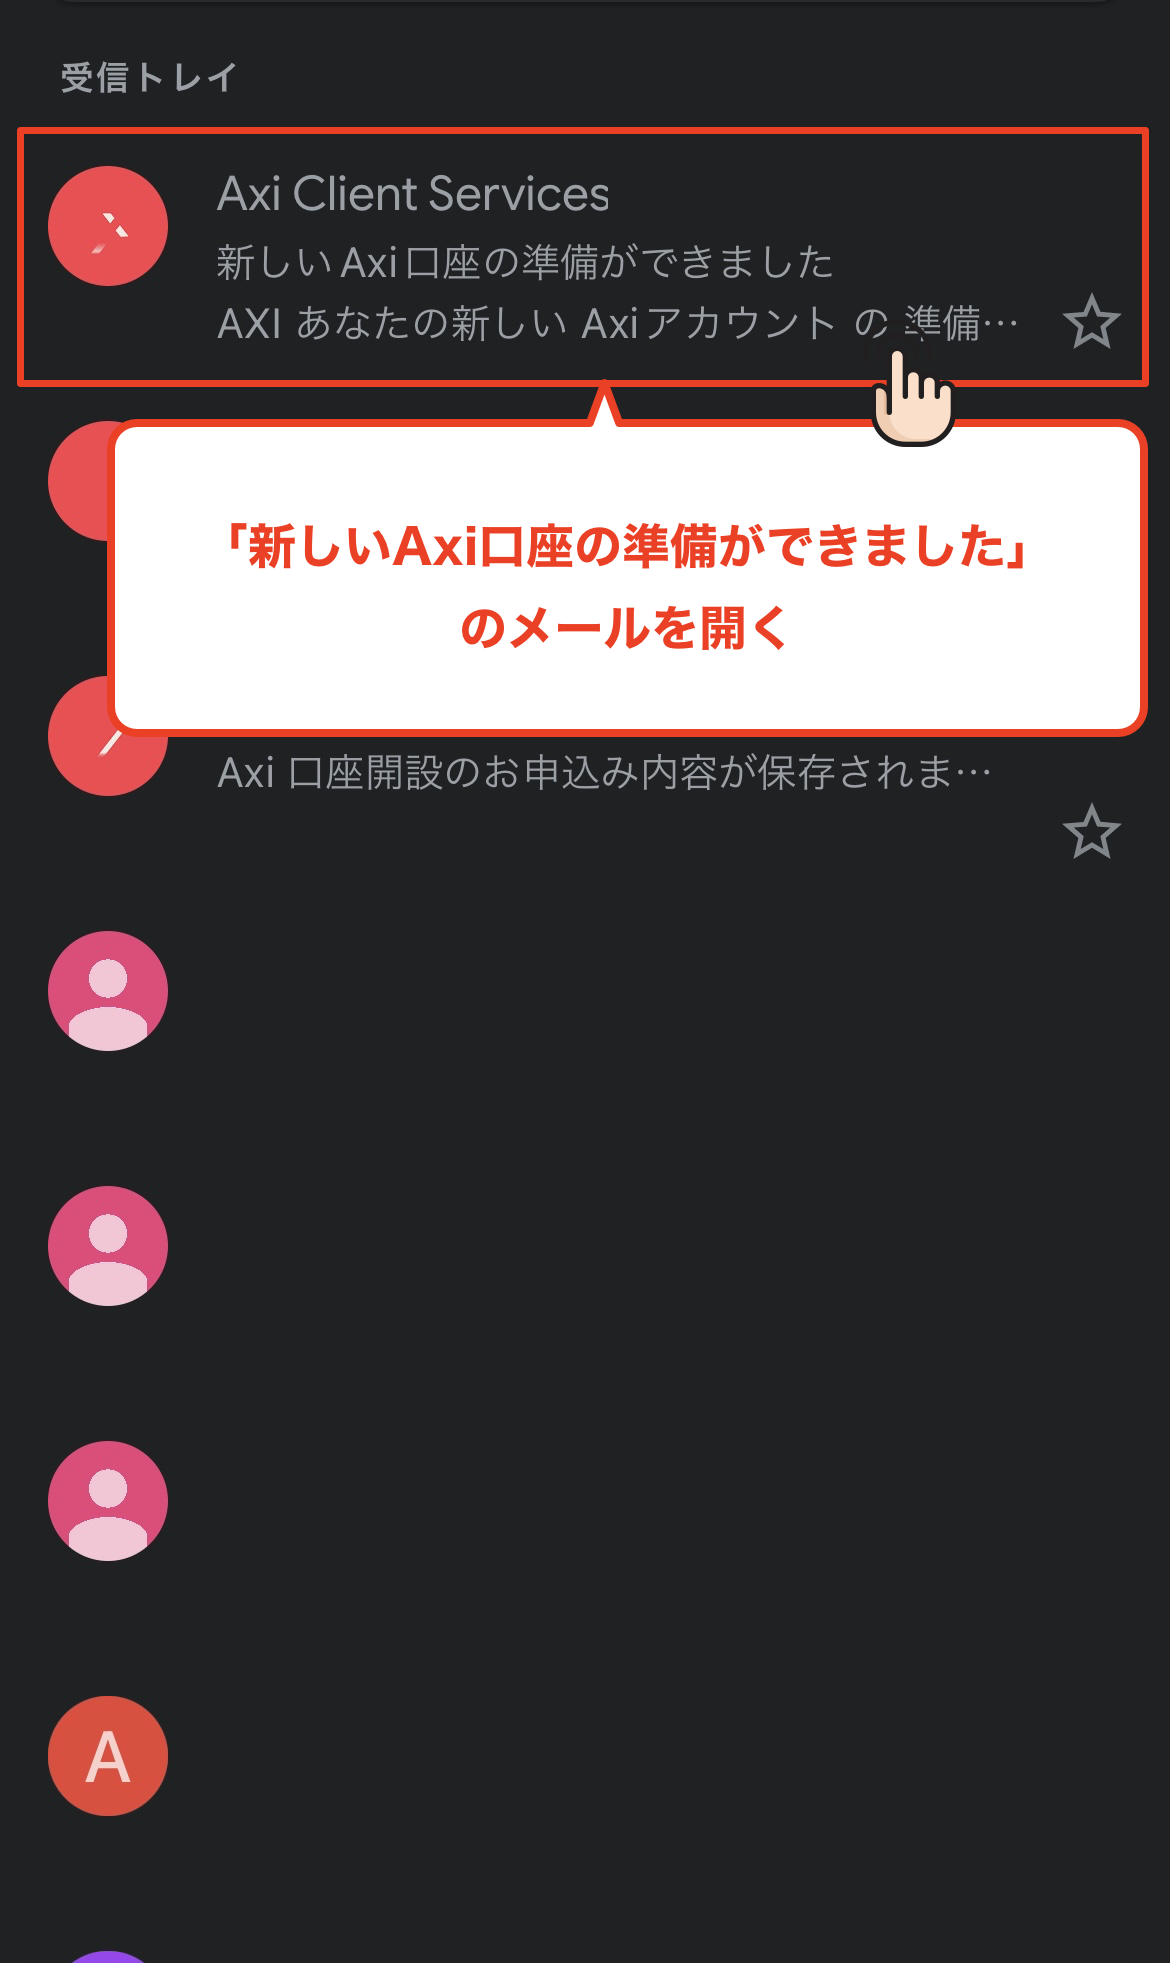
Check emails from Axi
You will receive an email fromAxito your registered email address with the subject line "Your newAxiaccount is ready." Open the email and check your trading account information
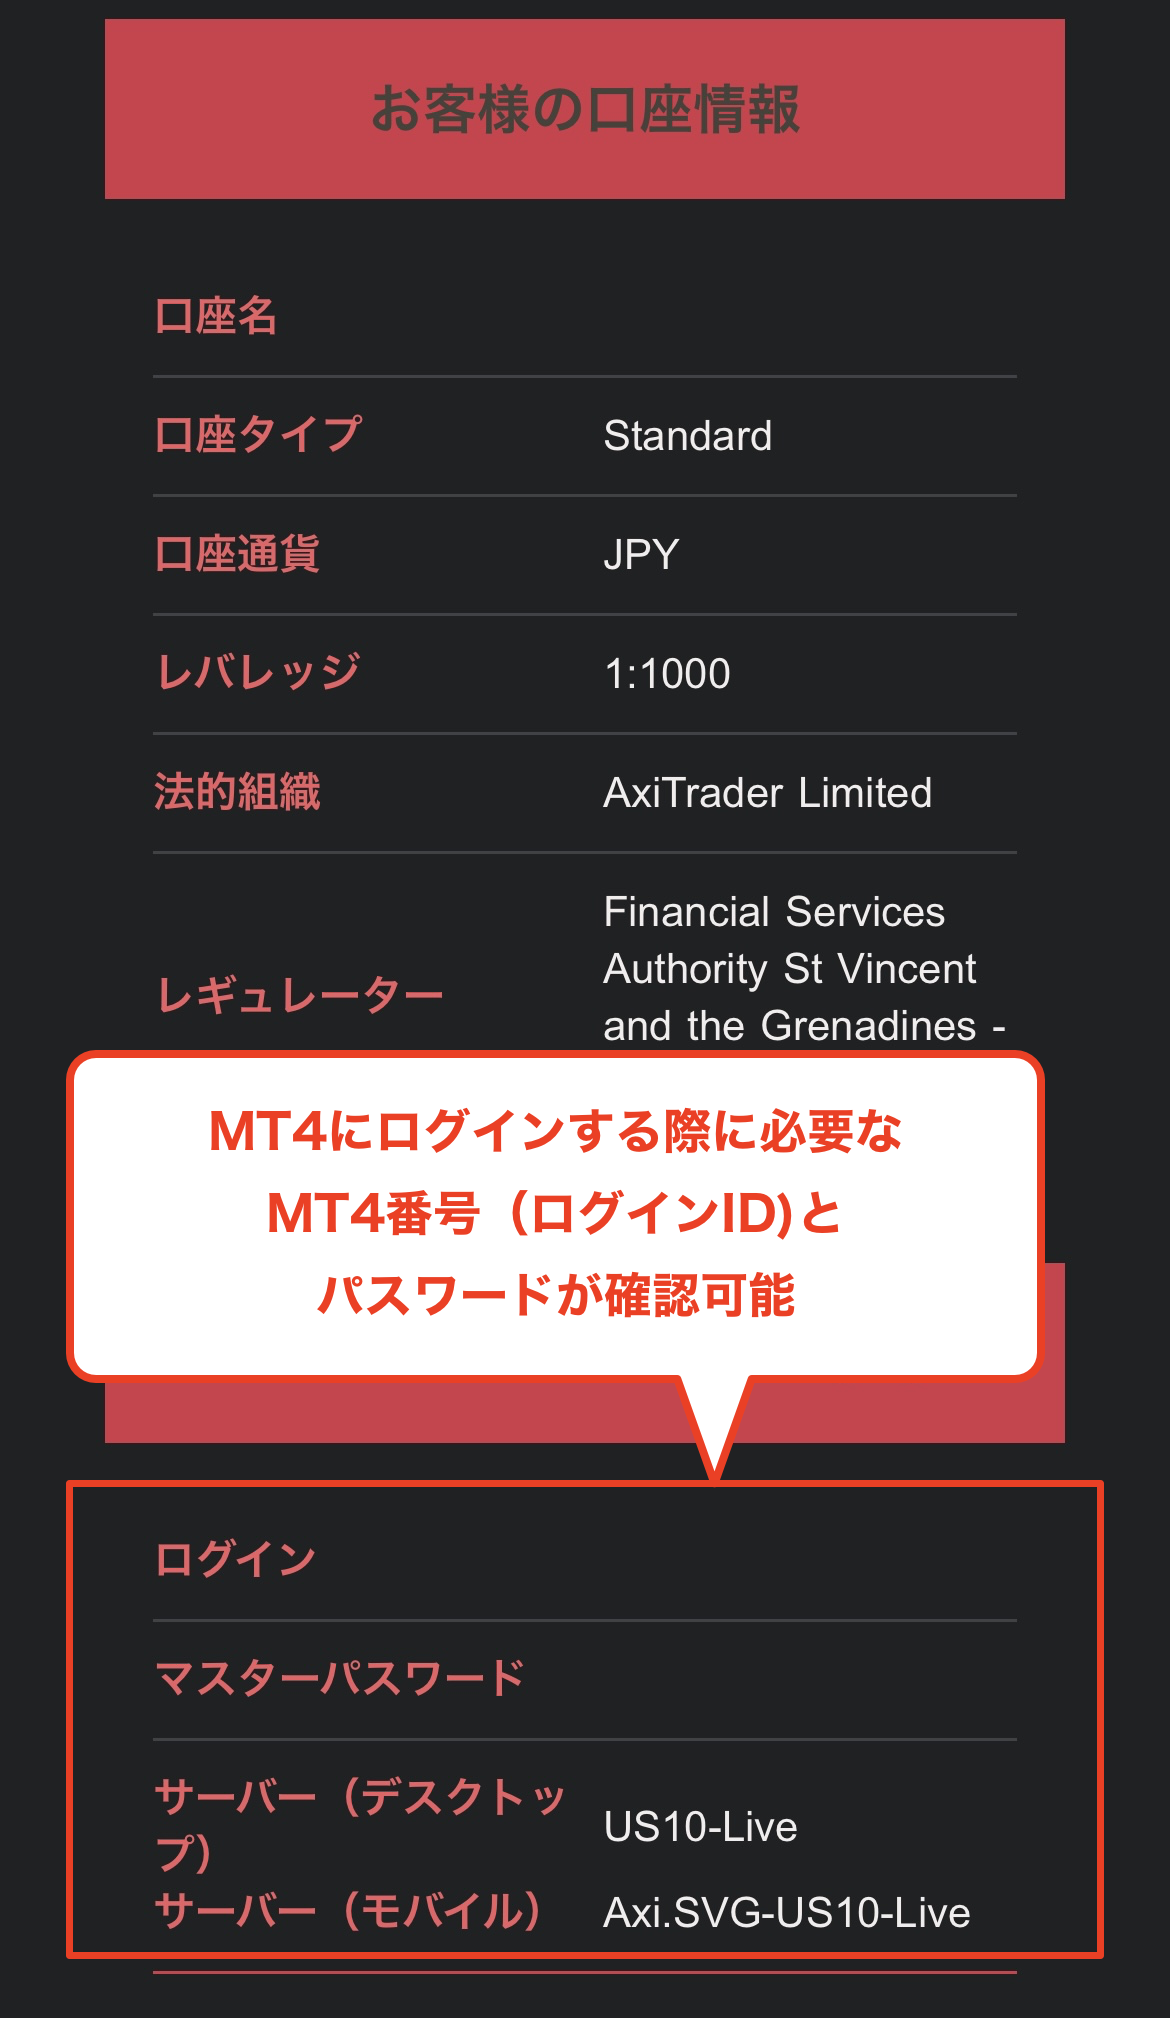
Get your account number and password
When you open the email, you will find your newly opened trading account's "account number (login ID)" and "password." Please make a note of these, as you will need them to log in to MT4 and register for a MoneyChat account
*This account number (login ID) will be needed later when registering your MoneyChat account, so it's a good idea to write it down or take a screenshot of it
Get cashback once your account is open !
CASHBACK APPLICATION
Register with Manecha and get cashback on every trade.
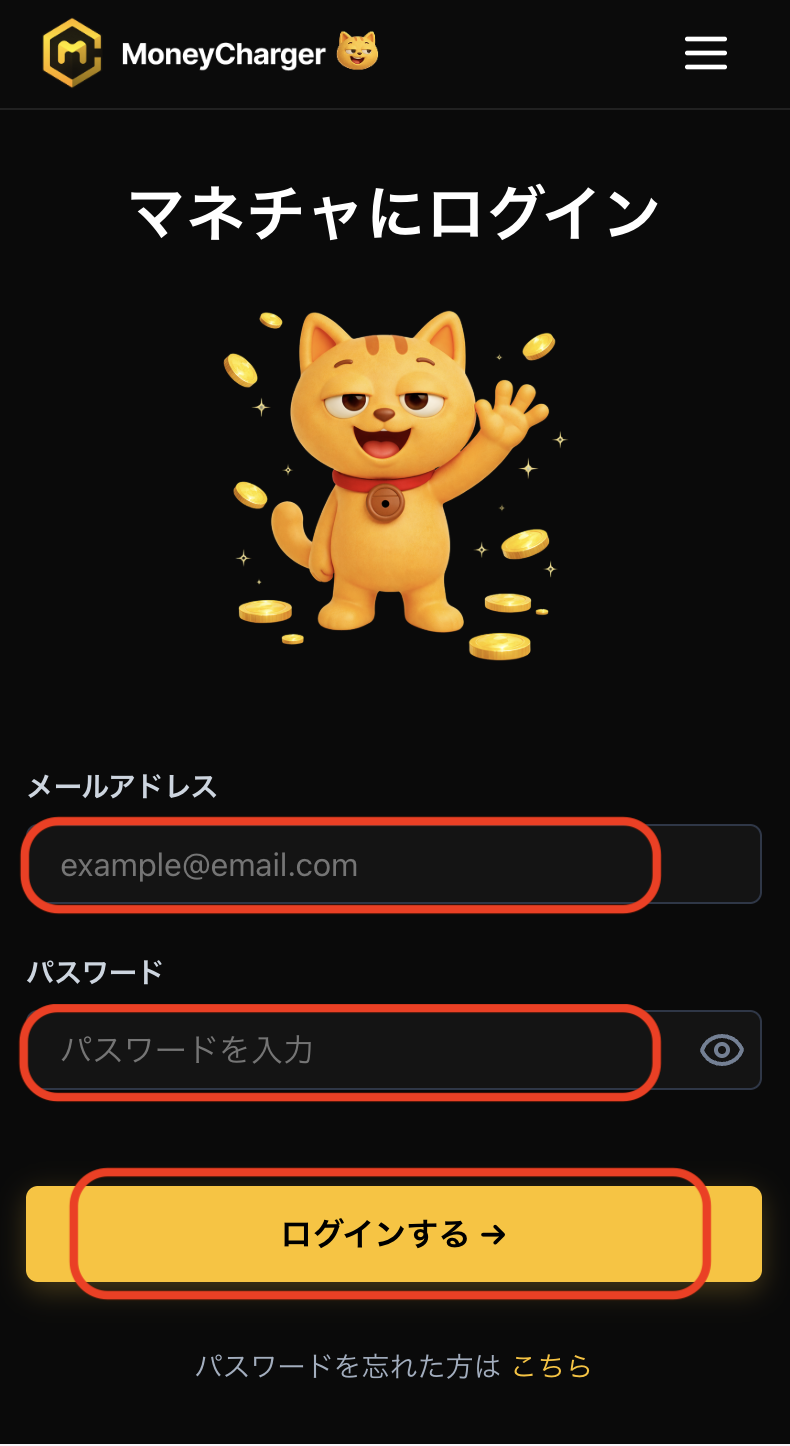
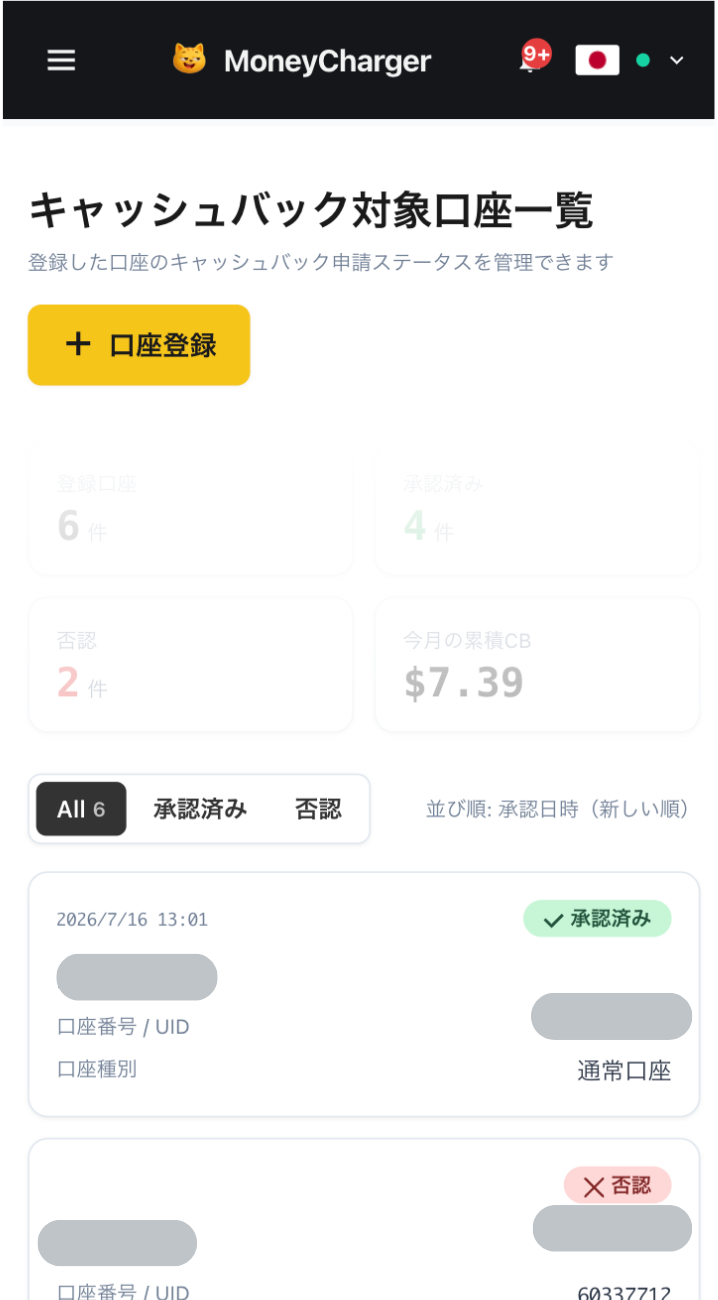
Log in to your MoneyChat My Page
Once your account is opened, log in to your MoneyChat My Page
If you haven't yet registered for a free Manecha account, please complete your registration first
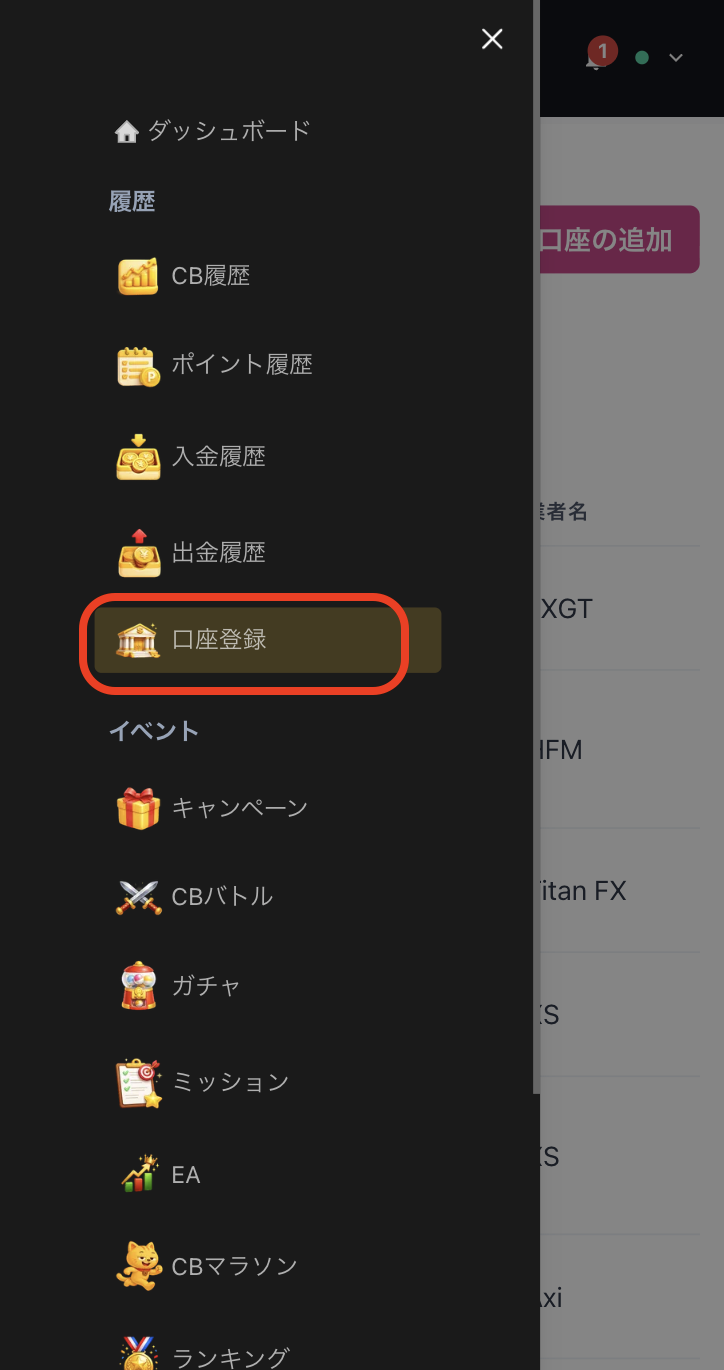
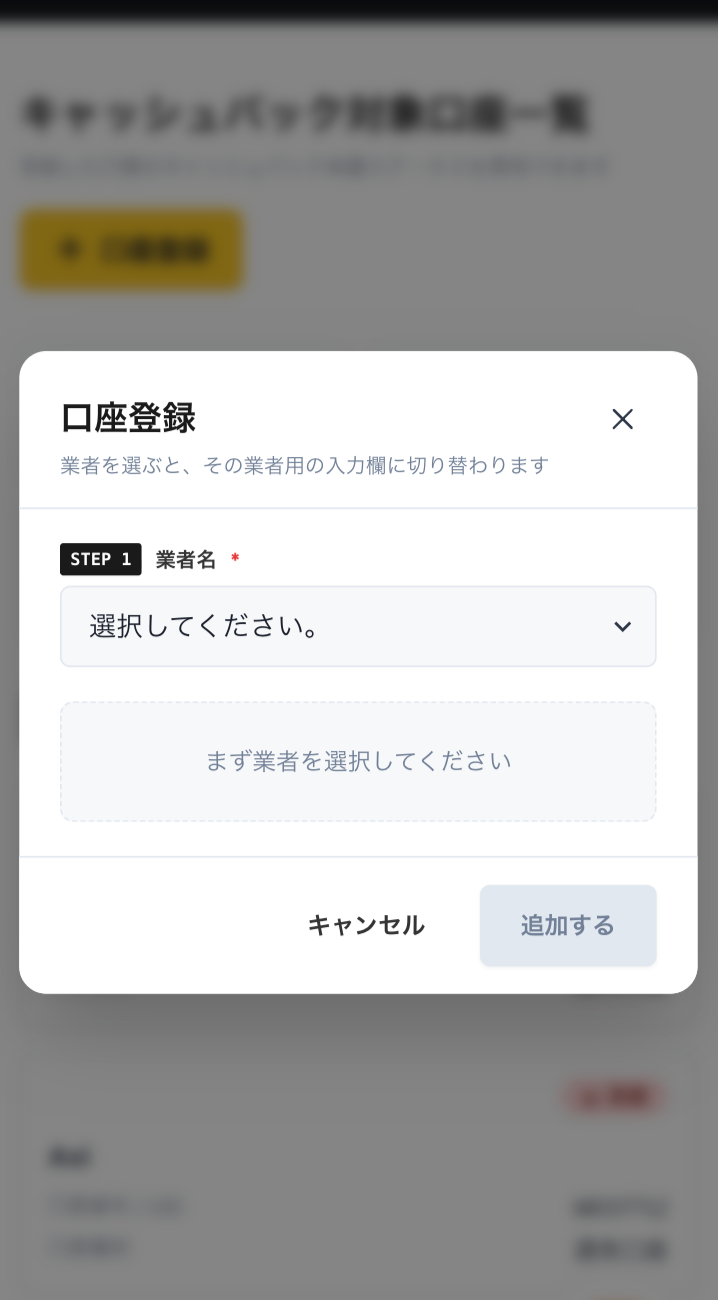
Select "Register Account" from the menu
Open the menu in the upper left corner of the screen and select "Register Account"
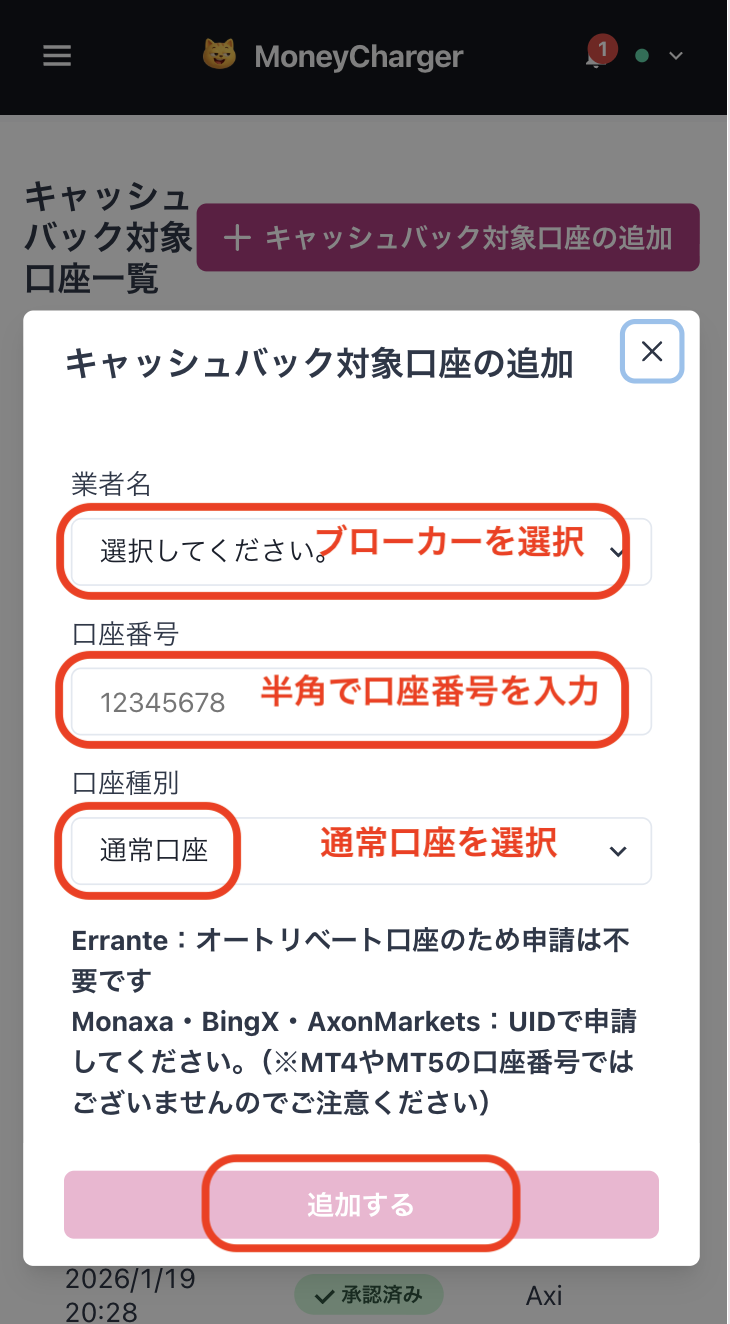
Enter your broker and account number on the account registration screen
On the account registration screen in My Page, selectAxias the broker name and enter the trading account number you opened using half-width numerals
If you are using regular discretionary trading or your own Expert Advisor (EA), please select "Standard Account" as your account type
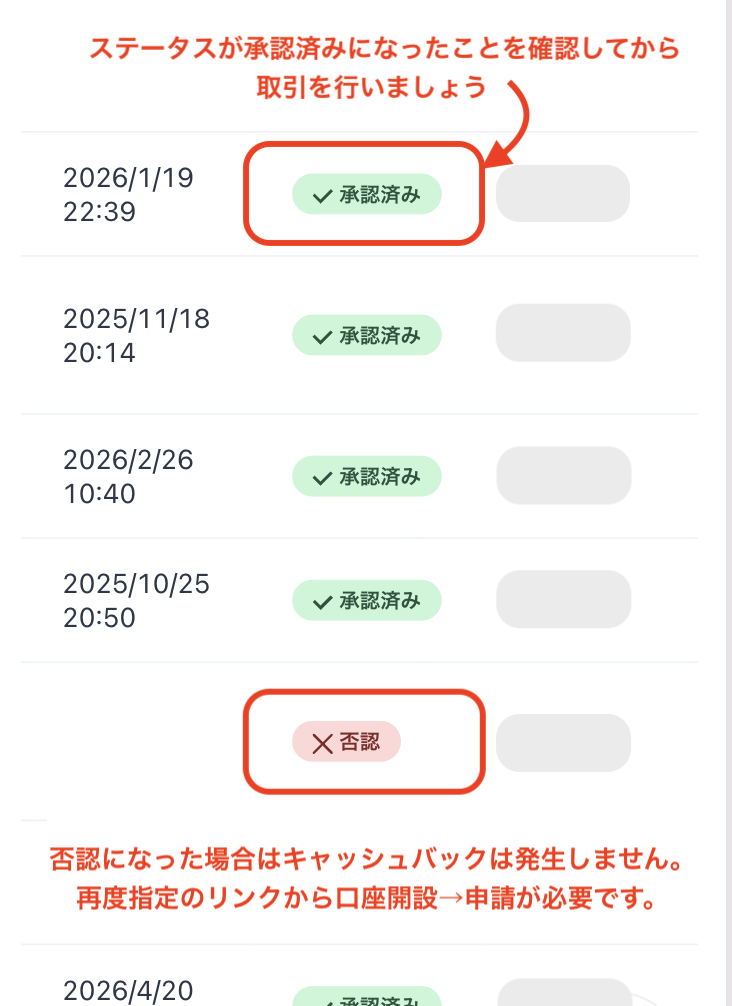
You will be eligible for the cashback after approval from the management
Once your application is approved, the cashback earned for each eligible transaction will be reflected in your MoneyChat My Page
Transactions that have not yet been approved may not be eligible for cashback. Please check that the status is "approved" before making a transaction
HOW TO OPEN
Transfer procedure
Please see below for instructions on how to make your existing account eligible for MoneyChat
How to change Axi linking
You can change your IB by contacting AxiClient Services directly or by submitting a request through the Help Center
- AxiContact The official page is here.
- Access the Help Center on Axiofficial website
- Click "Submit Request"
- "What kind of support do you need?" → Select "Partner Tagging"
- Please fill in the required information and submit the form
- After processing is complete (1-2 business days), apply for account registration on your MoneyChat My Page
- For new account openings, go to the portal and select "Do you have a partner?" → "Yes" → enter partner code 4364134
If the broker changes its specifications, this information may no longer be accurate. Please contactAxisupport first, using the above as a reference
FAQ
Frequently Asked Questions about Opening an Account or Switching Accounts
What documents are required to open an account?
Generally, you will need to provide proof of identity (passport, driver's license, or My Number Card) and proof of address (utility bill, bank statement, or resident registration certificate, issued within the last three months)
How long does it take to open an account?
The input process itself takes as little as 5 minutes, and the identity verification review is usually completed within one business day. The actual time required may vary depending on the service provider and the review status
I already have anAxiaccount. Can I receive cashback?
Existing accounts are generally not eligible. Please check the "Already usingAxi" tab at the top to see how to switch or add accounts
Can I open multiple accounts with Axi?
The possibility and conditions for opening multiple accounts vary from broker to broker. If you plan to use an additional account, please check the process for receiving cashback through MoneyChat before proceeding
Does Axisupport auto-rebates?
Yes.Axisupports auto-rebates. Auto-rebates are a system where cashback for each trade is automatically credited to your trading account. If you wish to open an account with auto-rebates, please proceed using this dedicated auto-rebate link . However, please note that with Axionce you enable auto-rebates, you cannot change it later. ,